Pages

Tuesday, February 26, 2013

Easy Weeknight Baked Chicken Parmesan

Let's face it, we all have those days when we're too tired to cook dinner when we come home from work. This is the recipe for one of those days. It's quick and easy, but your family will think you spent hours in the kitchen making it....no one ever has to know you didn't!


Easy Weeknight Baked Chicken Parmesan

Ingredients:
4 thin sliced chicken breasts
3 tablespoons extra vigin olive oil
1 tablespoon chopped fresh parsley
1 tablespoon chopped fresh rosemary
2 teaspoons chopped fresh thyme
1/2 teaspoon dried oregano
Salt & Pepper to taste
1  1/4 cup marinara sauce (homemade or your favorite store bought brand)
4 slices smoked provolone
1/2 cup parmesan cheese, shredded
3 tablespoons unsalted butter, cut into cubes
Sprigs of fresh herbs for garnish


Directions:

** Remove the chicken breasts from the fridge 30 minutes before cooking to bring to room temp. This helps the chicken cook evenly.

Preheat your oven to 500 f

Place the olive oil, chopped herbs and oregano in a small bowl. Add salt & pepper to taste. Stir well to combine.

Place the chicken breasts on a cutting board and brush one side of each breast with the oil-herb mixture. Use up half of the mixture.


Heat a cast iron skillet (or other large pan) over medium heat until hot. (My chicken breasts were pretty big so I had to use 2 pans).

Place the chicken breasts in the skillet herb side down. Brush the top side with the remaining oil-herb mixture. Use the remainder of the mixture.


Cook until the chicken breasts are browned on one side (approx 2-3 minutes), then flip and brown on the other side (approx 2-3 minutes more).


Remove the skillet from the heat. Top each chicken breast with marinara sauce, dividing evenly between the 4 breasts.

Top each breast with a slice of smoked provolone cheese, then sprinkle with parmesan cheese, then top with the cubed butter.


Place the skillet in the oven and cook until the chicken breasts are cooked through (approximately 5 minutes depending upon how thick the chicken breasts are).

If you want to brown the cheese on top of the breasts, place the pan under the broiler until browned.

Remove and garnish with a sprig of fresh herbs.


Serve over Creamy Polenta or your favorite pasta.


Friday, February 22, 2013

Expecting company, Overnight Apple French Toast


Expecting overnight company and not sure what to make them for breakfast??? This Overnight Apple French Toast recipe is a perfect solution, its quick and delicious!   You prep it the night before and in the morning all you need to do is pop it into the oven and bake.  The rich french toast topped with the cinnamon apples gives this dish that extra special flavor your guests will be asking for another piece. I hope you give this recipe a try.  Your guests will thank you .
Happy Cooking Everyone!


Ingredients
6-7 pieces day old French bread cut to 1 1/2 inch thickness
4 large eggs
1 cup whole milk
3/4 cup half and half
1 teaspoon vanilla
1/2 cup granulated sugar
1 tablespoon cinnamon
1/2 teaspoons nutmeg
2 apples (i used Fuji) peeled and cut into thin slices
3 tablespoons butter, cut into small cubes

Directions for day before:
1. Spray a 2 quart baking dish with non-stick cooking spray.
2. In a small bowl combine 1/4 cup sugar, cinnamon and nutmeg. Set aside.


3. Place the french bread slices into the baking dish.  The pieces will fit next to each other. I cut one extra slice to fill in the spaces.


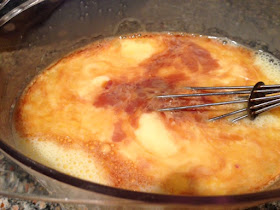
4. Whisk the eggs, the milk, half and half, the remaining 1/4 cup of the sugar and vanilla until it is all well incorporated.  Pour half of the liquid over the bread.


5. Add the apple slices on top of the soaked bread till as the bread is covered.


6. Pour the remaining egg mixture on top of the apples.


7.  Sprinkle the cinnamon sugar mixture over the apples.

8. Place the cut up butter over the cinnamon apples.  Make sure you distribute the butter pieces.


9. Cover with plastic wrap and put into refrigerator.

Directions for the following morning:
1.Remove casserole from refrigerator, remove plastic wrap
2. Preheat oven to 350 degrees. Once oven is ready, place casserole into the oven.
3.Bake for 1 hour. Remove from oven and let it sit for 15 minutes.
4. Cut and serve with butter and maple syrup and fresh berries.

Enjoy!!!


Tuesday, February 19, 2013

The Best Sprinkles Red Velvet Copycat Recipe


Stop the presses! The search is over. I have found the BEST copy cat recipe for Sprinkles Red Velvet Cupcakes!! Seriously. I made these cupcakes 3 times in one week...they're that good. They even received the thumbs up from 2 ladies I consider Sprinkles Cupcakes experts (you know who you are).

 The true test if a recipe is a winner is if people request it from you and are still talking about it days or even weeks later. Since I can't take any credit at all for this recipe and I didn't adapt or change it in any way, I'm posting the link directly to the blog.
 
Get the best Sprinkles Copycat Red Velvet Cupcake recipe here on Cooking Classy.

I highly recommend you give it a try!


Tip: If you decorate your cupcakes with sliced strawberries like I did, do not add them until your're ready to serve. The juice from the strawberries will break down the cream cheese frosting.


These cupcakes made the perfect Valentine's Day Treat!


Wednesday, February 13, 2013

LIVEBAKELOVE APRON

Hi Everyone,

To show our appreciation, we decided to have two giveaways this week for Valentine's Day.  First was the jars of cookies we made this week , and the second is two super cute  LIVEBAKELOVE aprons.  Please just leave a comment on our previous post telling us your favorite Valentine's Day dessert.  We will be picking names tomorrow night and letting everyone know on Friday.(Earlier entries will be included). The  Winners will be notified by email and will receive their aprons in the mail. We know we have followers all over the world so we are excited to see who wins!

Happy Valentine's Day!
~LiveBakeLove


Add caption


Sunday, February 10, 2013

Valentine's Day Cookies & LBL Apron Give Away

Valentine's Day is all about showing love to the special people in your life. Yvonne and I are both blessed to have some very special people in our lives; Yvonne's boyfriend, Earl, and my husband, Mike. This year we wanted to make sure we showed our love and appreciation to some other VIP's in our lives - those who have supported our blog, read our posts, commented on them and tried the recipes.  And if you are reading this right now, that includes you!  
 
To show our appreciation, we are giving away 2 of our LiveBakeLove aprons!

To win, enter a comment at the end of this post telling us what your favorite Valentine's Day dessert is. We will randomly select 2 winners this Tuesday, February 12th. Winners will be notified by email and aprons will be mailed to you.
 
 
Good luck!
 
Embroidery by Jump Girl
 
 
Now onto the cookies! Last year, we hosted a Valentine's Day Cookie Exchange. Check out that post here
 
This year, we decided to do something different; we had a Cookies & Crafts day!

These adorable Valentine's Day Cookie jars are filled with 4 different types of cookies - Meyer Lemon and White Chocolate Shortbread, Chocolate Cherry Kisses, Chocolate Sugar Cookies and Peanut Butter and Raspberry Jam Hearts.


Here are the links to the recipes we used to make the Chocolate Cherry Kisses, Chocolate Sugar Cookies and Peanut Butter and Raspberry Jam Heart Cookies.
 
And here's the recipe for the Meyer Lemon & White Chocolate Shortbread Hearts. I'm a big fan of Meyer Lemons and love it when they are in season. Meyer Lemons are sweeter than regular lemons, kind of like a cross between a lemon and an orange. You can substitute regular lemons in this recipe, but I prefer the sweetness of the Meyer Lemon.
 
 
Meyer Lemon & White Chocolate Shortbread Hearts
Makes approx 3 dozen 2" cookies
 
Cookie Ingredients:
1/2 cup granulated sugar
1 tablespoon meyer lemon zest
2 1/4 cups all purpose flour
4 ounces white chocolate finely chopped
1 cup butter softened
 
Glaze Ingredients:
1 teaspoon meyer lemon zest
2 tablespoons meyer lemon juice
1 - 1/4 cups powdered sugar
 
 
Directions:
Preheat oven to 300 degrees f
Line baking sheets with parchment paper
 
Add granulated sugar and lemon zest to the bowl of a stand mixer fitted with the paddle attachment (or using an electric hand mixer). Using your finger tips, rub the zest and the sugar together until very fragrant.
 
Add the flour and white chocolate and mix at low speed until combined.
 
Add the butter and mix on low speed until combined, then increase speed to medium and continue to mix until a dough is formed.
 
Dump the dough out onto a lighty floured surface and knead a few times and form into a disk shape. Roll the dough to 1/2 thickness.
 
Using a cookie cutter in the shape of your choice, cut the dough into shapes and place on the parchment lined baking sheets spacing about 1 1/2" apart.
 
Bake for 20-22 minutes or until very lightly browned.
 
Remove from oven and place on cooling racks to cool.
 
While cookies are cooling, make the glaze -
 
Place all glaze ingredients in a bowl, and mix to combine. Add additional powdered sugar or lemon juice to reach desired consistency.
 
When cookies are cool, dip the tops of the cookies into the glaze and return to the cooling racks to allow glaze to set. Tip: Place parchment paper underneath the cookie sheets, to catch the glaze drippings for each clean up.
 
Store in an air tight container for up to 2 days.


Monday, February 4, 2013

Easy Blackberry/Raspberry Cobbler


What to make,what to make...That is the question 
I was asking myself last week. A friend recently asked me to bake  a dessert for a dinner her and her husband were attending. Originally I had apples in mind, but as soon as I went to the store and saw the beautiful in season berries, my whole idea changed! This is one of the great things about going grocery shopping... it's filled with endless ideas.  So with my basket filled with blackberries and raspberries I headed home. I looked around for a good recipe and finally settled on one by the Pioneer Woman.  I have changed the recipe up quite a bit, but the foundation is the same - to really focus on the seasonal fruit.  I did a test run on the recipe the day before, just to make sure all my flavors were working the way I pictured they would.  All I can say is this Easy Blackberry/ Raspberry Cobbler is DELICIOUS!  I rely on Earl for the final seal of approval when I do my taste testing.  He had two helpings, so yes, it passed the test! The blackberries and raspberries work wonderfully with the vanilla and orange zest. This dessert is fruity and fragrant, sweet and tart; the perfect combination. Top it off with some vanilla ice cream and you have nothing but perfection! Easy and Delicious, my type of recipe.


Happy Cooking!


Ingredients
1 stick Butter
1 cup Granulated Sugar
1 cup Self-Rising Flour
1 cup Whole Milk
1 vanilla bean
1/2 tablespoon orange zest
1 cup Raspberries (rinsed and patted dry)
1 cup Blackberries(rinsed and patted dry)
1/4 cup Turbindo Sugar (raw sugar works good too)


Prep work:
Preheat oven to 350 degrees
Butter a 2 quart casserole dish, set aside
Scrape vanilla bean and put seeds into 1 cup of milk, set aside.


Zest orange, 1/2 tablespoon is about one medium orange
In a small bowl, Melt butter (about 30 seconds in Microwave)

Directions:
In a medium size bowl pour white sugar  and flour. Mix using a whisk.


Add vanilla milk and whisk together.

Add melted butter,  Then add orange zest.

Mix until all the ingredients are well incorporated
Pour mixture into casserole dish. Spread evenly.

Taking the raspberries and blackberries, place them over the batter, 
pressing down lightly until the majority of the batter is covered.


Sprinkle Turbindo Sugar on top


Bake at 350 for 50-60 minutes.  Top will be a light golden brown.


Serve with vanilla ice cream.
Enjoy!!!