Wednesday, February 29, 2012

Baked Egg Skillet with Crispy Hashbrown Crust

I think I've already mentioned that breakfast is my favorite meal. I love spending Sunday mornings savoring a cup of coffee and taking my time making a leisurely breakfast while everyone is sound asleep. But sometimes there are days when you just want something quick, simple and easy. This Baked Egg Skillet is just that; quick, simple, easy and delicious! Eggs baked on top of a crispy bed of potatoes topped with cheese and garnished with salsa, sour cream, green onions and avocado....or just leave it plain if you like!

Baked Egg Skillet with Crispy Hash Brown Crust
Serves 2-4

Ingredients:
1 1/2 cups shredded fresh potatoes
4 large eggs
3/4 cup shredded cheese (I used colby and monterey jack)
2 tablespoons extra virgin olive oil
Salt, pepper and paprika
Garnish: salsa, sour cream, sliced green onions, sliced avocado


Directions:

Shred the potatoes using your food processor or box grater. Place the potatoes between two dish towels or layers of paper towels and pat/squeeze to remove moisture. Once the potatoes are dry set aside while you prepare your pan. Note: Instead of grating your own potatoes, use "Simply Potatoes" which are alread pre-shredded and don't have a lot of moisture.


Heat the olive oil in a 9" cast iron or oven proof nonstick skillet over medium high heat. Add the potatoes and spread into an even layer. Press firmly to compact the potatoes to ensure they stick together. Sprinkle with salt, fresh ground pepper and paprika.


Cook undisturbed for 3-4 minutes or until golden brown. Using a large spatula, flip the hash brown over.

I used a large fish spatula to flip, but if you don't have one use any large spatula (or 2 spatulas)

Continue to cook on the reverse side another 3-4 minutes. At this point, preheat your broiler.


Remove the pan from the stovetop and crack the eggs in a single layer over the top of the hash brown. Sprinkle with salt and pepper then top with cheese.


 Place in the oven and broil until desired doneness is reached, approx 5 minutes for runny yolks or 7 minutes for firm yolks.

Tip: If your skillet has handles that you are not sure are oven proof, just cover them with a few layers of foil to protect them.


Remove from oven, slice and serve with desired garnish. Enjoy!


Recipe adapted from Two Tarts

Sunday, February 26, 2012

Fresh Blueberry Tart with Shortbread Crust for Fiesta Curiel

This weekend, Yvonne and her family celebrated two very special occassions, her father Ildefonso's birthday and his retirement. The Curiel's have always been known for throwing great parties and this one was no exception. There was a feast of traditional Mexican dishes: Carnitas, Costillas, her Mom's famous Rice and Beans, Tortillas as well as some American dishes: Earl's famous Pineapple Chicken, Macaroni Salad and Potato Salad. Guests were treated to refreshing Margaritas and shots of special Tequila from her Dad's home town of Laja Jalisco Mexico. The chilly San Diego night heated up when the Mariachi's arrived to serenade the guest of honor.


To compliment the amazing food and the two huge cakes, I was honored to be asked to make some of the desserts:

                     Blueberry Tarts with Shortbread Crust


                      Bite Size Raspberry Swirl Cheesecakes


                       Mini Chocolate Ganache Cheesecakes


                                       Apple Pie Pie Pops


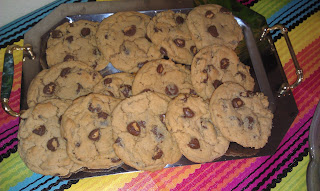
                and for the kids Chocolate Chip Cookies and
                             Peanut Butter Cup Cookies


        The cookies were a big hit with the kids. Some of their 
                 comments were "mmm, yummy cookies"


                             and "this cookie is delicious!"


Today I'm sharing with you one of the recipes which actually happens to be Yvonne's favorite, Fresh Blueberry Tart with Shortbread Crust. The crust is crisp, rich and buttery just like a good shortbread should be and the fresh blueberry filling is elevated by the addition of fresh lemon juice and lemon zest. I hope you'll make it for your next "Fiesta" or just as as special treat for yourself and your loved ones!

A special thanks to Yvonne, her family and especially Mr. Curiel for allowing me to be a part of such a special occasion. Wishing you a happy retirement and many happy years to come.


Blueberry Tarts with Shortbread Crust
Makes one 9" tart or nine 3" tarts

Ingredients:

Crust
1 1/4 cups all purpose flour
1/3 cup sugar
1/4 tsp salt
8-10 tablespoons cold unsalted butter cut into cubes

Filling
6 cups of fresh blueberries, rinsed and dried
2 tablespoons cornstarch
2 teaspoons lemon zest
3 tablespoons fresh lemon juice
2/3 cup granulated sugar
Pinch of salt

To make the crust:

In a large bowl, combine the flour, sugar and salt. Scatter 8 tablespoons of the cold cubed butter over the top of the flour mixture. Using a pastry cutter, cut the butter into the flour until small pieces remain. The dough should hold together when squeezed. If your dough is too crumbly and doesn't hold together when squeezed, add 1 tablespoon more of the cubed butter and cut in again. Test again to make sure dough holds together when squeezed.

Transfer dough to a 9" tart pan with removable bottom (or into the 3" tart pans with removable bottom if using). Press evenly onto the bottom and up the sides of the tart pan. Freeze until firm, approx 20 minutes. Remove from freezer, place on a baking sheet and prick the bottom of the tart dough all over with a fork (this will help prevent the bottom from puffing up when baking). Bake at 375 for 20-25 minutes or just until golden brown. Remove from oven and cool completely. Note: If  you are using a dark tart pan or mini tart pans, your baking time will be less because of the dark coating on your pan (darker pans bake faster). Check for doneness earlier during the baking process and then check frequently as soon as the tart shell starts to brown so you don't burn your tart shell.

Once your tart shells have cooled completely, make your filling.

Reserve 1 cup of blueberries for topping the tart.

In a small bowl, combine 2 tablespoons of cornstarch and 2 tablespoons of water. Mix well. Set aside.

In another small bowl, combine the lemon zest, lemon juice and sugar. Set aside.

In a medium saucepan, place 1/4 cup of water and 1 1/2 cups of the blueberries and bring to a boil over high heat. Reduce heat and simmer for 3-4 minutes stirring occassionally until the berries begin to breakdown. Restir the cornstarch/water mixture to recombine then add to the pot of berries and stir well to combine. Immediately add the lemon zest, lemon juice, sugar and a pinch of salt. Stir to combine then bring to a boil. Reduce heat and simmer stirring constantly until thickened. The mixture will thicken pretty quickly and should be thick enough to coat the back of a wooden spoon.

Remove from heat and stir in the remaining 3 1/2 cups of berries. Immediately pour into the cooled tart shell (or distribute evenly between the mini tart shells). Top with the reserved 1 cup of berries and press down slightly to help them adhere to the filling.

Refrigerate until cool (approx 2 hours or up to overnight).

Before serving, I like to garnish with a few sliced almonds and a sprig of mint but that is totally optional. The tart tastes great without them!

Leftovers should be stored in the refrigerator tightly covered for 2 days.

Thursday, February 23, 2012

Incredible Peanut butter Oatmeal cookies


This past weekend was all about camping and foods that went with camping.  I had the privilege to go camping to Joshua tree for some hiking and rock climbing with a group of amazing adventurous people.  I can definitely say it was great fun, lots of exercise and good eating. One thing this group knows is great places to camp and the tasty and hearty food that goes with camping.   This brings me to this week’s recipe.  One of the things Faye and I love about our blog is that we truly make and use each other’s recipes.  This weekend I used an adaption of the Sirloin Chili, vegetarian version and the Insanely Good Salted Toffee Chocolate bar. Both were a hit!   In addition to those two items, I also made these Incredible Peanut Butter Oatmeal Cookies.   They were soft and crispy all in one. They had great crunch factor due to the peanuts and not too sweet like some peanut butter cookies.  The oats is definitely what makes these cookies Incredible. It’s like having a peanut butter and oatmeal cookie all at once.  I have to throw in this funny story.  For those of you that have gone camping, you will understand that one of the main problems when you go camping is…. You leave items at home by accident!! So guess what didn’t making to Joshua tree… yep, the Incredible Peanut Butter Oatmeal Cookies.  So after returning from a long trip, we had 2 ½ dozen cookies waiting for us…Maybe these cookies were not suppose to go on this camping trip J… Happy Cooking Everyone


Peanut Butter Oatmeal Cookies (adaption from better home and garden)

¾ cup butter, soften

½ cup peanut butter

1 cup sugar

½ packed brown sugar

1 teaspoon baking powder

½ teaspoon baking soda

2 eggs

2 teaspoons vanilla

1  ¼ cups all purpose flour

2 cups Rolled Oats

1 cup roasted peanuts (no salt)


1.       Preheat oven to : 375 degrees

2.       In a large bowl mix butter and peanut butter with a electric mixer (I used my Kitchen Aid with the whisk attachment) for about 1 minute.

3.       Add sugar , brown sugar, baking powder and baking soda. Beat till everything is combined. (I switched to the mixing blade on the Kitchen Aid)

4.       Beat in eggs and vanilla. About 1 minute

5.       Add flour. Combine still the egg mixture is mixed into the flour.

6.       Stir in Oats and peanuts

7.       Drop dough using an ice cream scoop and place 2 inches apart on a non greased cookie sheet.


8.       Bake for 10 minutes. Remove from oven and quickly transfer them to a cooking rack.


9.       Enjoy with a big glass of milk!!!!


Sunday, February 19, 2012

An Award, An Anniversary and A Special Visit


Exciting things are happening here at LiveBakeLove. We just passed the 6 month mark (yeah!) and are honored to receive the Liebster Award from Louise at Laidoffmom. This award is given from one blogger to another to help bring attention to up-and-coming blogs with less than 200 followers. LiveBakeLove is definitely a labor of love for us and we are grateful to receive recognition for it however receiving this award is even more meaningful because it comes from someone we admire and respect. Thanks Louise!

There are a few requirements that come along with accepting the award:

1. First and foremost, show your appreciation to the blogger who gave you the award by linking back to them http://laidoffmom.com/.

2. Share the love by paying it forward. Choose up to 5 blogs to give the award to (should have less than 200 followers).

3. Post the award on your blog and list the blogs you gave the award to with links to their sites.

4. Share 5 random facts about yourself.

So, drum roll please....our Liebster awards go to:

1. Rachel at rara's everyday
2. Emily at the brass halo
3. Linda at divaonadetour
4. Michelle at i heart paleo
5. Trevor at trevorlincoln

These bloggers have inspired us in one way or another either by their amazing spirit, showing extraordinary courage under adversity, being brave enough to take the leap of faith into entrepeneurship or sharing their talent and creativity.

Congrats everyone!! While there's no obligation to accept the award, we hope you are as honored as we were!

Now to fulfill the last requirement....here are 5 random facts about LiveBakeLove. Enjoy!

Faye
1. I was lucky enough to fulfill my lifelong dream to live in Spain. I lived in Rota, Spain with my husband and 3 boys for four years. It was the best experience of my life and my husband and I plan to retire there one day.

2. I was once mugged at gun point while walking to the bus stop on my way to work early one morning and actually chased after the get-away car on foot when I realized the keys to the Bakery I was working at were in my purse. In retrospect, probably not the smartest move to chase after someone with a gun but I was running on pure adrenaline at the time....

Yvonne
3. My favorite holiday is Halloween. I love the colors, the weather and the food...especially apple pie from Julian.

4. I've been to Europe, Central America, South America, North America and Asia. Even though those places are great, home is still where the heart is.

Faye & Yvonne
5. Yvonne and I have been friends for a long time and have dreamt about opening a Bed & Breakfast with a bakery attached for as long as we've known each other.


While we normally share a recipe with you on Sundays, we actually don't have a recipe to post for you today. Instead I was able to spend the morning with two special friends visiting from China. In honor of their visit, I baked them some special treats LiveBakeLove style featuring two recipes posted here -Lemon Blueberry Bread and The Most Amazing Brownies

The smiles on their faces after giving them the box of home baked goodies was priceless...


Thursday, February 16, 2012

Strawberry Shortcake Cupcakes

This cupcake tastes exactly like the name suggests, Strawberry Shortcake! It starts with a delicious vanilla cupcake, but not just any vanilla cupcake, we're using  Magnolia Bakery's famous vanilla cupcake recipe. It's filled with a delicious fresh strawberry gelee then topped with a strawberry cream cheese and mascarpone frosting. The combination of cream cheese and mascarpone cheese in this frosting is amazing and the addition of both fresh strawberry puree and strawberry jam gives the frosting a fresh strawberry flavor.


Strawberry Shortcake Cupcakes

Strawberry Gelee

Ingredients:
1 cup fresh strawberry puree
1/4 cup granulated sugar
1 tablespoon fresh lemon juice
1/2 envelope unflavored gelatin powder
1/2 cup diced fresh stawberries

Directions:

Heat puree and sugar in a small saucepan just until it begins to bubble, stirring occassionally to dissolve sugar. Remove from heat and stir in lemon juice.

Put water in a small bowl and sprinkle with the gelatin powder. Let sit for 5 minutes.


Add fruit puree to the bowl and stir until the gelatin is completely dissolved.


Stir in diced strawberries and chill until set. (I placed the bowl in the fridge for approx 45 minutes).


While the gelee is setting in the fridge, make the cupcakes.

Vanilla Cupcakes

Ingredients:
1 1/2 cups self-rising flour
1 1/4 cups all purpose flour
1 cup unsalted butter, softened
2 cups sugar
4 large eggs at room temperature
1 cup milk
1 teaspoon vanilla extract

Directions:

Preheat oven to 350. Line two 12 cup muffin pans with paper liners.

In a small bowl, combine the flours. Set aside.

In a measuring cup, combine the milk and vanilla. Set aside.

In the bowl of an electric stand mixer fitted with a paddle attachment, cream the butter until smooth. Gradually add sugar and beat until fluffy, approx 2-3 minutes. Add eggs one at a time beating well after each addition. Add the flour mixture in 3 additions alternating with the milk mixture. Scrape down the bowl between additions as needed. Mix just until incorporated (do not overmix).

Divide the batter evenly between the prepared cups and bake at 350 for 20-25 minutes or until a toothpick inserted in the center comes out clean. Remove from oven and cool in pan for 10 minutes. Remove and cool completely on wire cooling rack.


While the cupcakes are cooling, make the frosting

Strawberry Cream Cheese Frosting

Ingredients:
1/4 cup softened butter
1 8 oz container mascarpone cheese at room temperature
1 8oz package cream cheese at room temperature
2 Tablespoons strawberry jam
1/2 cup fresh strawberry puree
4-5 cups powdered sugar

Directions:

Cream butter, cream cheese and mascarpone cheese with an electric mixer until light and fluffy.


Add the strawberries and jam and mix until combined.


Add 2 cups of powdered sugar and mix well to combine. Continue to add powdered sugar 1 cup at a time until you reach your desired consistency and sweetness. Chill frosting for approx 20 minutes to help set. Note: If frosting has not reached desired piping consistency add more powedered sugar.

Once the cupcakes have completely cooled and the frosting and gelee have set, assemble the cupcakes

Cut a cone shaped core out of the center of each cupcake (careful not to cut through the bottom of the cupcake). Cut a small piece off of the bottom of each core This will help the top fit back on top of the filled cupcake.


Fill each cupcake with approx 1 teaspoon of the fresh strawberry gelee and place top back on.


Frost with Strawberry Cream Cheese frosting and garnish with a fresh strawberry.


Notes: I used about 1 1/2 containers of strawberries for the entire recipe (gelee and frosting). Both the frosting and gelee can be made a day ahead and stored in the fridge. If you make them a day ahead be sure to stir the gelee and beat the frosting a little bit before using. Do not garnish the cupcakes with the fresh strawberries until just before your are ready to serve. Since the cupcakes are made with fresh fruit, I recommend storing any leftovers no longer than 1 day.

Recipe adapted from Stickygooeycreamychewy

Monday, February 13, 2012

Valentine's Day Cookie Exchange

Valentine's Day, a day dedicted to expressing your love to that special someone in your life. This year forget the Hallmark card and Sees candy, throw out those roses, nothing says "I love you" more than a homemade treat thoughtfully and lovingly baked by you...

Today LiveBakeLove hosted our very first annual Valentine Day Cookie Exchange and we're really excited to share these delicious recipes with you! Joining the festivities were our good friends, Teresa (French Macaron and Creme Brule queen) who you may recognize from this post, and Louise from http://laidoffmom.com/, one of our favorite new blogs.

We made a great assortment of treats sure to please that special someone in your life, from cupcakes and brownies to cookies and pie pops. And of course we added our special ingredient...love!

Note: OK, I really wasn't serious about throwing out the card, candy and roses but a homemade treat would definitely earn you extra "brownie points" (pun intended).


Stout Cupcakes with Double Vanilla Cream Cheese Frosting
Makes about 12 cupcakes

Ingredients

Cupcakes:
2 large eggs at room temperature
1/2 cup thick plain whole milk yogurt at room temperature
6 oz Dark Stout (Guinness) at room temperature
2 teaspoons Vanilla Extract
1/2 cup unsweetened natural cocoa powder
3/4 cup granulated sugar
1/4 light brown sugar, lightly packed
6 Tablespoons butter soften
1 1/4 cup all purpose flour
1 teaspoon baking soda
1/4 teaspoon cinnamon

Frosting:
8 oz cream cheese, softened
4 Tablespoons butter, softened
4 cups powdered sugar
1 teaspoon vanilla extract
1 Tablespoon vanilla bean paste


Directions:

Preheat oven to 350 and line a 12-cup cupcake pan with paper liners.

In a small bowl, sift together the flour, baking soda, cocoa powder and cinnamon. Set aside.

In the bowl of a stand mixer, beat the butter.  Add granulated sugar and brown sugar until combined. Add the eggs and and yogurt and mix.  Pour in beer and vanilla and mix to combine.

Add 1/3 of the flour mixture to the beer mixture.  Mix slowly untill well combined.  Repeat the process 2 more times until the are well combined.

Divide the batter evenly between the 12 baking cups. Bake at 350 for approximately 25 minutes or until a toothpick inserted in center comes out clean. Remove from oven. Allow to cool in pan for 10 minutes, then remove from pan and cool completely on cooling racks.

To make the frosting:

In the bowl of an electric stand mixer using the whisk attachment, blend together the butter, cream cheese, vanilla and vanilla bean paste. Gradually add powdered sugar mixing well until incorporated. Adjust consistency by adding more powdered sugar if needed.

Place frosting in a piping bag fitted with the decorating tip of your choice. Frost and decorate as desired.

Tip: Top each cupcake with a small frosted heart shaped sugar cookie using your favorite sugar cookie & frosting recipe. If you'd like the recipe we used, please feel free to e-mail us.

Source: Adapted from Dave Lieberman


Berry Pie Pops
Makes about 20-24 Pie Pops (depending upon the size of your cookie cutter)

Ingredients
2 boxes refrigerated pie crusts
Egg wash (1 egg beaten)
Sugar in the Raw or other sugar for sprinkling

Filling:
1  1/2 cups of berries (I used a combination of raspberries and coarsely chopped strawberries)
1/4 cup granulated sugar
1 1/2 Tablespoons Cornstarch
1 teaspoon fresh lemon juice

20-24 lollipop sticks

Directions:

Preheat oven to 375. Line 4 large baking sheets with parchment paper.

Make the filling - in a small saucepan, combine the berries, sugar, cornstarch and lemon juice. Cook over medium heat until thickened stirring occassionally. Remove from heat and allow to cool to room temperature. Refrigerate until ready to use.

Bring crusts to room temperature following the directions on the package.

On a lightly floured surface, roll out each pie crust. Using a 2-2 1/2" heart shaped cookie cutter, cut each crust into hearts. Place half of the hearts on parchment or Silpat lined baking sheets (about 6 per baking sheet).

Place about 1 Tablespoon of the filling in the center of each heart. Take a lollipop stick and place it in the center of the filling almost to the top of the heart. Take the remaining hearts and stretch them out slightly to fit over the top of the filled hearts. Brush the edges with egg wash and place over the top of the filled hearts (egg wash side down). Seal the edges by pressing with your fingers then use a fork to crimp the edges.

Brush tops lightly with egg wash and sprinkle with raw sugar or colored sugar.

Bake at 375 for about 15 minutes or until golden brown. Remove from oven and allow to cool before removing from baking sheets.

Store at room temperature for up to 2 days.

Source: Adapted from Kelsey's Essentials


I "Heart You" Brownies

To make the heart shaped brownies pictured to the left, make the 'Most Amazing Brownie Recipe" posted here. When brownies are completely cooled, cut into hearts using a 2" heart shaped cookie cutter. Dip tops in chocolate ganache and sprinke to decorate.


Ganache:
1/4 c heavy whipping cream
3/4 c semi sweet or dark chocolate chips or chunks

Place chocolate and cream in a microwave safe bowl. Microwave for 1 minute and stir until completely melted. If chocolate is not completely melted after stirring, return to microwave for an additional 20-30 seconds.

Brownies can be stored at room temperature in an air tight container for 2 days.


Stained Glass Heart Cookies

Ingredients
2 1/2 cups all purpose flour
3/4 teaspoon salt
3/4 cup butter softened
1 large egg
1 tsp vanilla extract
6-8 oz of your favorite hard candy

Directions:

1. Crush candy (we used a ziploc bag and a meat tenderizer)

2. Make cookie dough -

In a small bowl, whisk the flour and salt together

In a large bowl using an electric mixer, beat the butter and sugar together at medium speed until light and fluffy. Beat in egg and vanilla.

Add the flour mixture and beat  at low speed until combined. Form the dough into 3 equal disks. Wrap each disk with plastic wrap and chill until firm (approx 1-2 hours).

Working with one disk at a time, roll out each disk to about 1/8" thick on a lightly floured surface. Using a heart shaped cookie cutter, cut out hearts. Use a smaller heart shaped cookie cutter to cut out the center of each heart.

Place hearts on parchment or silpat lined baking sheets. Fill the center of each heart with crushed candy.

Bake at 350 for about 10-12 minutes or until lightly browned. Remove from oven and allow to cool completely before removing.

Store at room temperature in an air tight container for up to 3 days.


The Infamous "Neiman Marcus" Cookies
Source: Lovefromtheoven
Makes approx 5 dozen cookies


Ingredients

2 cups unsalted butter softened
2 cups granulated sugar
2 cups light brown sugar, lightly packed
4 large eggs, room temperature
2 teaspoons vanilla extract
4 cups all purpose flour
5 cups oats, blended (see directions below)
2 teaspoons baking soda
2 teaspoons baking powder
1 tsp salt
24 ounces good quality semi-sweet chocolate chips (we used Guittard)
1 8oz Hershey Milk Chocolate Bar, grated

3 cups chopped nuts (we used almonds)

Directions:

Preheat oven to 375

Measure oatmeal into a food processor or blender and process to a fine powder. Careful not to overblend. Place in a large bowl and add flour, salt, baking powder and baking soda. Set aside.

In the bowl of a stand mixer using a paddle attachment, cream together the butter, granulated sugar and brown sugar until completely combined.

Beat in eggs and vanilla.

Add flour/oatmeal mixture and blend just until combined. Stir in chocolate chips and nuts.

Roll into balls or use a 1 1/2" cookie scoop. Place approx 2" apart on an ungreased or parchment lined baking sheet. Bake for 10 minutes at 375 or until lightly browned.

Remove from oven and allow to cool for a few minutes on the cookie sheets. Remove and place on cooling racks to cool completely.

Store at room temperature in an air tight container for up to 2 days.


Behind the scenes photos....


Filling the pie pops
Adding candy to the stained glass cookies


Cookie Dough

Muffins in the oven


The anticipation builds ......


Yumm...brownies


The decorating master at work


More pie pops.....


Pie pop ooozing.....

Oohh pretty.....


Baking makes you silly....
Don't you just love Valentine's Day? <3