Thursday, September 27, 2012

Pure Goodness....CARROT CAKE CUPCAKES with PINEAPPLE FROSTING

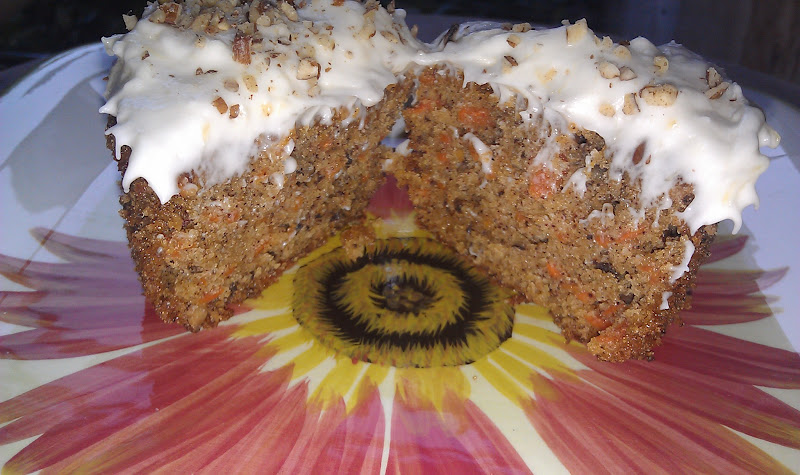
PURE GOODNESS....CARROT CAKE CUPCAKES with PINEAPPLE FROSTING


Not sure how to even start off this recipe except to describe it as pure goodness!! 

This cupcake recipe was so-o-o good.  I was watching an episode of the Pioneer Woman where she was making her favorite carrot cake recipe.   It looked so good that I decided to make it that weekend. I was surprised when I checked the recipe online to see that it had only received 3 stars.  Most of her recipes get 4 stars.  So I read through the comments and found the majority were the same; it was too dry.  I decided to change it up a bit by adding a bit more moisture with the pineapple juice and also added pineapple to the frosting.   I have now made this cake both ways; the original recipe and my updated version.  I have to say they are both delicious… but I think my updated version with the pineapple in the frosting just sends it over the top!

I hope you give this recipe a try.  I know it received great reviews from my boyfriend’s VW group.  I heard they were hoarding the cupcakes from the rest of the camping group. J  That put a smile on my face.

Happy Cooking Everyone!

Cupcake Ingredients
2 cups pure cane sugar (you can use granulated sugar too)
1 cup vegetable oil
3 large eggs
1/3 cup pineapple juice (reserved from the drained can of the crushed pineapple used for frosting)
2 cups all purpose flour
½ teaspoons salt
1 teaspoon baking powder
1 teaspoon baking soda
½ teaspoon cinnamon
2 cups grated carrot
about 1 cup chopped pecans (save about 1/8 of a cup to sprinkle on top)

Frosting
1 box powdered sugar
1 stick unsalted butter (softened)
1 8oz pack of cream cheese (softened)
½ cup of drained and pressed crushed pineapple (try to remove as much moisture as possible - reserving juice for cupcake batter)
2 teaspoons vanilla


To make cup cakes:
Prep: work
-Preheat oven to 350 degrees. Take a standard size muffin pan (12 cupcakes) and fill with the liner of your choice.  Once the liners are in place, lightly spray the liners with oil.  Set aside.
-Grated carrots (about 5-6 medium size) to make the 2 cups of grated carrots.  Set aside.
-Chop the pecans if you bought them whole (I like the whole ones better than the pre-chopped, but if you’re in a time crunch, by all means use the chopped ones.)
Batter:
-Mix together sugar, oil ,eggs and pineapple juice in your KitchenAid (or electric mixer).  In a separate medium-size bowl, sift the flour, salt, baking powder, baking soda and cinnamon. Once sifted, gradually add it to the sugar mixture.


-Add carrots and pecans and stir with a wooden spoon.

-Add batter to each individual cupcake cup. Each cup should be filled to about ¾ full.
-Bake for 25-30 minutes until the center is set.
-Cool

Frosting
-While the cupcakes are baking, you can make the frosting.
-Cream the butter and the cream cheese together with an electric mixer
. 
-Add vanilla and drained pineapple.  (make sure the pineapple is as dry as possible or it will make your frosting runny)


-Now gradually mix in the powdered sugar.

Frost Cupcakes:
-Using a spatula, use about 2 tablespoons to frost each cupcake.
-Sprinkle with extra chopped pecans.


-ENJOY

Monday, September 24, 2012

WHISKEY CHOCOLATE PECAN PIE BARS

WHISKEY CHOCOLATE PECAN PIE BARS


Another VW camping trip….. what to make…what to make?

That was me last Wednesday night.  My boyfriend, Earl, was going camping with his friends and I wanted to send along a little care package he could share with them. For some reason, they love my baked goods - go figure J.  Nice, huh?   This group always provides great motivation to try out new recipes. For this trip I narrowed it down to two. The first: Whiskey Chocolate Pecan Pie Bars - an adaptation from a Kentucky Derby Pie Bar recipe I had found online.  The second recipe was a Pecan Carrot Cake Cupcake with Pineapple frosting - an adaptation from a Pioneer Woman cake recipe. I wanted something that packed and traveled well. These two recipes worked out perfectly.   

I’m going to focus on the Whiskey Chocolate Pecan Pie Bars in this post, but I promise to share the Pecan Carrot Cake Cupcakes in the next.  Back to the Whiskey Chocolate Pecan Pie Bars. The original recipe called for Bourbon.  I don’t think I have ever tasted Bourbon, so it definitely was not in my liquor cabinet, but I did have a nice bottle of Scottish whiskey I had picked up on a trip to Scotland a few years ago.  After a bit of research online I figured out that Bourbon and Whiskey are very similar.  So I said, what the heck and gave it a try.

The bars turned out delicious!  The ginger crust gives them a wonderful flavor, plus the subtle taste of the Whiskey is enjoyable.  And don’t forget the chocolate! Yummy.  These bars would be great base for a scoop of vanilla ice cream or solo with a big glass of milk - just like Earl ate them.  These are a guaranteed, do it again recipe. It’s easy and delicious! 

Happy Cooking Everyone! (and to the Campbodians/Cunado Wear group ….. Glad you had a good camping trip and enjoyed the goodies!)
                                                      Earl in his Classic 63' VW bus
                                                      Typical VW camping set up

Now for the Recipe:
Crust
2 cups ginger snap crumbs (you can usually find Ginger Snap cookies near Graham Crackers in the cookie aisle at the grocery store)
1 stick (½ cup unsalted butter) melted

Filling
1 cup white sugar
1 stick (½ cup unsalted butter) softened
2 eggs
1 ½ teaspoons of vanilla
4-5 tablespoons Good Scottish Whiskey
½ cup flour
1 cup chopped pecans
1 cup semi-sweet chocolate chips


Pre-heat oven to 325 degrees
1. Cut a piece of wax paper to fit the inside of a 13 x 9 inch pan -  place in bottom of pan. Spray the side and bottom (which is covered with the wax paper) with spray oil, set aside.

2. To make the ginger snap crumbs: place ginger snap cookies into food processor - processing until the cookies are small crumbs.  **

3. Combine the gingersnap crumbs and butter in a medium size bowl until well blended.  All the crumbs will be moistened with the butter.


4. Pour the prepared crust into the prepared pan.  Press down till the bottom is covered with the crust mixture. Set aside.
5.  To make the filling:  in a medium size bowl and at a medium speed, mix together sugar and butter with an electric hand mixer or your kitchen aid with the paddle attachment.  Lower speed and gradually add in eggs, one at a time.

6. Add vanilla and whiskey till combined, then gradually add the flour till all the ingredients are combined.
7. Using a wooden spoon, add the pecans and chocolate chips, stirring slowly until combined. Do not over stir

8. Pour the filling over the crust and gentley spread till the majority of the crust if covered


9. Bake for 35-40 minutes. (the top will be a light golden color)
10. Cool, then cut into bars. Make sure you remove the wax paper from the bottom of the bars - sometimes it sticks to the bars a bit.  Store in a plastic container until ready to eat. (Trust me, they won’t last long!!!


Whiskey Choolcte Pean Pie Bars are in the middle.  Bottom is the Pecan Carrot Cake Cupcake with Pineapple frosting (next posting :-) ) 


*** TIP: If you do not have food processor, a blender works well, just do a few at a time.  Or put cookies in plastic bag and roll over them with rolling pin until they are a fine  crumb.

Thursday, September 20, 2012

End of Summer Berry Cobbler for Two


Even though we just suffered through a major heat wave, I'm not ready for Summer to end. I feel like I haven't enjoyed it enough and I'm rushing to enjoy all of my favorite Summer fruit. I have a very special recipe with peaches coming up next week, until then this Berry Cobbler is the perfect way to enjoy Summer berries. I used a combination of strawberries, raspberries and blueberries. It's also the perfect size. I baked it in a small 8" skillet that I found at Ralphs for only $6.00. It makes a delicious and romantic rustic dessert that you can share right out of the pan!

** If you don't want to bake it in a skillet, use a small baking dish. A pie pan would also work! You can also double the recipe and bake it in a larger skillet or baking dish.


End of Summer Berry Cobbler for Two

Ingredients:
1/2 cup all purpose flour
1/2 cup sugar + 2 tablespoons
1/8 teaspoon salt
1 teaspoon baking powder
1/4 teaspoon cinnamon
1/8 teaspoon nutmeg
1/2 cup milk
1/4 cup unsalted butter
1/2 cup blueberries, rinsed and dried
1/2 cup raspberries, carefully rinsed and dried
1/2 cup strawberries, rinsed, dried and cut into fourths
zest and juice from half a lemon

Directions:

Preheat oven to 350F

Place 1/4 cup of each of the berries in a medium saucepan. Add 3 tablespoons of water, the juice from half a small lemon, and the 2 tablespoons of sugar. Stir to combine. Cook over medium-high heat until berries have broken down and thickened. This takes about 5-7 minutes. Stir occassionally to prevent sticking/scorching. Note: If your berries aren't thickening, your heat is too low. The heat needs to be medium-high.


Pour the berry mixture into a medium bowl to cool while you prepare the remaining ingredients.


In a medium bowl, combine the flour, remaining 1/2 cup sugar, baking powder, cinnamon and salt. Set aside.

Melt butter in a small 8" oven proof skillet. Remove from heat. Note: I covered the handle of my oven proof skillet with foil to prevent melting.


Pour the milk into the flour mixture and whisk until smooth with no lumps.


Pour the milk/flour mixture over the butter in the skillet. Do not mix it together, just pour it in.


Add the remaining 1/4 cup of reserved berries to the bowl with the cooked berry mixture. Add the lemon zest and fold gently with a rubber spatula or spoon.


Spoon the berry mixture over the flour/butter mixture in the skillet as evenly as possible.


Place the skillet on a baking sheet to catch any drippings (mine didn't drip or spill over at all) and bake for 30 minutes or until the top is golden brown and almost set in the center.


Remove from oven and cool for 10-15 minutes to allow the cobbler to set.


Serve warm with a dollop of homemade cinnamon whipped cream or your favorite ice cream.


Monday, September 17, 2012

Cheers to One Year! Happy Blogiversary to Us!


They say that "time flies when you're having fun" and I can't think of a truer saying when it comes to our Blog, LiveBakeLove. It's hard to believe that one year ago we posted our very first recipe for the "The Best Blueberry Muffin". 110 posts and 24,240 hits later, we're turning one!

Some of the most important lessons we've learned along the way? Blogging is a lot harder than it seems, sometimes you feel like you're talking to yourself (Hello? Bueller?) and you wonder if anyone is reading or trying your recipes, but as with any labor of love, you keep doing it because you LOVE it.


We celebrated our first birthday with a special tea party with a few friends who have supported our blog along the way. On the menu, Vanilla Bean Scones with three types of homemade jam, Chilled Melon Soup topped with Crab, Eggplant Caprese Salad, an assortment of Tea Sandwiches and of course the grand finale, our remake of the 6-Layer Coconut Mango Cake. Both the tea party and the revamped recipe were a big success!

A big thank you to our family and friends and all of our supporters and followers, especially our taste testers who have probably gained a few pounds during the past year....

Are you ready for another year??

The beautiful China you see in the photos is from Verity Jane Vintage

We're sharing the recipe for the new and improved Coconut Cake with Mango Filling. The cake is lighter and fluffier than the original and not as dense. We added Coconut Extract and a bit of Almond Extract for added flavor. The Mango Filling is made with organic mango nectar which has more mango juice and pulp (instead of sugar) which intensifies the mango flavor.
This is truly a special occassion cake and a show stopper. The flavor is absolutely amazing. Guests of all ages won't be able to keep their hands off of it....


4-Layer Coconut Cake with Mango Filling
Makes One 8" four Layer Cake
Serves 10-12


Cake Ingredients:

2 1/4 cups cake flour
1 tablespoon baking powder
1/2 teaspoon salt
1 cup unsweetened coconut milk (canned, found in the Asian aisle)
1 teaspoon vanilla extract
1 teaspoon coconut extract
1/4 teaspoon almond extract
1 1/2 sticks unsalted butter, softened
1 cup granulated sugar, divided
4 large eggs, separated

Mango Filling Ingredients:

3/4 cup sugar
1/4 cup cornstarch
1 cup mango nectar (found in a bottle in the juice aisle)
4 egg yolks
3 teaspoons vanilla extract
1 stick unsalted butter, cut into tablespoons

Whipped Cream Icing Ingredients:

2 cups heavy whipping cream
3 1/2 tablespoons powdered sugar

Decoration:

1/2 of a mango sliced
2 cups toasted coconut


Directions:

Bake the cake:

Preheat oven to 350F

Grease two cake pans. Line bottoms with parchment paper. Grease the parchment paper then dust the cake pans with flour. The parchment paper is your insurance policy against sticking.

Combine flour, baking powder and salt in a medium bowl. Whisk to combine. Set aside.

In a measuring cup or small bowl, combine the coconut milk, vanilla extract, coconut extract and almond extract. Stir to combine. Set aside.

In a large bowl using your electric hand mixer, beat the softened butter and 1/2 cup sugar until light and fluffy (approx 2 minutes).

Add the egg yolks, one at a time, and beat well after each addition.

With your mixer on low speed, alternate beating in the flour mixture and the coconut milk mixture in 4 additions - start with 1/4 of the flour mixture, then add 1/3 of the milk mixture and repeat.

In a separate bowl, beat your egg whites until foamy. Gradually add in the remaining 1/2 cup of sugar and beat until thick, smooth and glossy.


Add the beaten egg whites to the cake batter and gently fold into the batter using a rubber spatula.


Divide batter between the cake pans and spread into an even layer.

Bake at 350 until the cake springs back when touched lightly in the center and a toothpick inserted in the center comes out clean. Careful not to overbake.

Allow cake to cool in pans for 10 minutes. Then remove to a cooling rack to cool completely.


Once cake has cooled completely, slice each cake in half horizontally to create 2 layers each for a total of 4 layers. Try to cut as evenly as possible. A sharp, serrated knife works best.

Make the filling:

Whisk the sugar and corstarch together in a medium size saucepan. Whisk in the mango nectar, egg yplks and vanilla. Cook over medium heat, stirring constantly, until thick (approx 5 minutes).

Once mixture is thick, stir for an additional 2 minutes. You'll need some mucle power during this part because it gets really thick.

Remove from heat and whisk in butter, one tablespoon at a time, until it is well blended.

Scrape the filling into a glass or ceramic bowl. Press a piece of plastic wrap over the surface and refrigerate until chilled (approx 2 hours).


Make the frosting:

Chill your bowl and beaters for about 15 minutes. I prefer to use my Kitchenaid mixer and whisk attachment.

Place 2 cups of heavy whipping cream in a large bowl. Beat at medium speed until foamy then gradually add the powdered sugar. Increase speed to high and continue beating until stiff peaks form. Do not overbeat.

Assemble and Decorate the Cake:

After slicing each layer in half horizontally, place one layer cut side up on your cake platter. Spread with 1/3 of the filling.

Repeat the process two more times.

Top with the last layer of cake. Spread the sides and top of the cake with a thick layer of the whipped cream frosting.

Carefully press the coconut onto the sides of the cake. A lot of coconut will fall off while you do this, just scoop up and reuse the coconut that falls off.

Lay the mango slices on top of the cake in your desired pattern.

Refrigerate the cake for a few hours to allow it to set. Remove 20 minutes before serving.

Keep leftovers stored in the refrigerator for up to 3 days.


**To make ahead:

Bake the cake the night before you're serving it. After cooling and removing the cake from their pans, wrap in plastic and store at room temperature. Cut the layers and assemple the following day.

Make the mango filling the day before you're serving the cake. Keep it tightly covered in the fridge until ready to assemble. Stir or beat the filling for a few seconds to soften before assembling the cake.


Friday, September 14, 2012

Rich Baked Coconut Rice Pudding


One of my favorite recipes is my Mom's “Arroz con Leche”; it’s a Mexican rice pudding made on the stove top.  The other day I was having a craving for it. I could have just made my Mom's recipe, but I thought I would give the American version a try. I found a few recipes online, but none of them sounded exactly like what I wanted to make....I wanted it to taste like my Mom's but also like a custard. Well, the combination I came up with in the end is delicious!  The rice flavored the coconut milk and the hint of vanilla from the vanilla bean was amazing!!! I will definitely be making this recipe again in the future.  I hope you give it a try.

Ingredients:
1 vanilla bean
3 whole eggs plus one 1 yolk
1 cup whole milk
1 cup coconut milk (in a can)
½ cup heavy cream
3/4 cup sugar  ( I added a 1 cup since I was using pure cane sugar)
1 ½ cups cooked rice (cooled, I used long grain white rice)
½ cup coconut flakes (unsweetened)
¼ salt
½ teaspoon cinnamon
***TIP, vanilla beans can be expensiv, but sometimes you can buy them individually at your grocery store if you go to the rack that has all the herbs and spices packaged in baggies instead of containers. Mine was only a $1.29 at Sprouts.
Preheat oven to 325 degrees.   You will need two pans for this recipe. A 11x14 aluminum baking dish and a 9 inch glass baking dish.
Lightly spray the glass baking dish with oil. Set aside
Take the vanilla bean, and make a slit down the middle. Using a spoon, scrap the middle out, it should be all the black beads. Set aside


In a large bowl beat eggs.


Add in the coconut milk and whip. 

Then add the milk and heavy cream and whip till all incorporated. Add sugar.

Now add the last four ingredients’ (rice, coconut flakes ,vanilla bean and salt).   Stir until everything is mixed together.


Pour mixture into prepared glass dish.


Set the glass dish into the 11x14 aluminum baking dish.Pour hot water into the aluminum pan, until its about 1inch in depth around the glass dish.


Bake for 1 ½ hours unit the middle is set.  Then, right before pulling it out, set oven on broil and broil for 1-2 minutes. It will get a nice golden look on the top.


Remove from oven, carefully remove the glass dish (toss the hot water in the aluminum pan). Sprinkle the cinnamon over the top .  Cool for about 30 minutes.
Serve warm or cold. ENJOY!!
Happy Cooking