Tuesday, March 27, 2012

Meat Lovers Smoky Bacon Meatballs


If these meatballs are wrong, then I don't wanna be right. They say "Everything is better with bacon" and bacon is definitely the star ingredient in this recipe; no cheese, no bread crumbs, nothing green and leafy getting in between you and pure meat lover's heaven. I was actually inspired to make these after receiving a comment from someone who has made the Smoked Gouda Meatballs posted here twice and said they have become one of her favorites. Tina, this one's for you!


Meat Lovers Smoky Bacon Meatballs
Makes approx 30 meatballs

Ingredients
1 lb hardwood smoked bacon, cut into 1" pieces
3/4 lb 80/20 ground beef
1/4 lb hot italian pork sausage
1 1/2 teaspoons kosher salt
2 teaspoons smoked spanish paprika
2 teaspoons dried oregano
1/2 teaspoon ground coriander or ground fennel
1/2 teaspoon freshly cracked black pepper
1/2 tsp crushed red pepper flakes
1 egg, lightly beaten

Directions:

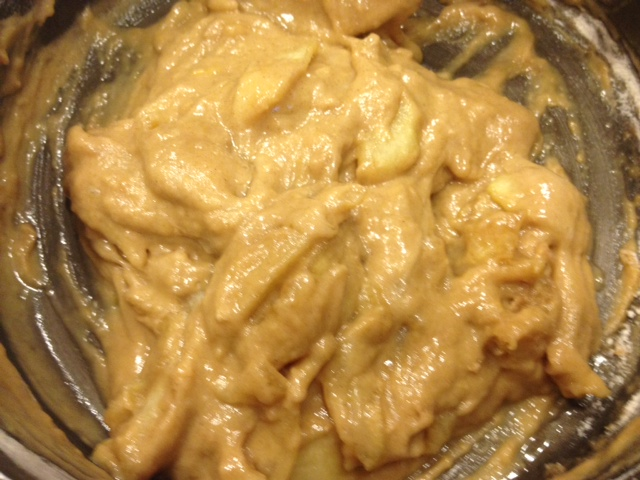
Place the cut bacon in the bowl of a food processor and pulse until it is evenly ground. Place the ground bacon in a large bowl.


Oooh, ground bacon, my new BFF

Add the remaining ingredients to the bowl. Be sure to crush the dried oregano in the palm of your hand or in between your fingers to release it's flavor. Using your hands, gently combine the ingredients. For best results, do not overhandle the mixture. If you don't have Smoked Spanish Parika, any other smoked paprika will do but I recommend the Spanish version (see notes below).


Gently roll into 1 1/2" balls making sure you handle the meat lightly and do not press or pack the meat too tightly.


Place on a baking sheet and refrigerate for 2 hours.

Meatballs chillin'

After 2 hours, preheat oven to 400 degrees.

Heat a large skillet over medium heat. Working in batches, brown the meatballs on all sides. Place the browned meatballs on a foil lined, rimmed backing sheet.


Place the baking sheet in the oven and bake approx 15 minutes until the temperature registers 160 degrees. You may still see some pink in the interior of the meatballs due to the bacon but as long as you cook them to the proper temperature, they are done.


Remove from the oven and serve as desired.


I made mine into meatball subs by placing sub rolls brushed with olive oil under the broiler then topping the rolls with provolone cheese, a few of the meatballs and some of our favorite marinara sauce.

You can also make them into sliders by placing one meatball on a toasted slider roll then topping with cheese and warm marinara sauce or serve as an appetizer with a side of warm marinara sauce for dipping.


Store leftovers in the refrigerator for up to 2 days. Reheat to the appropriate temperature before serving the leftovers.

Note: This is my favorite Smoked Spanish Paprika. It's from the La Vera region of Spain and has a great smoky flavor. I highly recommend it. You can usually find it for a good price at Home Goods in the gourmet food section.

Monday, March 26, 2012

Chocolate Pecan cake with Caramel frosting


Chocolate Sour Cream Cake with Pecans & Caramel Frosting
Who doesn’t love chocolate cake?  Well, I can tell you who, my parents and sisters! Growing up, I always received a vanilla cake with white vanilla frosting for my birthday because no one in my family liked chocolate cake.  Yes, I was a deprived child : )  As I got older, I started buying my own birthday cake or actually Faye would make my favorite for me, German Chocolate cake (yummy!).
Back to my fascination with chocolate cakes....since I know how to make my own chocolate cake these days, I like to experiment whenever I get a chance. This is one of my recent experiments. Imagine these wonderful ingredients: chocolate, sour cream, pecans and caramel.  Alone they can stand on their own, but together they form the most amazingly moist cake with sweet caramel frosting on top.  The perfect chocolate cake can't be too sweet because the sweetness of the frosting brings it all together.  This cake and frosting combination was perfect. I hope you all give it a try. Happy Cooking everyone.
Cake
2 cups flour
1 ¼ granulated sugar (white sugar)
¾ cup light brown sugar
1/4 teaspoon salt
4 oz unsweetened chocolate
1 cup water
½ cup unsalted butter
1 cup Sour cream
2 teaspoons Baking soda
3 beaten eggs
2 teaspoons vanilla


Frosting
½ cup brown sugar
½ cup half and half
½ cup butter
1 teaspoon vanilla
5-6 cups confectioners’ sugar
½ chopped pecans
36 pecan halfs


CAKE
-------

1.       Preheat oven to 350
2.       Prepare two 9 inch pans flour and grease them (I recommend you line the bottoms.  When I baked the cake, the bottoms got stuck even though I floured and greased them)
3.       In a large bowl (or Kitchen Aid) combine flour and sugars and salt.

4.       In a double broiler (or you can put a small metal bowl over a sauce pan, where the water just barely touches the bowl), put the chocolate, water, butter to melt.  Stir gentle until the chocolate is well combined with the water and butter. 


 5. Once liquid chocolate is complete melted, Add the hot chocolate liquid to the flour mixture and blend.


6.  Add sour cream and baking soda to the chocolate cake mixture.


7. Beat eggs with vanilla.


8. Pour eggs into with the Sourcream and baking soda in the bowl and mix for 3 minutes


9. Pour finished cake mix into prepare cake pans and bake for 30 minutes
10. Remove cake pans from oven and cool for 10 minutes on a metal wire rack.  Once 10 minutes are done, remove cakes from pan and finish cooling them on the wire rake.

Frosting
1.  Combine half and half, brown sugar and butter in a small saucepan.  Bring to a boil.  Let it boil for about 1 minute.  Remove it from heat.  Pour the hot liquid in a large bowl and set it aside and let it cool for about 10 minutes.  

2.       With a tablespoon, take about 2 tablespoons of the caramel and pour over one of the cake bottoms and set aside


3.       With the remaining caramel, gradually beat in the 5-6 cups of confectioners’ sugar and the vanilla to make a nice thick frosting. 
4.       Starting in the middle of the cake with the caramel on it, start with about ½ to  ¾ cup of frosting and spread evenly over cake.  Sprinkle the chopped pecans. 

5.       Lay the other cake layer over the cake layer with the frosting and pecans.  Start frosting the cake starting at top and working your way to the sides. Make sure the cake is completely covered.

6.       Decorate the top of cake with the pecan halves


Tuesday, March 20, 2012

Homemade Apple "Pop Tarts" with Cinnamon Glaze (and how I conquered my fear of homemade crust)


Sometimes in life when you are afraid to do something you just have to dive in head first and do it. That's just what I did with this recipe. I very seldom make homemade crust (heavy emphasis on the word seldom). I haven't found a recipe I love and I hate to waste precious ingredients (butter is like gold to me) so I usually stick with store bought crust (gasp!). This time I knew I wanted the crust to be the star so I decided to dive in and give homemade crust another try. I have to say that I was so surprised and impressed by the results. This crust recipe is so buttery, so flaky and so  amazingly good it can rival puff pastry when it comes to flakiness. I'm so proud of myself for finally conquering my fear of pie crust!

If you would like to simplify the recipe and skip making your own dough, it would also be delicious using frozen puff pastry or refrigerated ready made pie crust, but I highly recommend the homemade crust if you have the time. It's definitely worth it!


Homemade Apple "Pop Tarts" with Cinnamon Glaze
Makes 8 servings (or 8 pop tarts)

Ingredients

Pastry
1 1/2 cups all purpose flour
1 tablespoon sugar
1 teaspoon salt
1 cup cold unsalted butter, cut into 12 pieces
2 egg yolks
3 tablespoons cold milk

Filling
2 large granny smith apples, peeled and thinly sliced
3 tablespoons unsalted butter
1/2 cup packed light brown sugar
1 egg lightly beaten
1/2 teaspoon ground cinnamon
1/4 teaspoon ground nutmeg
1/8 teaspoon salt
1/2 cup all purpose flour

Cinnamon Glaze
1 cup powdered sugar
1 tablespoon milk
1/2 teaspoon cinnamon

Egg Wash
1 egg lightly beaten

Instructions:

To make the dough

Using a stand mixer fitted with the paddle attachment, combine the flour, sugar and salt by mixing for a few seconds.

Scatter the butter over the top and mix at low speed just until the mixture holds together when you squeeze a clump of it in your hand. This took exactly 1 1/2 minutes on my mixer. You should still see large lumps of butter.


In a small bowl, whisk together the eggs and milk. Add to the flour mixture and mix on low speed just until the dough comes together. It should still look shaggy and messy and not cohesive.


Dump the dough out onto an unfloured surface and shape it into a tight mound. Using the heel of your hand start at the top of the dough (either the far right or far left) and smear it down towards you. Repeat the process until the entire mound of dough has been smeared. You should see streaks of butter throughout the dough. These streaks will make your pastry flaky!


Using a bench scraper or thin spatula, scrape up the dough and place it on a large sheet of plastic wrap. Using the plastic wrap, form it into a disk (I made mine rectangular shape since that's the shape you will ultimately be rolling it into). Wrap tightly and refrigerate for 4 hours or up to 4 days. As a time saver, I made my crust the night before & then assembled/baked the pop tarts in the morning.


Prepare the filling

Melt the butter in a saucepan over medium-high heat. Add the apples and stir until the apples just begin to soften (approx 2 minutes). Add the brown sugar and continue to cook stirring constantly until the sugar is melted and the apples are softened (approx 3 minutes). Remove from heat and allow to cool for 30 minutes.


To the cooked apples, add the flour, salt, cinnamon, nutmeg and egg. Stir gently with a rubber spatula to combine. Make sure the mixture is cooled completely before using.


Prepare the glaze

In a small bowl combine the powdered sugar, milk and cinnamon. If glaze is too runny, add a little more powdered sugar and vice versa.


To assemble

Remove the dough from the refrigerator and cut in half. Place one half back in the refrigerator.

On a lightly floured surface, roll out the dough into a rectangle approximately 24"x11". Cut the dough into 8 equal rectangles.


Brush four of the rectangles with the egg wash. Spoon 2 tablespoons of the apple filling into the center of the egg washed rectangles. Place the other rectangles on top and crimp with a fork.


Remove the second half of the dough from the fridge, repeat the above process with the remaining dough.

Place on parchment lined baking sheets and bake for 35-40 minutes or until dough is golden brown.

Allow to cool 30 minutes, then brush with the cinnamon glaze. Enjoy!


Keep leftovers stored at room temperature for up to 2 days.

Source: Adapted from Buns in my Oven

Monday, March 19, 2012

Chicken Stuffed Chile Rellenos with Roasted Tomato Sauce


If you’re looking for an alternative to the traditional Chile Relleno, this is a great recipe to try. For those of you that didn’t grow up in a traditional Mexican family, a Chile Relleno is a stuffed chile. In the traditional recipe, the chiles are filled with cheese, coated in a flour mixture then dipped into an egg wash and fried. Even though those are tasty, you have to give this recipe a try. My Aunt Conchi, who has been a great source for recipes, gave this one to me over the weekend. The concept sounded interesting and I wanted to play with the idea and see what I could do. I gave the sauce a twist by roasting the tomatoes and adding the root vegetables (shallots and garlic). Also, the original recipe only used evaporated milk, but I added the whipping cream and broth. I also added chicken to make it a heartier dish. The end result was fantastic! The sauce is absolutely delicious. The roasted vegetables gives the sauce a bit of sweetness which is wonderful. For you vegetarians out there, you can easily change this recipe to vegetarian by omitting the chicken and adding a vegetable base for the sauce. I bet it would be just as good. Happy cooking everyone!


Ingrediates:
1-2 cups of shredded chicken
6 Anaheim Chiles
6-8 strips of Mexican Queso Fresco ( or a fresh Mozzerella would work also)
1/4 cup of crumbled Queso Fresco (or Mozzerella cheese)


Roasted Tomato Sauce
4 Roma tomatoes
2-3 shallots  (peeled)
1 garlic clove (peeled)
1 tablespoon Vegtable oil
1/2 cup evaporated milk
1/2 cup whipping cream
1/2 cup chicken broth
1 1/2 chicken flavored boullion cubes
1 tablespoon cornstarch


Preheat oven to 450 degrees


1. Coat Chiles, Tomatoes and shallots with the one tablespoon of oil and place on a 11x14 tray.


2. Place in oven and set timer for 10 minutes.  After first 10 minutes, take tray from oven and flip all the vegtables. Put tray back in the oven and bake for another 10 minutes.

                                                                    (after 10 minutes)
                                                             (after 20 minutes)

3.Take 3 wet paper towels, and wrap the chiles as soon as the come out of the oven in the towels. This will make it easier to remove the skin. Set aside for 15 minutes before you start peeling.  Also, set aside the tomatoes, scallots and garlic in a bowl to cool.


4. Once the chiles are cool , it is time to start peeling.  Pull at the skin to creat a hole.  The skins should easily come off.   Place de-skinned chile on a plate and  remove the skins from the remaining chiles.

  5. Once all the chiles are peeled, take one of the chiles and cut off the top.  Then make a slit from the top to the bottom on one side (do not cut all the way through). Taking a butter knife, remove all the seeds.  Repeat the process on all the chiles and set aside.


6. Take the cooled tomatoes and start peeling off the skin. This is a bit more difficult than the chiles, just take your time till all the tomatoes are peeled (ok if a little skin is left on).


7. Once all the tomatoes are peeled, take the tomatoes, shallots and garlic and put in the blender.  Add the evaporated milk, whipping cream , boullion  and chicken broth. Blend for 1-2 minutes until the sauce looks creamy . Pour sauce in a small saute pan.  Add corn starch and bring to a boil. Remove from heat.

                                                    
8. Prepare a 2 quart casserole dish by spraying oil on it.  Take one of the prepared chiles and place on a plate.  Put one strip of cheese and cover with shredded chicken. Add two tablespoons of the sauce.  Pull the ends together to cover and place open side down in casserole dish.


9. Pour the remaining sauce over chiles and sprinkle with about 1/4 cup of crumbled Queso Fresco.  Bake at 350 degrees for 40 minutes.  Serve with Rice. Enjoy!