Showing posts with label glaze. Show all posts

Tuesday, January 21, 2014

Glazed Meyer Lemon Cookies


There's not much excitement going on in the way of fresh produce during the winter, with the exception of Meyer Lemons! I always look forward to Meyer Lemon season. If you're not familiar with Meyer Lemons, the best way to describe them is a cross between a regular lemon and a tangerine. They tend to be smaller in size and have thinner skins, like a tangerine, but the flavor is the perfect combination of the sourness you get from a lemon with the slight sweetness of a tangerine. Whenever they're in season, I love to use them in  baking wherever I would use regular lemons. They also make a delicious curd.


Recently, I fell in love with these Lemon Glazed Cookies from Mama's Gotta Bake.  And by love, I mean L.O.V.E! (all caps with an exclamation point). Her photos of these cookies made me want to run to the kitchen and make them on the spot, but I knew I wanted to adapt the recipe using my favorite...Meyer Lemons!  My patience, definitely paid off.
 
Whether or not you are a lemon lover (and I know some people are not...Boo!), you will love these cookies. They're tender, chewy and bursting with lemon flavor without being overwhelming or too tart. L.O.V.E!

If you're a fan of Meyer Lemon like I am, you would also enjoy these Fresh Strawberry and Meyer Lemon Scones


Glazed Meyer Lemon Cookies
Makes approx. 16-17 large cookies

Ingredients

Cookie Ingredients:
1 3/4 cup all purpose flour
1 cup cake flour
1 teaspoon cream of tartar
1/2 teaspoon baking soda
1/2 teaspoon salt
1 cup unsalted butter, softened but still slightly firm
2 tablespoons fresh Meyer lemon zest (from approx. 3 Meyer lemons)
1 1/2 cups granulated sugar
4 large egg yolks
1 teaspoon vanilla extract
1/4 cup fresh Meyer lemon juice (from approx. 3 Meyer lemons)

Glaze Ingredients
2 cups powdered sugar, preferably sifted
1 tablespoon light corn syrup
1/2 teaspoon fresh meyer lemon zest (from approx. 1/2 Meyer lemon)
A few tablespoons of fresh Meyer lemon juice

Directions:

Place the butter and lemon zest in the bowl of an electric stand mixer fitted with the paddle attachment. Alternatively, you can also use your electric hand mixer. Beat at medium speed until light and fluffy, approx. 2 minutes.

With mixer at medium speed, gradually add in the granulated sugar and beat until combined, approximately 1 minute. Scrape down the bowl.

Add the egg yolks and vanilla extract. Beat at medium speed until combined. Scrape down the bottom and sides of bowl.

Add the lemon juice and beat at medium speed until combined. Scrape down the bowl.

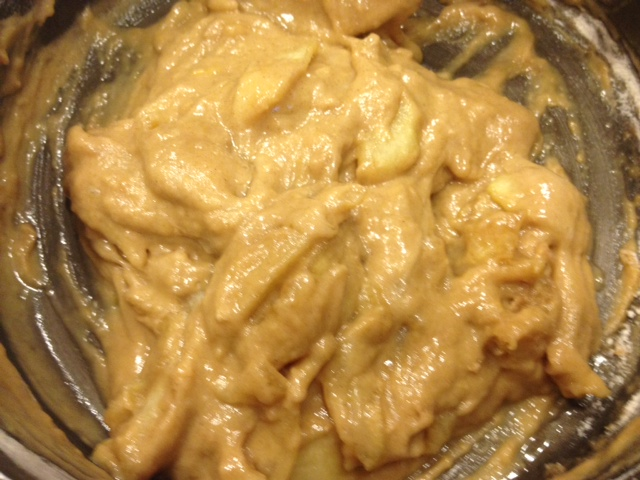
With mixer at low speed, add the dry ingredients in 3 batches beating just until combined.

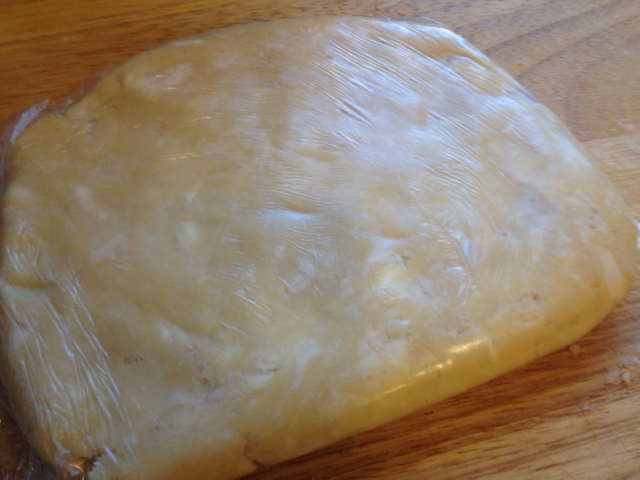
Place the cookie dough in a large bowl, cover with plastic wrap and refrigerate at least a few hours or overnight.

When ready to bake -

Preheat oven to 350 and line baking sheets with parchment paper.

Divide the dough evenly into 16 portions, then roll into balls. Place the balls on the baking sheets (no more than 6 per baking sheet) and flatten each ball into a 3" disk using the palm of your hand. If you do not have enough baking sheets for 16 balls of dough, place the remaining balls of dough in the fridge so they don't get too soft.


Bake at 350 for approx. 10 minutes or until light golden brown. Do not overbake.

Remove from oven and allow to cool on cookie sheet for 2 minutes then remove to a wire cooling rack to cool completely.


While the cookies are cooling, make the glaze -

Place all of the ingredients (starting with only 3 tablespoons of lemon juice) in a medium size bowl and stir with a spoon until well combined. If the glaze is not proper spreading consistency, add a little more lemon juice and stir. Repeat until you get a thick glaze that is easy to spread, but isn't too thin or runny.


Using the back of a spoon or an offset spatula, spread glaze on each cookie. Allow a few minutes for the glaze to set.


Saturday, July 27, 2013

Baked Chocolate Donuts with Mocha Glaze

These Chocolate Donuts with Mocha Glaze combine 3 of my favorite things - Chocolate, Donuts and Coffee all in one! How can you beat that? The donuts are baked, making them healthier than the fried version, and they are deceptively light, not overly sweet. Imagine a light chocolate "cupcake" topped with a chocolate glaze flavored with a hint of coffee. Who wouldn't want that for breakfast?
 
The great thing about this recipe (in addition to the taste) is that it's easy to make and only makes 6 donuts! After all, having a dozen Chocolate Glazed Donuts sitting around could be a dangerous thing....
 
Next time you're looking for an easy and delicious breakfast treat that's a little bit on the indulgent side (without all of the guilt), I hope you'll give this recipe a try!


Baked Chocolate Donuts with Mocha Glaze
Makes 6 donuts

Ingredients:
1 cup all purpose flour
1/4 cup + 2 tablespoons granulated sugar
1/4 cup natural unsweetened cocoa powder
1/2 teaspoon baking powder
1/2 teaspoon baking soda
1/2 teaspoon salt
1/4 cup + 3 tablespoons whole milk
1 large egg, room temperature
1 teaspoon vanilla extract
1 tablespoon melted butter (preferably unsalted)

Glaze Ingredients:
1 1/4 cup powdered sugar
3 tablespoons natural unsweetened cocoa powder
2-3 tablespoons strong brewed coffee
1/4 teaspoon vanilla
small dash of salt
Drizzle of heavy whipping cream

Directions:

Preheat oven to 325F

Spray a 6 cavity Donut Pan with nonstick cooking spray.

Combine all dry ingredients in a large bowl and whisk to combine.

Add the milk, egg, vanilla extract and melted butter and whisk just until combined (do not overmix).

Using a rubber spatula, transfer the batter to a plastic storage bag. Cut off the tip and divide evenly between the 6 cavities of the Donut Pan.


Bake approx. 9-10 minutes or until toothpick inserted comes out clean.
 
 
Allow to cool in pan for 2 minutes, then carefully remove to cooling rack.
 
 
Make glaze - Combine the powdered sugar, coffee, vanilla and salt in a bowl and stir to combine. Drizzle in a small amount of heavy whipping cream to lighten. 
 
Dip or drizzle the donuts with the glaze.


Kick back, relax with your favorite cup of coffee and enjoy!
 
Recipe adapted from Foodfamilyfinds

Friday, May 31, 2013

Fresh Strawberry and Toasted Almond Scones

This weekend was Strawberry Festival in downtown Vista, a suburb of San Diego County.  A little known fact about Vista is that it was once considered the "Strawberry Capitol of the World" and still has quite a few strawberry fields. While Vista is no longer as well known for its' strawberries, Strawberry Festival was a great time to get out and celebrate one of Summer's best fruits.
 
I decided to celebrate Strawberry Festival by making these delicious Strawberry and Toasted Almond Scones. This is definitely one of my new favorite scone recipes. Normally I like to shape scones into neat little triangles, but these scones have a more rustic, homemade look which I think makes them even better (and easier to make!).
 
Wherever you live, I hope you'll take advantage of strawberry season this summer and give this recipe a try.


Fresh Strawberry & Toasted Almond Scones
Makes 8 large Scones


Scone Ingredients:
1 1/2 cups all purpose flour
3 tablespoons sugar
1/2 tablespoon baking powder
1/4 teaspoon baking soda
1/4 teaspoon salt
1/4 cup cold butter, cubed
3/4 cup cold heavy cream
1/4 teaspoon almond extract
1 cup sliced fresh strawberries (place the sliced strawberries on paper towels to soak up some of the moisture while you prepare the dough)
* Cream and course sugar for topping
 
Glaze Ingredients:
1 1/2 cups powdered sugar
1/4 teaspoon almond extract
2-3 tablespoons milk or cream
1/4 cup sliced almonds, toasted (for garnish)
** do not skip toasting the almonds, it enhances the flavor of the almonds
 
Directions:
 
Preheat oven to 400f
 
Line a baking sheet with parchment paper or silpat mat.

Pour the cream into a measuring cup, add the almond extract and stir to combine.
 
Place the flour, baking powder, sugar, baking soda and salt in a large bowl and whisk to combine.
 
Add the cold cubed butter and cut in with a pastry cutter or 2 butter knives until mixture resembles course crumbs.
 
Create a well in the center of the mixture and pour in the cream/extract mixture. Using a rubber spatula, fold just until the dough is moistened.


Gently fold in the sliced strawberries.
 
Using a large cookie scoop, place 8 heaping scoops of dough evenly spaced apart onto the prepared baking sheet.


Brush lightly with cream and sprinkle with coarse sugar.
 
Bake until lightly golden brown, approximately 15 - 20 minutes depending upon your oven.
 
Remove from oven and allow to cool for 15 minutes.
 
Make the glaze:
 
Place the powdered sugar, almond extract and cream in a medium size bowl. Whisk to combine. Adjust to desired consistency.
 
Drizzle glaze on scones and top with a sprinkle of toasted almonds. Press the almonds very lightly into the glaze to help them adhere to the glaze.


** Tips for successful scones:
1. Use cold butter and cream.
2. Don't over mix or over handle the dough.
3. Scones are best served the day they are made (preferably within a few hours of baking) and generally do not store well especially if they are made with fresh fruit. Scones made without fruit or with dried fruit, store better.
4. If you need to bake your scones ahead of time (a few hours before serving them), do not glaze them until just before they are served. The glaze can make the scones soggy if they sit for too long.


Thursday, April 5, 2012

Fresh Strawberry & Meyer Lemon Scones with Meyer Lemon Glaze


You may have noticed that we've done a little sprucing up over here at LiveBakeLove. We've updated our colors to welcome in Spring (yay!) and added a Search feature to make recipes easier to find as well as "Pin It" and "Follow Me on Pinterest" buttons. I don't know about you, but I'm totally addicted to Pinterest. So many great ideas out there! I find myself slapping my forehead and saying "why didn't I think of that!" Whether you're on Pinterest or not, I hope you'll follow LiveBakeLove (via Pinterest and/or email) and like us on Facebook. As always, we appreciate your support.

To welcome Spring, this morning I made these delicious Strawberry and Meyer Lemon Scones drizzled with a Meyer Lemon Glaze. I have to confess that I wasn't always a big fan of scones until I started making them at home. Scones don't have to be dry, hard, crumbly rocks. This scone recipe makes tender, moist, flakey, melt in your mouth delicious scones just the way a scone should be.

If you've never made scones or if you're looking for an excellent scone recipe, I hope you'll give this one a try. You will not be disappointed.


Strawberry Meyer Lemon Scones with Meyer Lemon Glaze

Scone Ingredients
2 cups all purpose flour
2 teaspoons baking powder
3 tablespoons + 1/2 tablespoon granulated sugar
1/2 tsp meyer lemon zest
1/4 teaspoon salt
6 tablespoons cold butter cut into pieces
2/3-1 cup cold heavy cream
1 cup fresh strawberrries chopped into chunks (approx 1/4" or slightly larger)

Place the strawberries into a small bowl and sprinkle with 1/2 tablespoon of granulated sugar. Set aside.


In a large bowl, whisk together the flour, 3 tablespoons of sugar, baking powder, salt and lemon zest. Note: Make sure your baking powder is fresh.

Sprinkle the cold, cut butter on top of the flour. Using a pastry cutter or two knives, cut the butter into the flour until the butter is the size of small peas. Note: If you don't have a pastry cutter, I highly recommend getting one. They're inexpensize and make cutting butter into biscuits, scones and pastry dough a lot easier. You can also use a food processor if you have one but you have to be careful not to over process.


Add the strawberries to the flour mixture. Using a rubber spatula, toss gently to combine and coat the strawberries.


Add 2/3 cup of heavy cream to the flour mixture. Using a rubber spatula fold gently to combine. If mixture looks too dry drizzle over a little more heavy cream (but do not add more than another 1/3 cup). The dough will look slightly moist all over but will not be cohesive until the next step.


Using your hands, carefully dump the dough onto a lightly floured surface. Gently pat & shape into a disk about 1 - 1 1/4" thick. The dough should now hold together. Note: Don't over work the dough. The secret to light, tender scones is keeping the butter as cold as possible and working the dough as little as possible. If the dough looks too "craggly" on top after you've shaped it, I take a thin spatula and flip it over. The flip side is usually smoother and more uniform as you can see below. If you feel you may have overworked your dough, place the scones back in the fridge for 15 minutes after you have cut them and put them on the baking sheet, then remove from the fridge, brush lightly with cream and bake as directed below.


Using a sharp knife or pizza cutter, cut the dough equally into 8 triangles. Place on a parchment lined or silpat lined baking sheet. Brush each scone lightly with heavy cream: Note: If you are not using glaze, sprinkle tops with coarse sugar.


Bake at 400 for approximately 15-20 minutes or until lightly golden brown.


Allow to cool a few minutes. Remove to a wire rack and cool for 10 minutes more before drizzling with glaze.


Glaze Ingredients
1 1/2 cups powdered sugar
zest from 1 small meyer lemon
1 tablespoon butter softened
Juice from 1 small meyer lemon

Add the powdered sugar, lemon zest and softened butter to a small bowl. Add the juice from half of the meyer lemon and stir well to combine. If glaze is too stiff, add a little more meyer lemon juice (a little at a time) stirring well until you reach the desired consistency. The glaze should be a creamy, thick drizzling consistency (not thin and runny).


Due to the fresh fruit, scones are best enjoyed the day they are made.

Note: You can substitute orange zest and juice for the Meyer Lemon. You can substitute whole milk yogurt or greek yogurt for the heavy cream. Lemon greek yogurt would also be great and would further enhance the lemon flavor.

Tuesday, March 20, 2012

Homemade Apple "Pop Tarts" with Cinnamon Glaze (and how I conquered my fear of homemade crust)


Sometimes in life when you are afraid to do something you just have to dive in head first and do it. That's just what I did with this recipe. I very seldom make homemade crust (heavy emphasis on the word seldom). I haven't found a recipe I love and I hate to waste precious ingredients (butter is like gold to me) so I usually stick with store bought crust (gasp!). This time I knew I wanted the crust to be the star so I decided to dive in and give homemade crust another try. I have to say that I was so surprised and impressed by the results. This crust recipe is so buttery, so flaky and so  amazingly good it can rival puff pastry when it comes to flakiness. I'm so proud of myself for finally conquering my fear of pie crust!

If you would like to simplify the recipe and skip making your own dough, it would also be delicious using frozen puff pastry or refrigerated ready made pie crust, but I highly recommend the homemade crust if you have the time. It's definitely worth it!


Homemade Apple "Pop Tarts" with Cinnamon Glaze
Makes 8 servings (or 8 pop tarts)

Ingredients

Pastry
1 1/2 cups all purpose flour
1 tablespoon sugar
1 teaspoon salt
1 cup cold unsalted butter, cut into 12 pieces
2 egg yolks
3 tablespoons cold milk

Filling
2 large granny smith apples, peeled and thinly sliced
3 tablespoons unsalted butter
1/2 cup packed light brown sugar
1 egg lightly beaten
1/2 teaspoon ground cinnamon
1/4 teaspoon ground nutmeg
1/8 teaspoon salt
1/2 cup all purpose flour

Cinnamon Glaze
1 cup powdered sugar
1 tablespoon milk
1/2 teaspoon cinnamon

Egg Wash
1 egg lightly beaten

Instructions:

To make the dough

Using a stand mixer fitted with the paddle attachment, combine the flour, sugar and salt by mixing for a few seconds.

Scatter the butter over the top and mix at low speed just until the mixture holds together when you squeeze a clump of it in your hand. This took exactly 1 1/2 minutes on my mixer. You should still see large lumps of butter.


In a small bowl, whisk together the eggs and milk. Add to the flour mixture and mix on low speed just until the dough comes together. It should still look shaggy and messy and not cohesive.


Dump the dough out onto an unfloured surface and shape it into a tight mound. Using the heel of your hand start at the top of the dough (either the far right or far left) and smear it down towards you. Repeat the process until the entire mound of dough has been smeared. You should see streaks of butter throughout the dough. These streaks will make your pastry flaky!


Using a bench scraper or thin spatula, scrape up the dough and place it on a large sheet of plastic wrap. Using the plastic wrap, form it into a disk (I made mine rectangular shape since that's the shape you will ultimately be rolling it into). Wrap tightly and refrigerate for 4 hours or up to 4 days. As a time saver, I made my crust the night before & then assembled/baked the pop tarts in the morning.


Prepare the filling

Melt the butter in a saucepan over medium-high heat. Add the apples and stir until the apples just begin to soften (approx 2 minutes). Add the brown sugar and continue to cook stirring constantly until the sugar is melted and the apples are softened (approx 3 minutes). Remove from heat and allow to cool for 30 minutes.


To the cooked apples, add the flour, salt, cinnamon, nutmeg and egg. Stir gently with a rubber spatula to combine. Make sure the mixture is cooled completely before using.


Prepare the glaze

In a small bowl combine the powdered sugar, milk and cinnamon. If glaze is too runny, add a little more powdered sugar and vice versa.


To assemble

Remove the dough from the refrigerator and cut in half. Place one half back in the refrigerator.

On a lightly floured surface, roll out the dough into a rectangle approximately 24"x11". Cut the dough into 8 equal rectangles.


Brush four of the rectangles with the egg wash. Spoon 2 tablespoons of the apple filling into the center of the egg washed rectangles. Place the other rectangles on top and crimp with a fork.


Remove the second half of the dough from the fridge, repeat the above process with the remaining dough.

Place on parchment lined baking sheets and bake for 35-40 minutes or until dough is golden brown.

Allow to cool 30 minutes, then brush with the cinnamon glaze. Enjoy!


Keep leftovers stored at room temperature for up to 2 days.

Source: Adapted from Buns in my Oven

Saturday, November 26, 2011

Cranberry Lemon Bundt Cake with Lemon Glaze


Well, Thanksgiving is over and the holiday season is upon us. Were you brave enough to venture out into the crowds and take advantage of the Black Friday deals? Did you eagerly put up your holiday decorations? More importantly, have you used up all of those Thanksgiving leftovers? : ) In my house, we usually don't have too many leftovers, however two things I did have leftover were fresh cranberries and lemons. I wanted to combine them to make something savory since our last post was a cake (thanks Yvonne for the wonderful birthday cake), but I recently saw this great recipe on Pinterest (thanks Pinterest!) and decided to give it a try. Cranberry Lemon Bundt Cake with Lemon Glaze....yumm. This cake would be great to serve for brunch or as a holiday dessert. The tartness of the cranberries and lemon blend perfectly with the rich, buttery sweetness of the cake and the glaze (also made with fresh lemon juice and zest) elevates the refreshing lemon flavor. I hope you'll give this recipe a try this holiday season.


Cranberry Lemon Bundt Cake with Lemon Glaze
Adapted from William Sonoma

Cake Ingredients:
2 cups fresh cranberries, rinsed and dried
1/3 cup light brown sugar, lightly packed
1 1/2 cups granulated sugar
2 lemons zested and juiced, reserved separately (2 T will be used for the cake, the remaining for the glaze)
1 1/2 sticks unsalted butter, softened to room temperature
3 large eggs, room temperature
3/4 cup buttermilk (see note below if you don't have buttermilk)
1 1/2 teaspoon vanilla extract
2 1/2 cups all purpose flour
1/2 teaspoon baking soda
2 1/2 teaspoons baking powder
1 teaspoon salt

Glaze Ingredients:
1 1/2 - 2 cups powdered sugar
The remaining lemon juice from the 2 lemons above
Zest of 1/2 lemon

Directions:

Preheat oven to 350

Generously butter a 12c bundt pan with softened butter. Do not use cooking spray as the butter blends with the brown sugar and adds flavor to the cake.

In a medium bowl, combine the flour, baking powder, baking soda and salt. Set aside.

In a measuring cup, combine the buttermilk, vanilla extract and 2 tablespoons of the lemon juice. Set aside.


Sprinkle the brown sugar evenly into the bottom of the buttered bundt pan and sprinkle the cranberries evenly over the brown sugar. Set aside. 


Put the granulated sugar in a large mixing bowl. Add the lemon zest and, using your fingers, rub the lemon zest into the sugar until fragrant (approx 30-45 seconds). This process releases the lemon oils from the zest and essentially creates a lemon sugar.


Add the butter and cream at medium speed for 2 minutes.


Add the eggs one at a time mixing well after each addition and scraping down the bowl with a rubber spatula as needed.

Add 1/3 of the flour mixture, mixing just until combined. Then add 1/2 of the buttermilk, mixing just until combined. Repeat this process adding 1/3 of the flour mixture, mixing until combined, then the remaning buttermilk mixture, then the last of the flour mixture. Mix just until combined at each addition to ensure you do not overmix the batter. Once the last of the flour is mixed in. Increase speed to medium-high and beat for 2 minutes.


Spread the batter into the prepared bundt pan, spreading evenly over the cranberries.


Bake for 30-35 minutes or until a toothpick inserted in center comes out clean. Cool in pan for a few minutes, then invert onto a cake platter and allow to cool completely.


While the cake is cooling, make the glaze: Combine the zest of 1/2 lemon, 1 c of the powdered sugar and the remaining lemon juice. Mix until well combined. At this point adjust as needed - if the glaze is too runny, gradually add more powdered sugar a little at a time until the desired consistency is reached. Try not to add too much powdered sugar or you will need to add more lemon juice. The glaze should slowly and partially run down the sides of the cake (it should not completely slide off creating a puddle at the bottom of the cake).

Slice and enjoy!!


Note: If you do not have buttermilk, you can create "sour milk" by adding 2 teaspoons of fresh lemon juice to the 3/4 cup of milk you need for the recipe and allowing it to sit/curdle for 5-10 minutes. You can also use white vinegar, but I think using lemon juice is better since this recipe already requires fresh lemon juice.