Showing posts with label cinnamon roll. Show all posts

Tuesday, March 20, 2012

Homemade Apple "Pop Tarts" with Cinnamon Glaze (and how I conquered my fear of homemade crust)


Sometimes in life when you are afraid to do something you just have to dive in head first and do it. That's just what I did with this recipe. I very seldom make homemade crust (heavy emphasis on the word seldom). I haven't found a recipe I love and I hate to waste precious ingredients (butter is like gold to me) so I usually stick with store bought crust (gasp!). This time I knew I wanted the crust to be the star so I decided to dive in and give homemade crust another try. I have to say that I was so surprised and impressed by the results. This crust recipe is so buttery, so flaky and so  amazingly good it can rival puff pastry when it comes to flakiness. I'm so proud of myself for finally conquering my fear of pie crust!

If you would like to simplify the recipe and skip making your own dough, it would also be delicious using frozen puff pastry or refrigerated ready made pie crust, but I highly recommend the homemade crust if you have the time. It's definitely worth it!


Homemade Apple "Pop Tarts" with Cinnamon Glaze
Makes 8 servings (or 8 pop tarts)

Ingredients

Pastry
1 1/2 cups all purpose flour
1 tablespoon sugar
1 teaspoon salt
1 cup cold unsalted butter, cut into 12 pieces
2 egg yolks
3 tablespoons cold milk

Filling
2 large granny smith apples, peeled and thinly sliced
3 tablespoons unsalted butter
1/2 cup packed light brown sugar
1 egg lightly beaten
1/2 teaspoon ground cinnamon
1/4 teaspoon ground nutmeg
1/8 teaspoon salt
1/2 cup all purpose flour

Cinnamon Glaze
1 cup powdered sugar
1 tablespoon milk
1/2 teaspoon cinnamon

Egg Wash
1 egg lightly beaten

Instructions:

To make the dough

Using a stand mixer fitted with the paddle attachment, combine the flour, sugar and salt by mixing for a few seconds.

Scatter the butter over the top and mix at low speed just until the mixture holds together when you squeeze a clump of it in your hand. This took exactly 1 1/2 minutes on my mixer. You should still see large lumps of butter.


In a small bowl, whisk together the eggs and milk. Add to the flour mixture and mix on low speed just until the dough comes together. It should still look shaggy and messy and not cohesive.


Dump the dough out onto an unfloured surface and shape it into a tight mound. Using the heel of your hand start at the top of the dough (either the far right or far left) and smear it down towards you. Repeat the process until the entire mound of dough has been smeared. You should see streaks of butter throughout the dough. These streaks will make your pastry flaky!


Using a bench scraper or thin spatula, scrape up the dough and place it on a large sheet of plastic wrap. Using the plastic wrap, form it into a disk (I made mine rectangular shape since that's the shape you will ultimately be rolling it into). Wrap tightly and refrigerate for 4 hours or up to 4 days. As a time saver, I made my crust the night before & then assembled/baked the pop tarts in the morning.
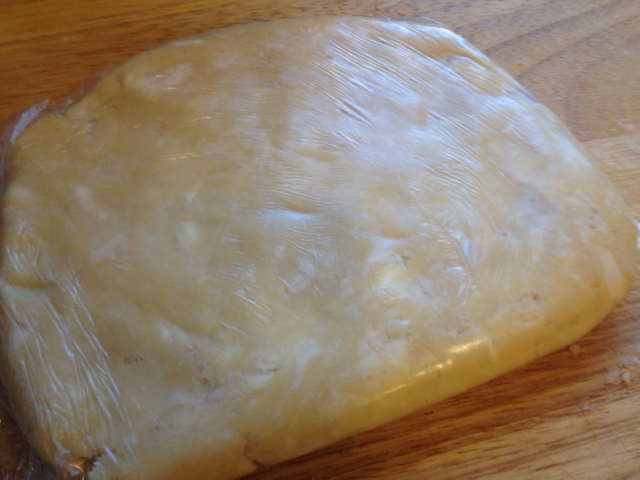


Prepare the filling

Melt the butter in a saucepan over medium-high heat. Add the apples and stir until the apples just begin to soften (approx 2 minutes). Add the brown sugar and continue to cook stirring constantly until the sugar is melted and the apples are softened (approx 3 minutes). Remove from heat and allow to cool for 30 minutes.


To the cooked apples, add the flour, salt, cinnamon, nutmeg and egg. Stir gently with a rubber spatula to combine. Make sure the mixture is cooled completely before using.
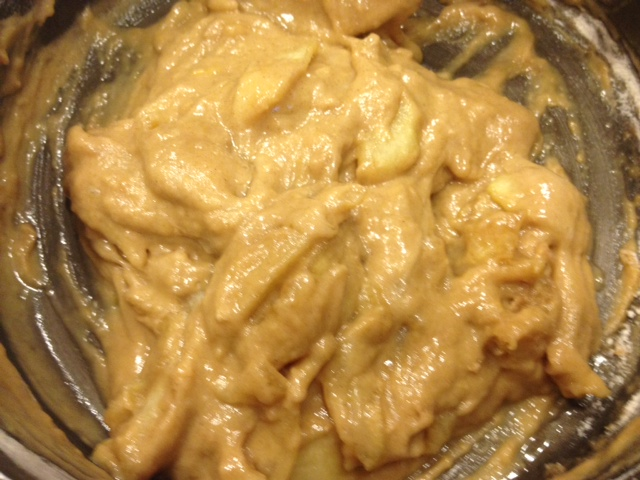


Prepare the glaze

In a small bowl combine the powdered sugar, milk and cinnamon. If glaze is too runny, add a little more powdered sugar and vice versa.


To assemble

Remove the dough from the refrigerator and cut in half. Place one half back in the refrigerator.

On a lightly floured surface, roll out the dough into a rectangle approximately 24"x11". Cut the dough into 8 equal rectangles.


Brush four of the rectangles with the egg wash. Spoon 2 tablespoons of the apple filling into the center of the egg washed rectangles. Place the other rectangles on top and crimp with a fork.


Remove the second half of the dough from the fridge, repeat the above process with the remaining dough.

Place on parchment lined baking sheets and bake for 35-40 minutes or until dough is golden brown.

Allow to cool 30 minutes, then brush with the cinnamon glaze. Enjoy!


Keep leftovers stored at room temperature for up to 2 days.

Source: Adapted from Buns in my Oven

Thursday, January 26, 2012

Banana Walnut Muffins with Brown Sugar Crumble

I know what you're thinking...another banana recipe?? Yep. At some point in the week, every single week, I have 2 or 3 overripe bananas sitting in my kitchen just begging to be put out of their misery. I was raised to believe that wasting food is a crime, so of course I would feel guilty throwing those poor bananas away. I have already shared Flour Bakery's Famous Banana Bread recipe and a Banana Chocolate Chip Espresso Muffin recipe, both of which are absolutely delicious. This recipe for Banana Walnut Muffins with Brown Sugar Crumble topping is another keeper. The muffin is moist and delicious, the crunchy brown sugar topping with a hint of cinnamon adds just the right amount of texture and sweetness. Your house will smell like brown sugar/cinnamon/banana heaven when you bake them. Seriously. And if you bring the muffins to work like I did, you will be tempted by the heavenly aroma  and may arrive with one or two muffins missing. Don't worry no one will know....

If you're debating whether or not to make these muffins the next time you need to use up some overripe bananas, here are some of the responses I received from coworkers: "unreal", "so delicious", "amazing", "I had a tiny mouth orgasm" (now who doesn't like to hear that!).

Banana Walnut Muffins with Brown Sugar Crumble

Muffin Ingredients:

1 1/2 cups all purpose flour
1 teaspoon baking powder
1 teaspoon baking soda
1/2 teaspoon salt
1/4 teaspoon cinnamon
3 large over ripe bananas, mashed
3/4 c granulated sugar
1 egg, lightly beaten
1/2 c unsalted butter, melted
1/2 teaspoon vanilla extract
1 c walnuts, coarsely chopped (optional)


Topping Ingredients:

3 tablespoons unsalted butter, cold cut into pieces
2/3 c lightly packed brown sugar
1/4 teaspoon cinnamon
2 tablespoons all purpose flour


Directions:

Preheat oven to 375 and line a 12 cup muffin pan with paper liners or spray with non-stick spray.

To make the topping: In a small bowl, combine the flour, brown sugar, and cinnamon. Using a pastry cutter (or 2 knives) add the cold butter chunks and cut in until blended and crumbly and no large chunks of butter remain. It's important to keep the topping cold so refrigerate until ready to use.


To make the muffin batter:

In a large bowl, combine the flour, baking soda, baking powder, salt and cinnamon. Whisk to combine.

In a medium size bowl, combine the mashed bananas, sugar, vanilla, egg and melted butter. Stir well until combined.


Make a well in the center of your dry ingredients and pour the wet ingredients into the well. Using a wooden spoon, mix just until combined. (there may still be some light streaks of flour remaining). Gently fold in the chopped walnuts. Tip: It's important not to overmix muffins otherwise they will come out tough, not light and tender. The secret to a good muffin is not to overmix.


Using a spoon (or large cookie or ice cream scoop), scoop the batter into the prepared muffin pan dividing evenly between the 12 cups.

Divide the crumble topping mixture evenly between the 12 mufins.

Since these are large muffins with a topping, I like to use muffin/cupcake liners with tall edges like these tulip cupcake liners. The batter clings to the edges creating tall muffins and the topping stays intact. If you don't have these, regular cupcake liners or just spraying the pan with non-stick spray also works, but some of the crumble topping may fall off.

Bake at 375 for 18-20 minutes. Test with a toothpick to ensure muffins are done but don't overbake. Allow to cool in the pan for 10 minutes then remove to a wire rack.


Tip: Place foil or a baking sheet on the rack underneath the muffin pan to catch any sugar that may fall off of the topping so it doesn't make a mess in your oven.

Store leftovers (if any) in an air tight container for up to 2 days. You could probably freeze these muffins too but nothing ever lasts long enough in my house for me to freeze.

Sunday, November 20, 2011

Award Winning Upside Down Apple Pie


If you're like me, you're sitting in front of your computer right now wondering where the month has gone. It's so hard to believe Thanksgiving is almost here. From the looks of the stores (that immediately began playing Christmas Carols the day after Halloween) you would think we've completely skipped Thanksgiving this year.  Thanksgiving definitely doesn't get the respect it deserves. I'm looking forward to a few days off, to sitting down to a delicious meal with family, to giving thanks for all of the blessings of the past year. It doesn't feel like Thanksgiving to me if I haven't spent most of the day cooking and baking.  We have our traditional dishes we make every year: the boys would be upset if I didn't make Macaroni and Cheese, Chris loves stuffing, my Niece, Mandy, loves Pumpkin Cheesecake and my husband loves everything! My favorite dishes are my Mom's Sweet Potatoes and this Upside Down Apple Pie. I'll never forget the first time I made it. I thought it was one of the best apple pies I have ever eaten and most people who have tasted it agree. I call it "Award Winning" because it won 'Best Taste' in a Bake Off at work. I've only given this recipe out to a few people, but I strongly believe that great food is meant to be shared. So if you want to be the hero of your Thanksgiving dinner, if you want your guests to rave about one of the best apple pies they've ever eaten, then you will make this pie.


Award Winning Upside Down Apple Pie
Serves 8-10

Ingredients:
6 Tablespoons melted butter, divided
1/2 c light brown sugar, packed
3/4 c chopped pecans
1 box refridgerated pie crust
1 c granulated sugar
1/3 c all purpose flour
1 tsp cinnamon
6 granny smith apples, peeled and sliced into 1/2" thick slices

Instructions:

Follow instructions to bring crust to room temperature.

Preheat oven to 375

Spray a deep dish glass pie plate with non-stick cooking spray. Line with waxed paper making sure there is at least a 1" overhang. You'll need the overhang to help loosen and remove the pie. Spray the wax paper with cooking spray.

In a small bowl, combine the brown sugar, pecans and 4 tablespoons of the melted butter. Spread evenly into the bottom of the prepared pie plate.


Roll out one of the crusts to a size approx 1- 1 1/2" larger than the pie plate. Gently place the crust into the pie plate on top of the pecan mixture and gently press the bottom against the nut mixture.

In a large bowl, combine the granulated sugar, flour, cinnamon and remaining 2 tablespoons melted butter. Add the sliced apples and toss to coat. Spoon the apple mixture into the prepared pie plate.


Roll out the remaining pie crust and place on top of the apple mixture. Fold the overhang of the bottom crust over the edges of the top crust and crimp to seal. Cut 3-4 slits in the top of the crust.


Place the pie on a baking sheet and bake for 1 hour. Place a foil tent over the crust if it begins to brown too quickly. Careful not to overbake or your apples will turn into apple sauce.

Remove the pie from the oven and carefully loosen the wax paper around the edges of the pie. Carefully invert the pie onto a platter. The brown sugar/pecan mixture will be extremely hot.


Remove wax paper and allow the pie to cool approx 30 minutes. Cut into wedges and serve warm or allow to cool completely.

Store leftovers (if any) covered at room temperature for no longer than 2 days.

Enjoy!!

Note: Place another baking sheet or foil on the rack underneath the pie to catch any drippings. I like to use Granny Smith apples which are tart since the filling has a lot of sugar but feel free to use any apples you like that are suitable for baking. Decrease sugar to 3/4 c if you like your filling on the tart side. Add nutmeg to increase the spice. If you already have an apple pie filling recipe you like, feel free to use that recipe and follow the same method for turning it into an upside down apple pie! Making individual pies baked in ramekins would also be a good idea : )

Sunday, November 6, 2011

Sour Cream Cinnamon Buns

Sour Cream Cinnamon Buns

Hello Everyone….So its Rainy and cold this morning in San Diego, California, perfect weather for  homemade cinnamon buns.  For me, the smell of cinnamon reminds me of a nice fire and being snuggled under a thick blanket while my mom is making Chocolate de la Aguelita  while I wait to see what she baked in the oven.  Hmmmm… yummy… I do not think Faye and I have mentioned it, but we have both been blessed with amazing mothers that can cook.  Faye's mom makes amazing Filipino food from her heritage and then learned to cook Southern food for her husband since he was from the South.  If you ever get lucky enough to be in invited to her table (like me J ), you  get to eat crunch, savory Lumpia and have Southern buttery peach cobbler!! As for my mom, her Mexican food speaks for itself.  I do not think I have been to any Mexican restaurant in the US or Mexico that can compete with her cooking. My favorite being her Chicken Sopes with the homemade sope shell and Peach empanada, in which she makes the pastry and the jam from scratch.  Honestly, I do not think I will ever be as good a cook as my mother, but the skills I have gained from her I will have for the rest of my life J….see what rainy weather does to us Californians, we get nostalgic.   Now back to my Sour Cream Cinnamon Buns… let's just say they are so good that I ate one without icing and the second one after I put the icing on.  I do not know where I got this recipe from except to say it came from a magazine about 8 years ago.    I hope you guys really give this recipe a try as the holidays approach, your family will be knocked off their feet 1. That you made them homemade cinnamon rolls and 2. That they taste so damn good! Happy baking everyone!


Sour Cream Cinnamon Buns

Roll Ingredients
1-(8oz) carton sour cream
2 tablespoons butter
3 tablespoons sugar
½ teaspoon salt
1/8 teaspoon baking soda
1 large egg, lightly beaten
1 package active dry yeast (I used the rapid rise)
3 cups all purpose flour

Filling Ingredients

2 tablespoons butter
½ cup firmly packed brown sugar
2 teaspoons ground cinnamon

Icing Ingredients
1 ½ cup powdered sugar
2 tablespoons milk

·         Heat sour cream in small sauce pan over medium low heat.

·         Combine warm sour cream, 2 tablespoons butter, 3 tablespoons sugar, salt and baking soda in a large mixing bowl.  Add egg and yeast: blend well. Add 1 ½ cups flour; beat at medium speed with a electric mixer until well blended. Gradually stir in enough remaining flour to make a soft dough.
·         Turn dough out onto a lightly floured surface and knead lightly 4-5 times. Cover and let rest 5 minutes.   ( I actually used the hook like attachment on my Kitchaid which does the kneading for you)


  •  Roll dough into an 18x6- inch rectangle; spread 2 tablespoons softened butter over dough. Sprinkle brown sugar and cinnamon over dough. Roll up dough, starting at long side, pressing firmly to eliminate air pockets, pinch seam to seal.

·         Slice roll into 12 (1 ½ inch) slices. Place cut side down, in greased muffin pan.  (as picture)

Cover pan and let rise in a warm place, free of drafts for 30 minutes or until doubled in size (as picture, see how they are bigger)

       ·         Bake at 375 degrees for 12-15 minutes or until golden.

·         Remove buns from pan immediately: let cool on wire rack. Combine powdered sugar and milk; drizzle over buns.