Showing posts with label walnuts. Show all posts

Monday, April 7, 2014

MAPLE WALNUT OATMEAL COOKIES, WITH LEMON ICING


If you're ever in the Oceanside California, area there is an amazing bakery called Petite Madeline Bakery and Bistro (http://www.petitemadelinebakery.com/)


They make absolutely delicious desserts, cakes and amazing chocolate croissants . Yummy!!! Well, one of my favorite things (there are many favorites there, trust me) is the Oatmeal cookies he makes.  But this is not your ordinary oatmeal cookie, he covers them with a lemon icing which is absolute delicious. 
 
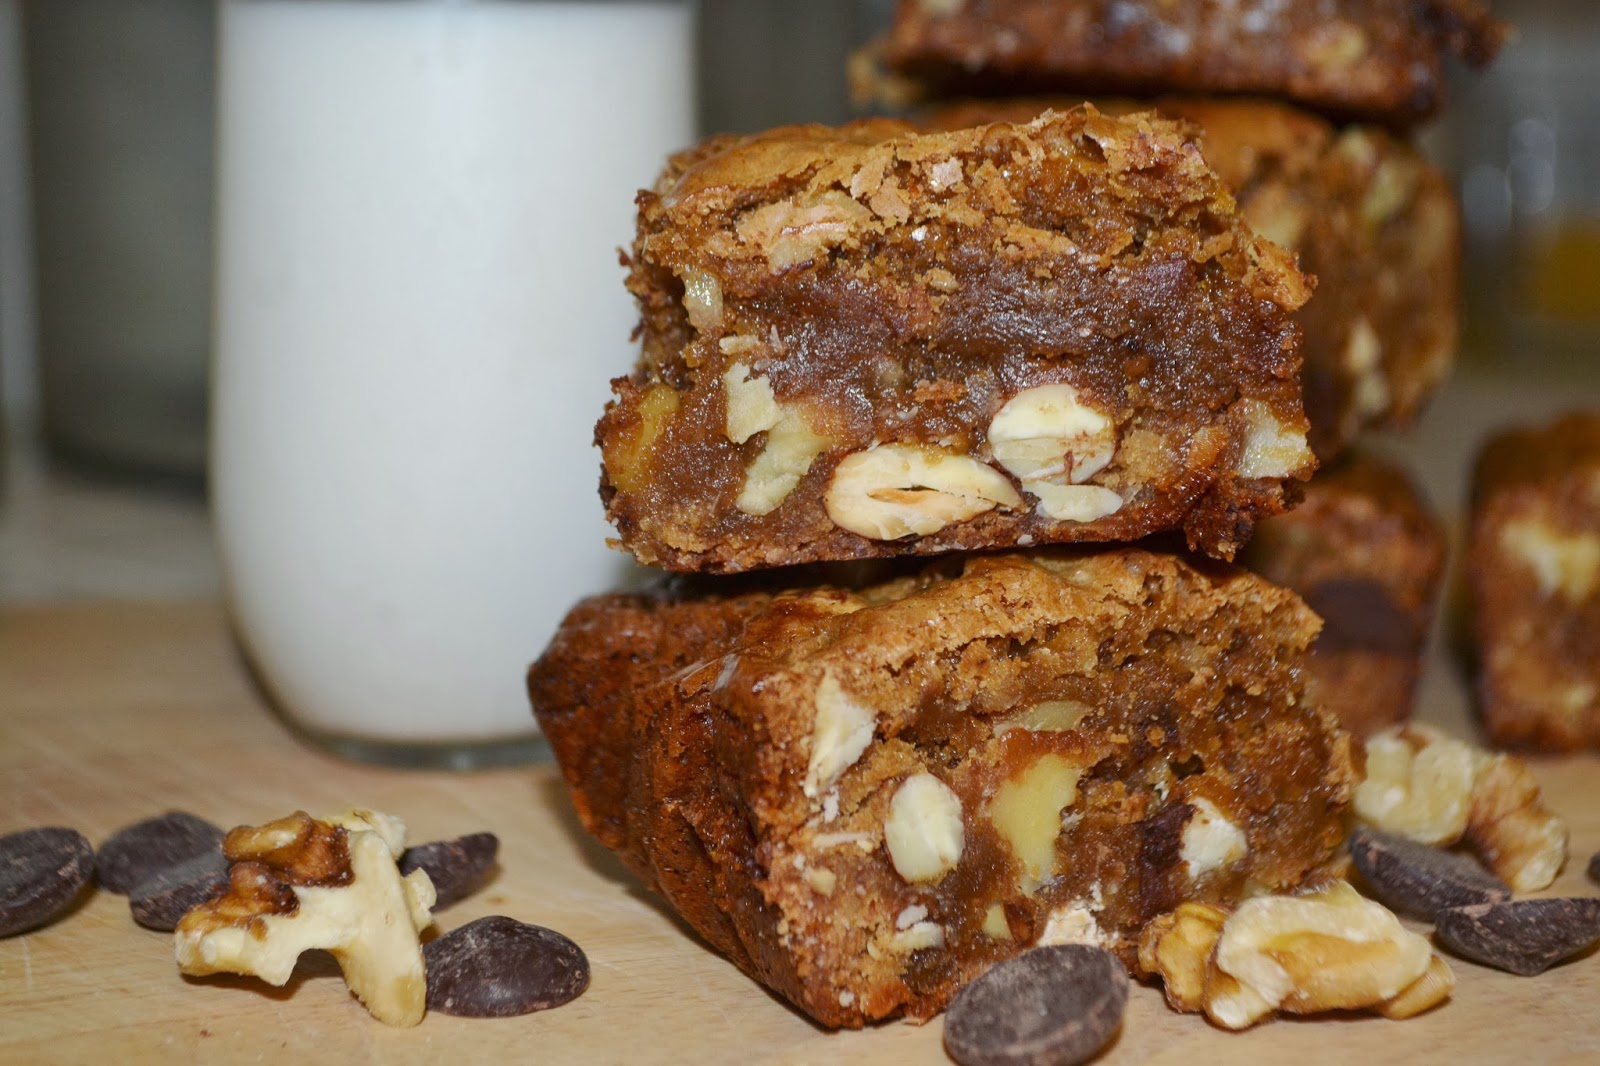
Well, a few weeks ago I was craving these cookies and the bakery was closed so I thought I would try to make something similar to it. I took a different spin and made a Maple Walnut Oatmeal Cookie with lemon icing.   Let’s just say they were a HIT!.  These cookies have amazing lemon flavor and the combination with the maple and walnuts is so delicious that honestly it is hard to describe. 
I have added this cookie to my favorites list!  
 
Also a tip, if you’re ever in a specialty food store and they have Maple Sugar makes sure you pick it up!  I didn’t even know it existed!  But now it is a must in my pantry.   I hope you give these cookies a try.  Absolutely delicious! 

Ingredients:
4 cups of old fashioned oats
1 cup flour
½ teaspoon salt
½ teaspoon baking soda
¾ cup of sweet cream butter (the one with salt), softened
1 cup light brown sugar packed
1/3 white sugar
3 tablespoon Maple sugar  (if you cannot find maple sugar, add 3 tablespoon white sugar)
¼ cup pure maple syrup
1 large egg
2 teaspoons vanilla
3 tablespoons of water
½ cup walnuts finely chopped
½ cup walnuts chopped


Icing:
1 cup powder sugar
Zest of one lemon
Juice of ½ lemons

¼ teaspoon vanilla


Directions

Preheat oven to 350 degrees

Line cookie sheet with parchment paper.


 In a large mixing bowl, mix together oats, flour, salt and baking soda till all combined


     In a mixing bowl and using an electric mixer, cream butter till nice and   creamy.   Add brown sugar, white sugar and maple sugar. Mix in till combinded.


     Add maple sugar and egg and vanilla and 3 tablespoon of water, and mix till all combined.


     Now gradually add in the Oat/Flour mixture and ½ cup finally chopped walnuts. Beat till all mixed together.  Using a wooden spoon , stir in ½ chopped walnuts


      Using a medium size ice cream scoop, drop dough rounds on to a cookie sheet. Set dough balls  at least 2 each apart .


     Bake for 11-13 minutes.

     Remove from oven, wait 1 minute before transferring on to cooling rack.


     While cookies are cooling, make icing. Combing powder sugar, lemon zest, lemon juice and vanilla. Stir with fork.  If its too thick, add a little more juice from the other half.  But the icing needs to be on thick side.  


     Ice each cookie by adding about 1-2 teaspoons to the middle of  each cookie, spread using a   butter knife.  Let the icicle set overnight if possible
-        


-         


        Enjoy with a large glass of milk or nice cup of coffee or tea J


Monday, March 3, 2014

"Not Your Average Blond-ie"

I call this recipe "Not Your Average Blond-ie" because it's so much more than just a regular blondie. It's big, it's bad, it's bodacious, packed full of butter, dark brown sugar, 2 types of nuts, 2 types of chocolate, toffee bits and coconut. How can you go wrong with that combination?


I adapted this recipe from one of my all-time favorite Cook Books, Sticky, Gooey, Messy, Chewy: Desserts for the Serious Sweet Tooth by Jill O'Connor. I bought this book several years ago at a signing at William Sonoma. I just happened to walk into the Fashion Valley store (just to browse) when I saw Jill giving samples of her Everything But the Kitchen Sink Cookies. Seriously, a single bite of that cookie changed my life. It was as if the clouds parted and the Cookie Gods shone down from heaven. No exaggeration....
 
Now, I'm not trying to sell the book, but if you are looking for a great baking cook book, this one needs to be on your book shelf for sure. First of all, the name. Who can resist it? Second, the book is super cute and has lots of pictures. Third, the names of the recipes alone will make your mouth water - Chocolate Caramel Pecan Souffle Cake, Cinnamon Donut Bread Pudding, Double Crumble Hot Apple Pies....I mean, come on now people....
 
Needless to say, I bought not one but two autographed copies of the book (one I gave to Yvonne). Each and every single recipe I have tried has been mind blowing and this one was no exception. Take it from me, this is "Not Your Average Blondie".


"Not Your Average Blond-ie"
Makes 24 square bars
 
Ingredients
2 cups all purpose flour
3/4 teaspoon baking powder
1 cup unsalted butter, softened
3 cups firmly packed dark brown sugar (be sure to use dark brown, it's essential to the flavor)
4 large eggs, room temperature
1 tablespoon vanilla extract
1 teaspoon salt
1 cup walnut halves, toasted and coarsely chopped
1 cup whole raw almonds, toasted and coarsely chopped
1 cup sweetened flaked coconut
1 cup toffee bits (I used Heath Toffee Bits)
1 cup white chocolate chips
1 cup dark chocolate chips (I used Ghiradelli)

Directions:

Position oven rack in the middle of the oven and preheat to 350f

Line a 13"x9" metal baking pan with non-stick foil or spray regular foil with non-stick spray.

Combine flour and baking powder in a small bowl. Set aside.

Melt butter and brown sugar in a medium heavy bottom saucepan over medium heat. Cook stirring constantly until the butter and sugar are melted and starting to bubble gently.  Remove from heat and allow to cool approx. 10-15 min (stir occasionally to help cool the mixture down).


In a large bowl, whisk together the eggs, vanilla and salt. Slowly whisk in the cooled butter-brown sugar mixture whisking just until combined.

Whisk in the flour mixture to form a loose batter. At this point, make sure your batter is cool to ensure you do not melt the chips when they are added.

Stir in the nuts, coconut, chocolate chips, white chocolate chips and toffee.

Pour the batter into the prepared baking pan and smooth to an even layer with a rubber spatula.


Bake approx. 30-40 minutes until the surface is glossy and golden brown, slightly cracked around the edges and feels firm to the touch. A toothpick inserted should come out with a few moist crumbs.


Remove and place the pan on a wire cooling rack. Cool to room temperature before cutting.

Store leftover bars tightly covered for up to 3 days.


Thursday, January 26, 2012

Banana Walnut Muffins with Brown Sugar Crumble

I know what you're thinking...another banana recipe?? Yep. At some point in the week, every single week, I have 2 or 3 overripe bananas sitting in my kitchen just begging to be put out of their misery. I was raised to believe that wasting food is a crime, so of course I would feel guilty throwing those poor bananas away. I have already shared Flour Bakery's Famous Banana Bread recipe and a Banana Chocolate Chip Espresso Muffin recipe, both of which are absolutely delicious. This recipe for Banana Walnut Muffins with Brown Sugar Crumble topping is another keeper. The muffin is moist and delicious, the crunchy brown sugar topping with a hint of cinnamon adds just the right amount of texture and sweetness. Your house will smell like brown sugar/cinnamon/banana heaven when you bake them. Seriously. And if you bring the muffins to work like I did, you will be tempted by the heavenly aroma  and may arrive with one or two muffins missing. Don't worry no one will know....

If you're debating whether or not to make these muffins the next time you need to use up some overripe bananas, here are some of the responses I received from coworkers: "unreal", "so delicious", "amazing", "I had a tiny mouth orgasm" (now who doesn't like to hear that!).

Banana Walnut Muffins with Brown Sugar Crumble

Muffin Ingredients:

1 1/2 cups all purpose flour
1 teaspoon baking powder
1 teaspoon baking soda
1/2 teaspoon salt
1/4 teaspoon cinnamon
3 large over ripe bananas, mashed
3/4 c granulated sugar
1 egg, lightly beaten
1/2 c unsalted butter, melted
1/2 teaspoon vanilla extract
1 c walnuts, coarsely chopped (optional)


Topping Ingredients:

3 tablespoons unsalted butter, cold cut into pieces
2/3 c lightly packed brown sugar
1/4 teaspoon cinnamon
2 tablespoons all purpose flour


Directions:

Preheat oven to 375 and line a 12 cup muffin pan with paper liners or spray with non-stick spray.

To make the topping: In a small bowl, combine the flour, brown sugar, and cinnamon. Using a pastry cutter (or 2 knives) add the cold butter chunks and cut in until blended and crumbly and no large chunks of butter remain. It's important to keep the topping cold so refrigerate until ready to use.


To make the muffin batter:

In a large bowl, combine the flour, baking soda, baking powder, salt and cinnamon. Whisk to combine.

In a medium size bowl, combine the mashed bananas, sugar, vanilla, egg and melted butter. Stir well until combined.


Make a well in the center of your dry ingredients and pour the wet ingredients into the well. Using a wooden spoon, mix just until combined. (there may still be some light streaks of flour remaining). Gently fold in the chopped walnuts. Tip: It's important not to overmix muffins otherwise they will come out tough, not light and tender. The secret to a good muffin is not to overmix.


Using a spoon (or large cookie or ice cream scoop), scoop the batter into the prepared muffin pan dividing evenly between the 12 cups.

Divide the crumble topping mixture evenly between the 12 mufins.

Since these are large muffins with a topping, I like to use muffin/cupcake liners with tall edges like these tulip cupcake liners. The batter clings to the edges creating tall muffins and the topping stays intact. If you don't have these, regular cupcake liners or just spraying the pan with non-stick spray also works, but some of the crumble topping may fall off.

Bake at 375 for 18-20 minutes. Test with a toothpick to ensure muffins are done but don't overbake. Allow to cool in the pan for 10 minutes then remove to a wire rack.


Tip: Place foil or a baking sheet on the rack underneath the muffin pan to catch any sugar that may fall off of the topping so it doesn't make a mess in your oven.

Store leftovers (if any) in an air tight container for up to 2 days. You could probably freeze these muffins too but nothing ever lasts long enough in my house for me to freeze.

Wednesday, October 19, 2011

Flour Bakery's Famous Banana Bread Recipe and a Bonus!


So I recently came home to a 40 lb box of bananas sitting on my kitchen table. If you don't know what 40 lbs of bananas looks like....


               (Either my husband had visions of Banana Bread loaves dancing in his head or we were adopting a monkey!)


Being the practical person that I am (most of the time), I made the Banana Bread. I already have my go-to Banana Bread recipe that I have been making for years. In my opinion, it is the best Banana Bread I have ever tasted. But I recently came across the recipe for Joanne Chung's famous Banana Bread from her bakery Flour in Boston. If you are not familiar with Joanne Chung, she is a baking goddess and one of my true inspirations. I have great admiration for her. Joanne graduated from Harvard with a degree in Economics then discovered her passion for baking. She opened a Bakery (Flour Bakery and Cafe) in Boston which garnered rave reviews from top pastry chefs and is the author of "Flour: Spectacular Recipes from Flour Bakery and Cafe". She even beat Bobby Flay in a Sticky Bun throwdown! Needless to say, a trip to Flour Bakery in Boston is on my bucket list.


As much as I admire Joanne, I was a little hesitant to try her recipe. Deep down inside, I was afraid to be disappointed. Would her famous banana bread measure up to or surpass the recipe I have been using for years? Since I had a few bananas to spare (haha), I decided to give the recipe a try.


The verdict? It was delicious. Did it measure up? Yes! Did it surpass my go-to recipe? I wouldn't say it did, but it is just as delicious and I will definitely be making it again. Even if you already have your own recipe that you swear by, I encourage you to give this one a try and let us know how it measures up to yours.


Flour Bakery's Famous Banana Bread
from Flour: Spectacular Recipes from Flour Bakery and Cafe


Ingredients:
1 2/3c all purpose flour
1 tsp baking soda
1/4 tsp ground cinnamon
1/2 tsp salt
1 c + 2T sugar
2 eggs
1/2 oil
3 1/2 very ripe bananas, mashed
2 T sour cream
1 tsp vanilla extract
2/3 c walnuts or pecans, toasted and chopped (don't skip the toasting process, it makes a difference)


Directions:


Preheat oven to 350. Spray a loaf pan with non-stick spray and line the botton with parchment paper. Spray the parchment paper with non-stick spray.


In a medium bowl. whisk together the flour, baking soda, cinnamon and salt.


In a large bowl with an electric mixer, whisk the eggs and sugar until light and fluffy (approx 10 minutes). I used a stand mixer fitted with a whisk attachment so I didn't have to stand in front of the mixer for 10 minutes.


Gradually drizzle in oil. Add mashed bananas, sour cream and vanilla. Mix to combine.


Fold in the dry ingredients and the nuts just until combined. Do not overmix.


Pour into lined loaf pan and bake 45 minutes to an hour or until done.


Cool in pan for 15-20 minutes then turn out onto a cooling rack.


Store in an air tight container for up to 2 days (if it lasts that long!)


********************************************************************************


As a bonus, I made these delicious Banana Chocolate Chip and Espresso Muffins. Every once in a while, you come across a recipe that just blows you away and you want to share it with the world. This recipe, from one of my favorite Cookbooks, is it. If you like the combination of banana and chocolate, you will absolutely love these muffins. They are so moist and delicious, you won't be able to eat just one....


Banana Chocolate Chip and Espresso Muffins
from Baked: New Frontiers in Baking


Ingredients:


1 1/2c all purpose flour
1 tsp instant espresso powder
1 1/2 tsp baking soda
1 tsp salt
1 1/2 c very ripe bananas, mashed
1/2 c sugar
1/4 c light brown sugar, firmly packed
1/2 c unsalted butter, melted
1/4 c whole milk (I used lowfat)
1 large egg
1/2 tsp vanilla extract
1 c mini semi-sweet chocolate chips (I recommend using the mini size chips)


Directions:


Preheat oven to 350. Spray a 12 c muffin pan with non-stick cooking spray.


In a medium bowl, stir together the bananas, sugars, butter, milk, vanilla and egg until well combined.


In another medium bowl, whisk together the flour, baking soda, salt and espresso.


Create a well in the center of the dry ingredients and pour in the wet ingredients. Mix with a wooden spoon just until combined. You may still see small pockets or streaks of flour. This is ok, do not overmix or your muffins will be tough. Gently fold in the chocolate chips just until distributed throughout the batter.


Scoop the batter into the prepared muffin pan making sure to divide evenly. The cups will be almost full.


Bake on the center rack of your oven for 20-25 minutes or until the tops are springy and a toothpick inserted in the center comes out clean but with a few moist crumbs.


Cool in the pan on a cooling rack for 15 minutes, then remove them from the pan.


These muffins keep well and stay moist and delicious when stored in an air tight container for up to 2 days.

Friday, September 30, 2011

Decadent Brown Butter and Toasted Walnut Brownies


Brownies. Who doesn't love a good brownie? I consider brownies to be on the of the all-time classic comfort desserts, right up there with the Chocolate Chip Cookie. Everyone should have a great homemade brownie recipe in their collection and, in my opinion, this is one of the best. The secret? A full arsenal of flavor - brown butter, toasted walnuts, chunks of high-quality chocolate and espresso powder! If you have never used brown butter in your baking, you should give it a try. This technnique transforms the flavor of the butter and gives it a rich, nutty flavor. Toasting the walnuts brings out the oils and (believe it or not) makes them taste even more nutty. Chunks of chocolate? Well that's a no-brainer and the espresso powder enhances the flavor of chocolate. Whether you're a fan of fudgy, chewy or cakey brownies, this recipe will appeal to everyone. I hope you give it a try and it becomes your go-to brownie recipe.

Decadent Brown Butter and Toasted Walnut Brownies

2  1/2 sticks unsalted butter, cubed
2 1/2 c sugar
2 tsp vanilla extract
1 tsp espresso powder
4 tsp water
4 large eggs chilled
1 1/2 c natural cocoa powder
2/3 c plus 2 T all purpose flour
1/2 tsp salt
2 c walnuts, toasted and coarsely chopped
1 c good quality dark chocolate, chopped (Valhrona, Guittard, Ghiradelli, Lindt are some of the best)

Preheat oven to 325 and line a 13x9" baking pan with non-stick foil or spray regular foil with non-stick cooking spray. I usually use a glass baking pan.

Combine the water and espresso powder in a small bowl. Set aside.

Combine the sugar, cocoa powder and salt in a large bowl. Set aside.

In a small saucepan, melt butter over medium heat. Continue cooking, stirring often, until the butter stops foaming and brown bits form at the bottom of the pan. This process could take 5-10 minutes depending upon how cold your butter was when you put it in the pan. Remove from heat and pour immediately into th cocoa powder mixture. Add water, vanilla and espresso powder and stir to blend. Allow to cool 5 min.

After 5 min, add eggs to mixture one at a time, beating vigorously to blend after each addition. When mixture looks thick and shiny, add flour and stir until blended. Ok, here's where you get a little bit of a workout and burn calories so you can eat more brownies...Beat vigorously for 60 strokes. This will give your brownies that shiny, crackly top that's the trademark of a good brownie.

Fold in nuts and chocolate chunks. Spread into prepared pan and bake approx 25-30 minutes or until a toothpick inserted in the center comes out with a few moist crumbs. Watch your brownies carefully during the end of the baking time as all ovens are different and there is nothing worse than an underbaked or overbaked brownie.

Allow to cool completely in pan. Remove, cut and enjoy!

These brownies are best when eaten within 2 days. Store in an airtight container at room temperature.