Showing posts with label bread. Show all posts

Friday, December 5, 2014

Apple Cinnamon Fritter Bread

Holy moly you guys...this bread. It's so good it's wrong. Imagine all of the flavor of the most delicious Apple Cinnamon Fritter, but in an easy to make quick bread. Seriously, it is that good...

Make some today, you will not regret it! 

P.S. This bread would make great holiday gifts. Just sayin'...


Apple Cinnamon Fritter Bread
Makes one 9"x5" loaf (serves 6-8)

Ingredients:

Steusel:
1/3 cup brown sugar, packed
1 tsp ground cinnamon
1 cup diced apples (I used granny smith)

Bread:
1 1/2 cups all purpose flour
1 3/4 tsp baking powder
1/4 tsp salt
1/2 cup unsalted butter, softened
2/3 cup granulated sugar
2 large eggs, room temp
1 1/2 tsp vanilla extract
1/2 cup whole milk

Glaze:
1 cup powdered sugar
a splash of vanilla extract
a few tablespoons of milk or cream

Directions:

Preheat oven to 350. Grease and flour a 9"x5" loaf pan (or grease and line with parchment paper)

In a small bowl combine the streusel ingredients (brown sugar and cinnamon only). Set aside.

In a small bowl, combine the flour, baking powder and salt. Set aside.

In a large bowl, cream the butter and granulated sugar together with an electric mixer until light and fluffy. Mix in the eggs, one at a time, mixing well after each addition Scrape down the bottom and sides of the bowl. Mix in the vanilla extract.

Mix in the flour mixture, mixing just until combined. Add milk and mix just until combined.

Dollop half of the batter into the prepared loaf pan and spread into an even layer. Top with half of the brown sugar cinnamon mixture and half of the diced apples. Lightly press the mixture into the batter.

Dollop the remaining half of the batter into the pan and spread into an even layer. Top with the remaining apples. Lightly press into the batter. Lightly swirl the streusel into the batter with a skewer or handle of a spoon.

Place on a baking sheet and bake 30-40 minutes until a toothpick inserted comes out clean.

Cool on a wire cooling rack for 30 minutes. Remove from pan and place on cooling rack. Top with glaze.

Store leftovers at room temperature tightly wrapped for up to 2 days.


Thursday, March 6, 2014

Fresh Blackberry & Meyer Lemon Bread

In case you haven't noticed, I am in love with Meyer Lemons so I am taking every opportunity to enjoy them these last few weeks while they're still in season. This Fresh Blackberry and Meyer Lemon Bread will remind you of spring time even in the dead of winter- it's light, airy and absolutely delicious!


For this month's Leftovers Club, I was paired with Charlotte, who has a cute new Blog called Pickle. For the February swap she baked some Banana Bread Scones with Brown Butter Glaze that look really yummy. I'm definitely going to have to give her recipe a try.
 
If you're interested in joining The Leftovers Club and receiving delicious treats in the mail every month, I encourage you to sign up at Food Ramblings.
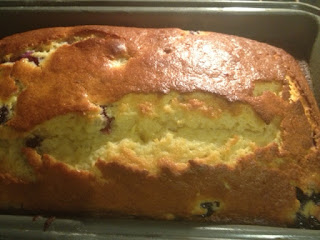


Fresh Blackberry and Meyer Lemon Bread
Makes Three 6" Loaves or one 9" Loaf
 
** Note - I used 4 small meyer lemons for this recipe
** Tip - zest the lemons before extracting the juice
 
Bread Ingredients:
1 1/2 cups all purpose flour sifted
1 teaspoon baking powder
1/4 teaspoon baking soda
1/2 teaspoon salt
1/4 cup sour cream
1 tablespoon fresh meyer lemon zest
1/4 cup fresh meyer lemon juice
1 teaspoon vanilla extract
1 cup unsalted butter, softened
1 1/4 cups granulated sugar
4 large eggs, room temp
3/4 cup fresh blackberries, cut into chunks
 
 
Glaze Ingredients:
1 tablespoon unsalted butter, softened
1 cup powdered sugar
1/2 teaspoon meyer lemon zest
1 tablespoon fresh meyer lemon juice (+ more if needed)
 
 
Directions:
 
Preheat oven to 325. Prepare a 9"x5" loaf pan (grease and flour). I used four 6" paper loaf pans (bought at World Market).
 
In a small bowl, combine the flour, baking powder, baking soda, salt. Set aside.
 
In another small bowl, combine the sour cream, lemon juice, lemon zest and vanilla extract. Set aside.
 
In the bowl of your electric stand mixer fitted with the paddle attachment (or using your electric hand mixer), beat butter and granulated sugar until light and fluffy (approx. 2-3 minutes). Scrape down the sides and bottom of the bowl.
 
Add eggs one at a time and mix at low speed just until combined after each addition. Scrape down the bottom and sides of the bowl as needed.
 
At low speed, mix in 1/3 of the flour mixture, then half of the sour cream mixture. Repeat ending with the last 1/3 of the flour mixture. Mixing only until just combined after each addition to prevent overmixing.


Gently fold in the blackberries. Scoop the batter into the prepared pan(s) and spread into an even layer.
 
Place pan on baking sheet and bake until a tootpick inserted in the center comes out clean. My three 6" loaves took approx. 40-45 minutes. A 9" loaf may take from 60-80 minutes depending upon your oven. Tip: Check for doneness towards the beginning of the bake time. If the tops of your loaves get too brown before they are done, tent with foil to prevent over browning.
 
Remove from oven and allow to cool on wire cooling rack.


While the bread is cooling, prepare the glaze:
 
Mix all ingredients in a small bowl until combined. Add more fresh lemon juice as needed. The glaze should be a thick, drizzling consistency.


Drizzle the bread with glaze & enjoy!
 
Store leftovers tightly wrapped for up to 1 day.


Saturday, February 1, 2014

White Pizza Dip with Garlic Butter Bread Dippers

Let's be honest, Super Bowl is all about the food, the commercials and the half time show. Ok, ok...for some it may actually be about the game (haha). And I completely understand that. If the Chargers were playing, I'd be so into it.
 
But since the Chargers aren't in the Big Game this year, let's focus on my favorite part...the food! Super Bowl food has become as traditional as Thanksgiving dinner. Pizza, Wings, Chili, Chips & Dip have all become America's go to food for the big game. What's your favorite Super Bowl food?
 
We usually fire up the grill, make a bunch of burgers and dogs with lots of toppings, fry or bake up a big batch of wings with plenty of delicious sides. This year,  I decided to make a delicious all in one baked dip, but not just any boring old dip....one that's gooey, oozing with cheese and reminiscent of a white pizza. Instead of spinach, which you might typically find on a traditional White Pizza, this dip has steamed kale and roasted tomatoes for freshness. After all, the veggies make it healthy, right?
 
OMG you guys, this dip is SO freakin' good. It's a bit more complicated than your standard mix & bake dip, but it's well worth the extra work. It's destined to be the hit of your Super Bowl get-together. I guarantee you won't even miss the pizza.


White Pizza Dip with Garlic Butter Bread Dippers
Serves 6-8
 

Ingredients:
6 Grape Tomatoes, halved
1/2 cup steamed Kale, coarsely chopped (make sure you remove the thick ribs)
12 Rhodes Frozen White Bread Rolls, thawed
****( 6 will be used for the skillet, 6 will be served on the side as additional dippers)
4 oz cream cheese, softened to room temperature
8 oz shredded mozzarella cheese (for better melting, use a block cheese and shred yourself)
1/4 cup shredded parmesan cheese (again, shred yourself)
1/2 T Italian Seasoning
Melted Butter + Garlic Powder or garlic paste (for brushing)


Directions:

Roast the tomatoes - Preheat the oven to 400. Cut the tomatoes in half, place on a rimmed baking sheet, drizzle with a little olive oil, sprinkle with salt and roast for approx. 10-15 minutes until the tomatoes burst. Remove from oven and set aside.


Generously butter a cast iron skillet, then invert a glass bowl in the center and spray it with nonstick spray. Set aside.


Tear each of the thawed rolls in half, then form into a ball to make 24 balls. Place 12 balls in the skillet evenly spaced around the bowl. Cover loosely with a clean kitchen towel and allow to rise until doubled in size. This might take 1-2 hours depending upon the temperature in your kitchen. Tip:  To make the rolls rise faster, I placed the skillet by the stove then preheated my oven, turned the oven off and left the door slightly ajar.


While the dough is rising, make the dip.

Place the softened cream cheese, mozzarella cheese, parmesan cheese and Italian Seasoning in a large bowl. Stir well to combine. Tip: Your cream cheese needs to be really soft in order to properly incorporate the ingredients. Also, for good melting consistency, try not to use pre-shredded cheese. The package cheese usually has an ingredient added to prevent the cheese from sticking together in the package. For dips like this it's better to shred your own.

Add the minced garlic, kale and tomatoes. Fold carefully to evenly incorporate the ingredients into the cheese mixture.


When the dough has risen, carefully remove the bowl without deflating the rolls. You'll probably need a thin, sharp knife to do this.


Scoop the dip ingredients into the center of the skillet, making sure it's in an even layer.

Bake at 375 for approximately 20 minutes or until the dip is nice and bubbly. You might need to tent the rolls with foil during the last 5 minutes to prevent them from getting too brown. If so, just cover them with strips of foil leaving the dip exposed.

Simultaneously, bake the remaining rolls in the same oven until golden brown. These rolls will be served along side the dip in the skillet.

When the dip is nice bubbly and melted, remove from the oven.

Combine a little melted butter (approx. 1-2 T and some garlic powder or garlic paste in a small ramekin). Brush on the warm rolls. Don't forget to brush the rolls you baked on the side.


Allow to cool a few minutes before serving.

Enjoy!


Thursday, August 9, 2012

Middle of the Summer pre-Fall craving …SPICED PUMPKIN BREAD w/CINNAMON ICING


Middle of the Summer pre-Fall craving …SPICED PUMPKIN BREAD w/CINNAMON ICING

Middle of the Summer pre-Fall craving… that is all I really can call this bread.  To me, there is nothing that says fall better than pumpkin and cinnamon.   For some people, seasons come to mind as represented by specific colors… Fall - browns and golds, Winter - green and red, Spring - any of the pastels and Summer - bright pink and green or red, white & blue.  In my mind, all seasons have certain smells attached to my memories them….. it’s all about the scent. Fall would be pumpkin and cinnamon, Winter - ginger and orange, Spring - flowers and strawberries, and Summer - peaches, melons and pina colada suntan lotion J
So why am I making pumpkin bread in August?  Well…. I happened to go to the mall and yep, they had the Halloween stuff up!   I got this big whiff of cinnamon……. hmmm… just couldn’t get that scent out of my mind.  I caved …. and made the best tasting pumpkin bread ever!!  It completely satisfied the craving for those fall flavors. The pumpkin bread is moist and the spices I added give it that great fall flavor.  It’s topped with a light icing that adds just the right amount of extra sweetness, since the pumpkin bread is not super sweet.

I will definitely be making this again…. but maybe I can make it to September next time.   I hope you enjoy this pre-fall flavor bread - SPICED PUMPKIN BREAD w/ CINNAMON ICING -  it’s delicious. 

Happy Cooking Everyone!


       Ingredients
1 cup brown sugar
2 eggs, beaten
½  cup vegetable oil
1/3 cup half and half
15oz canned solid pumpkin (NOT pumpkin pie mix)
2 cups flour
½ teaspoon baking powder
1 teaspoon baking soda
½ teaspoon salt
¼ teaspoon nutmeg
¼ teaspoon ginger
¼ teaspoon cardamom
1 teaspoon cinnamon


      Icing
1 ¼ cups powder sugar
½ teaspoon vanilla
¼ teaspoon cinnamon
2 tablespoon half and half
¼ cup of sliced almonds
-----------


1. Line a loaf pan with foil. Spray with cooking oil and set aside.
2. In a medium size bowl, mix brown sugar, beaten eggs, vegetable oil and half and half.

3. Add the pumpkin and mix till all the ingredients are well combined. Set aside.
4. In a large bowl mix together all the dry ingredients (flour, baking powder, baking soda, salt, nutmeg, ginger, cardamom and cinnamon.

5. Create a hole in the middle of the dry ingredients, add the pumpkin mixture.  Mix till blended but do not over mix. It is ok if the batter is a bit lumpy.


6. Pour contents into the foiled pan.  Bake for 50-60 minutes, till middle is completely set (not wet)
7. Cool for about 1 hour.  While bread is cooling make the icing.

8. Icing: mix powdered sugar, vanilla, cinnamon, half and half .  Mix until the icing is smooth. 


9. Once the bread has cooled, pour icing on top and sprinkle with almonds.  The icing will harden as it cools, but if you just cannot wait, go ahead …. cut a slice …. and enjoy!!!


Wednesday, December 21, 2011

Lemon Blueberry Bread

I don't remember exactly how old I was when I stopped believing in Santa or even how it happened. Did I find out by accident? Did my Mom or Dad (or one of my older siblings) break the news to me when I reached the "appropriate" age or one of the older kids on the playground at school? Even though I don't remember exactly how it happened, I distinctly remember being disappointed. There wasn't a jolly old man that magically delivered presents to good boys and girls all over the world in a single night? The Wish List I made every year was really going to Mom and Dad?? After that, Christmas just wasn't the same...it was no longer magical.


The magic and wonder of Christmas was recaptured when I started taking care of my stepson and my 2 boys were born. I got to re-live it all through the eyes of my children. Feeling their anticipation build as Christmas approached, watching the joy on their faces as they raced down the stairs early Christmas morning to find all of the presents Santa brought piled under the tree. Hearing their exclamations as they tore the wrapping off of the toys they had asked Santa to bring when they sat on his lap a few weeks earlier.


The boys are all older now and obviously no longer believe in Santa. Although we all know Santa isn't real and that the true meaning of Christmas has nothing to do with a jolly old man in a red suit, we can still believe in the spirit of Santa. The spirit of giving.


Which brings me to today's post...I was recently invited to a holiday brunch and wanted to show my appreciation for the invitation by bringing the hosts a homemade gift. I happened to have some fresh blueberries in the fridge that needed to be used up so I made one of my favorite quick breads - Lemon Blueberry Bread that's brushed with a lemon simple syrup while still warm and then finished with a lemon glaze. This Lemon Blueberry Bread is so moist and delicious, packed with lemon flavor without being over powering and bursting with blueberries. It's a slice of heaven. If you can't get fresh blueberries, you can substitute frozen with the same great results making this a treat you can enjoy all year round. I hope you'll give this recipe a try and maybe even make it as a gift yourself.

Lemon Blueberry Bread with Lemon Simple Syrup and Lemon Glaze
Slightly adapted from sweetpeaskitchen
Makes one 9" loaf, serves approx 8-10

Ingredients


For the bread:
1 1/2 cups all purpose flour + 1 Tablespoon separated
2 teaspoons baking powder
1/2 teaspoon salt
1 cup whole milk vanilla yogurt
1 cup granulated sugar
3 large eggs
2 teaspoons lemon zest (from 1 1/2 - 2 lemons)
1/2 teaspoon vanilla extact
1/2 cup vegetable oil (I used canola)
1 1/2 cups blueberries, washed and dried


Lemon Simple Syrup
1/3 cup freshly squeezed lemon juice (do not use the bottled lemon juice)
1/3 cup granulated sugar


Lemon Glaze
1 cup powdered sugar
2 - 3 tablespoons fresh lemon juice
1/2 tsp lemon zest


Directions:


Preheat oven to 350


Grease and flour a 9" loaf pan


In a medium bowl, whisk together the flour, baking powder and salt. Set aside.


In a large bowl, whisk together the sugar, yogurt, eggs, lemon zest, oil and vanilla.


Slowly whisk in the dry ingredients.


In a small bowl, toss the blueberries with the 1 Tablespoon of flour. This supposedly will help keep all of the blueberries from sinking to the bottom of the bread although I have found that this doesn't always work...


Gently fold the blueberries into the batter and immediately pour it into the prepared loaf pan.


Bake for 50-55 minutes or until a toothpick inserted comes out clean (mine took about 50 minutes).


Remove from oven and place on a cooling rack. Allow to cool in pan for 15 minutes. Loosen the sides with a knife and then remove from pan and place on the cooling rack with a cookie sheet or wax paper underneath.


While the bread is cooling is cooling in the pan, prepare the lemon simple syrup. In a small saucepan over medium heat, combine the lemon juice and sugar. Bring to a simmer stirring to ensure the sugar dissolves. Simmer for 3 minutes stirring occasionally. The liquid should be slighly reduced. Remove from heat and set aside.


After removing the bread from the pan, use a skewer or toothpicks (a skewer is better because it makes bigger holes),to poke holes in the top of the bread. You will need to poke a lot of holes to allow the simple syrup to soak in. Be careful not to poke all the way through the bottom of the loaf.


Take the simple syrup and brush or pour slowly over the top of the loaf allowing the syrup to soak into the bread. This should be done as soon as you remove the bread from the pan so the syrup will soak in better. It won't soak in as well if the bread is too cool. Allow to cool completely.


Prepare the lemon glaze by combining the powdered sugar, lemon juice and lemon zest. Make sure the glaze is the appropriate drizzing consistency. It should slowly drip off of a spoon so it will sit on the bread and slowly pour down the sides.


When the bread is completely cooled, drizzle with the lemon glaze.


This bread is so good, I made 2 loaves!
Mmm...a slice of heaven

Keep stored in an air tight container for 2-3 days (if there are any leftovers).

Wednesday, October 19, 2011

Flour Bakery's Famous Banana Bread Recipe and a Bonus!


So I recently came home to a 40 lb box of bananas sitting on my kitchen table. If you don't know what 40 lbs of bananas looks like....


               (Either my husband had visions of Banana Bread loaves dancing in his head or we were adopting a monkey!)


Being the practical person that I am (most of the time), I made the Banana Bread. I already have my go-to Banana Bread recipe that I have been making for years. In my opinion, it is the best Banana Bread I have ever tasted. But I recently came across the recipe for Joanne Chung's famous Banana Bread from her bakery Flour in Boston. If you are not familiar with Joanne Chung, she is a baking goddess and one of my true inspirations. I have great admiration for her. Joanne graduated from Harvard with a degree in Economics then discovered her passion for baking. She opened a Bakery (Flour Bakery and Cafe) in Boston which garnered rave reviews from top pastry chefs and is the author of "Flour: Spectacular Recipes from Flour Bakery and Cafe". She even beat Bobby Flay in a Sticky Bun throwdown! Needless to say, a trip to Flour Bakery in Boston is on my bucket list.


As much as I admire Joanne, I was a little hesitant to try her recipe. Deep down inside, I was afraid to be disappointed. Would her famous banana bread measure up to or surpass the recipe I have been using for years? Since I had a few bananas to spare (haha), I decided to give the recipe a try.


The verdict? It was delicious. Did it measure up? Yes! Did it surpass my go-to recipe? I wouldn't say it did, but it is just as delicious and I will definitely be making it again. Even if you already have your own recipe that you swear by, I encourage you to give this one a try and let us know how it measures up to yours.


Flour Bakery's Famous Banana Bread
from Flour: Spectacular Recipes from Flour Bakery and Cafe


Ingredients:
1 2/3c all purpose flour
1 tsp baking soda
1/4 tsp ground cinnamon
1/2 tsp salt
1 c + 2T sugar
2 eggs
1/2 oil
3 1/2 very ripe bananas, mashed
2 T sour cream
1 tsp vanilla extract
2/3 c walnuts or pecans, toasted and chopped (don't skip the toasting process, it makes a difference)


Directions:


Preheat oven to 350. Spray a loaf pan with non-stick spray and line the botton with parchment paper. Spray the parchment paper with non-stick spray.


In a medium bowl. whisk together the flour, baking soda, cinnamon and salt.


In a large bowl with an electric mixer, whisk the eggs and sugar until light and fluffy (approx 10 minutes). I used a stand mixer fitted with a whisk attachment so I didn't have to stand in front of the mixer for 10 minutes.


Gradually drizzle in oil. Add mashed bananas, sour cream and vanilla. Mix to combine.


Fold in the dry ingredients and the nuts just until combined. Do not overmix.


Pour into lined loaf pan and bake 45 minutes to an hour or until done.


Cool in pan for 15-20 minutes then turn out onto a cooling rack.


Store in an air tight container for up to 2 days (if it lasts that long!)


********************************************************************************


As a bonus, I made these delicious Banana Chocolate Chip and Espresso Muffins. Every once in a while, you come across a recipe that just blows you away and you want to share it with the world. This recipe, from one of my favorite Cookbooks, is it. If you like the combination of banana and chocolate, you will absolutely love these muffins. They are so moist and delicious, you won't be able to eat just one....


Banana Chocolate Chip and Espresso Muffins
from Baked: New Frontiers in Baking


Ingredients:


1 1/2c all purpose flour
1 tsp instant espresso powder
1 1/2 tsp baking soda
1 tsp salt
1 1/2 c very ripe bananas, mashed
1/2 c sugar
1/4 c light brown sugar, firmly packed
1/2 c unsalted butter, melted
1/4 c whole milk (I used lowfat)
1 large egg
1/2 tsp vanilla extract
1 c mini semi-sweet chocolate chips (I recommend using the mini size chips)


Directions:


Preheat oven to 350. Spray a 12 c muffin pan with non-stick cooking spray.


In a medium bowl, stir together the bananas, sugars, butter, milk, vanilla and egg until well combined.


In another medium bowl, whisk together the flour, baking soda, salt and espresso.


Create a well in the center of the dry ingredients and pour in the wet ingredients. Mix with a wooden spoon just until combined. You may still see small pockets or streaks of flour. This is ok, do not overmix or your muffins will be tough. Gently fold in the chocolate chips just until distributed throughout the batter.


Scoop the batter into the prepared muffin pan making sure to divide evenly. The cups will be almost full.


Bake on the center rack of your oven for 20-25 minutes or until the tops are springy and a toothpick inserted in the center comes out clean but with a few moist crumbs.


Cool in the pan on a cooling rack for 15 minutes, then remove them from the pan.


These muffins keep well and stay moist and delicious when stored in an air tight container for up to 2 days.