Showing posts with label apple. Show all posts

Wednesday, September 28, 2016

Easy Back to School Breakfast "Berry Apple Swiss Oatmeal"


As I am writing this post, I am eating a jar of the Back to School Berry Apple Swiss Oatmeal my eighteen year old step daughter made for her dad and I.  She absolutely loves these jars for breakfast, lunch and dinner , LOL!  I thought it would be a good idea for her to do a run through on the recipe to see how it tasted if someone else made it.  Just as delicious. 

If you're not a breakfast person like me, this is a great alternative.  The flavors are crisp and creamy  from the apples and yogurt and with a hearty flavor from the oatmeal and nuts.  It will keep you full til lunch so you're not snacking. If you are always in a rush in the morning (like me)  packing lunches and get myself out the door, this is a great shortcut. I make them on Sunday night and we are ready to go on Monday morning, just grab a jar and a topping bag and I'm out the door.  Trust me when I say, I make this weekly... my family absolutely loves these jars.  I cannot believe I waited so long to start making them.   But here they are now. So I hope you give this recipe a try...

Happy Cooking everyone!

Easy Back to School Breakfast "Berry Apple Swiss Oatmeal"
Makes 8 jars

Ingredients:
3 cups Old Fashioned Oats
3 cups Lowfat Vanilla Yogurt (not Greek)
2 cups  Low Fat Milk (or you can use Vanilla Almond Milk)
4 Tablespoon Honey
1 Teaspoon Vanilla
pinch of salt
3 Granny Smith Apples, cored and sliced into cubes
1 cup sliced Strawberries or 1 cup Blueberries
1/2 cup dried cranberries
1 cup of toasted almond slices
3 tablespoons light brown sugar or 2 tablespoons of white sugar

Need:
8-16 oz Mason Jars  (Target is a great source for these)
Cooking Spray
Large bowl


Directions:
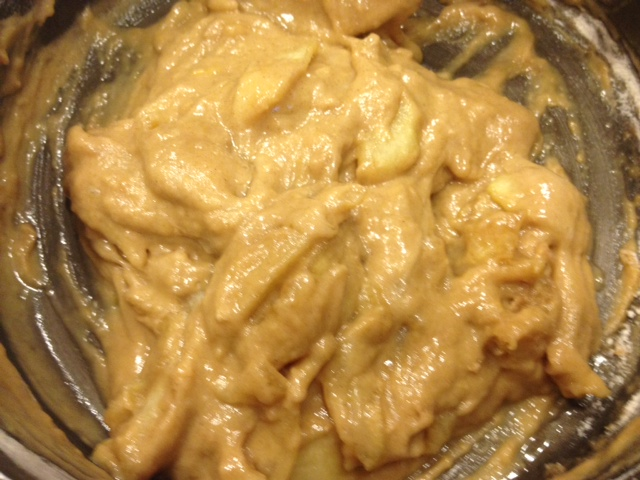
1. In a Large bowl add 3 cups of old fashioned oats


2. Add 3 cups vanilla yogurt

3. Add 2 cups of milk, 3 tablespoons of honey and 1 teaspoon of vanilla extract. Mix everything together

4. Core and Cut up three large Granny Smith apples into 1" cubes.


5. Add chopped apples into the large bowls


6. Add a cup of cut strawberries or cup of blueberries and 1/3 cup of dried cranberries in the large bowl


7. Fold in the cut up fruit into the yogurt/oat mixture


8. Add 2-3 1/4 cups measurements of mixture into each of the mason jars. Tighten lids and put in the refrigerator for at least 6 hours.


9. Turn on oven to 350 degrees.   Add 1 cup a sliced almonds to cookie sheet.  Spray with coconut oil or  vegetable oil.  Sprinkle with sugar.  Bake for 5 minutes, till nuts are golden.   Remove from oven and cool.   Put 2-3 tablespoons of nut mixture in 8 plastic snack bags and serve with Berry Apple Swiss Oatmeal.


10. Oats are good in the refrigerator for 3-4 for days for freshness.

Tuesday, February 10, 2015

Apple Pie Scones with Vanilla Glaze

Have you ever tasted something so delicious it makes you do a happy dance? Well, I had this very reaction to these Apple Pie Scones with Vanilla Glaze. I guess you can say I wasn't expecting them to be THAT good....but they are.
 
This recipe requires a few more steps than your average scone recipe (ie making the filling), but remember these are not your average scones. They're "happy dance" scones!
 
Try them & let me see you do your happy dance...


Apple Pie Scones with Vanilla Glaze
Makes 12 Scones

Filling Ingredients:
1 1/2 large Granny Smith Apples (or 2 small), peeled and diced into bite size pieces
1/4 cup brown sugar
1/2 tsp cinnamon

Scone Ingredients:
3 cups all purpose flour
3/4 teaspoon kosher salt
1 tablespoon baking powder
1/4 tsp baking soda
1/2 teaspoon cinnamon
3/4 cup cold, unsalted butter cut into cubes
3/4 cup buttermilk (+ additional if needed)
1 large egg, cold
1/2 teaspoon vanilla extract
Topping to sprinkle on top of the scones:
1 tablespoon granulated sugar +  1/8 tsp cinnamon combined in a small ramekin

Glaze:
1 cup powdered sugar
4 tablespoons heavy whipping cream
1/4 tsp vanilla extract
1 - 1/2 tablespoons water


Directions:

Make the filling -

In a small saucepan, combine the chopped apples, sugar and cinnamon. Cook over medium-low heat, stirring occasionally, until sugar has melted and apples start to tenderize (approx. 3-4 minutes). Remove from heat, then place on a plate in a single layer to cool completely (approx. 15 minutes).

After apples have cooled, make the scones -

Line a large baking sheet with silpat or parchment paper

In a measuring cup, combine the 3/4 cup buttermilk, egg and vanilla. Whisk to combine then return to refrigerator to keep cold.

In a large bowl, whisk together the flour, baking soda, salt, baking powder and cinnamon. Add the cold, cubed butter and toss in the flour to help separate the cubes of butter. Using a pastry cutter, cut the butter into the flour until there are only a few pieces of butter that are the size of peas and the remaining mixture resembles coarse crumbs.

Drizzle the buttermilk-egg mixture over the flour and fold with a rubber spatula to combine. The dough should not be completely incorporated and will look shaggy. If there is too much "dry flour" remaining, drizzle over another tablespoon - 2 tablespoon of buttermilk over the dry spots and combine again with a rubber spatula.

Dump the dough onto a lightly floured cutting board, then pat into a rectangle about 1/2" thick. At this point, the dough should be holding together.

Spoon the cooled apple mixture over one half of the dough in an even layer leaving a border around the edges. Then fold the other half of the dough over the apple mixture, pressing the edges to help seal in the apples.

Cut into 12 equal pieces with a sharp knife and carefully transfer to the prepared baking sheet placing them about 2" apart since the scones will rise and spread a little. If the baking sheet seems too crowded, divide onto 2 baking sheets.

Refrigerate for 15 minutes to help chill the dough. Don't skip this part. This ensures that the butter is cold when you bake the scones.

While the scones are chilling, preheat your oven to 400f.

After 15 minutes, remove the baking sheet from the fridge and brush the scones lightly with buttermilk, then sprinkle with cinnamon sugar mixture.

Bake approx. 20 minutes or until light golden brown.

Cool scones on the baking sheet for approx. 5 minutes, then transfer them to a wire cooling rack to cool.

While the scones are cooling, make the glaze: Combine the powdered sugar, heavy cream and vanilla in a small bowl. Mix well to combine. Add water a little at a time, stirring well after each addition, until you reach your desired consistency. The glaze should still be slightly thick but should drizzle easily.

When scones have cooled, drizzle with the glaze and serve immediately or within a few hours.


If you need to make the scones more than a few hours ahead of time, apply the glaze before serving.

Store leftovers loosely covered at room temp for up to 1 day.


Friday, December 5, 2014

Apple Cinnamon Fritter Bread

Holy moly you guys...this bread. It's so good it's wrong. Imagine all of the flavor of the most delicious Apple Cinnamon Fritter, but in an easy to make quick bread. Seriously, it is that good...

Make some today, you will not regret it! 

P.S. This bread would make great holiday gifts. Just sayin'...


Apple Cinnamon Fritter Bread
Makes one 9"x5" loaf (serves 6-8)

Ingredients:

Steusel:
1/3 cup brown sugar, packed
1 tsp ground cinnamon
1 cup diced apples (I used granny smith)

Bread:
1 1/2 cups all purpose flour
1 3/4 tsp baking powder
1/4 tsp salt
1/2 cup unsalted butter, softened
2/3 cup granulated sugar
2 large eggs, room temp
1 1/2 tsp vanilla extract
1/2 cup whole milk

Glaze:
1 cup powdered sugar
a splash of vanilla extract
a few tablespoons of milk or cream

Directions:

Preheat oven to 350. Grease and flour a 9"x5" loaf pan (or grease and line with parchment paper)

In a small bowl combine the streusel ingredients (brown sugar and cinnamon only). Set aside.

In a small bowl, combine the flour, baking powder and salt. Set aside.

In a large bowl, cream the butter and granulated sugar together with an electric mixer until light and fluffy. Mix in the eggs, one at a time, mixing well after each addition Scrape down the bottom and sides of the bowl. Mix in the vanilla extract.

Mix in the flour mixture, mixing just until combined. Add milk and mix just until combined.

Dollop half of the batter into the prepared loaf pan and spread into an even layer. Top with half of the brown sugar cinnamon mixture and half of the diced apples. Lightly press the mixture into the batter.

Dollop the remaining half of the batter into the pan and spread into an even layer. Top with the remaining apples. Lightly press into the batter. Lightly swirl the streusel into the batter with a skewer or handle of a spoon.

Place on a baking sheet and bake 30-40 minutes until a toothpick inserted comes out clean.

Cool on a wire cooling rack for 30 minutes. Remove from pan and place on cooling rack. Top with glaze.

Store leftovers at room temperature tightly wrapped for up to 2 days.


Monday, October 7, 2013

Apple Blossom Cheesecake with Cinnamon Graham Cracker Pecan Crust

Fall is in the air and that means apple season! While apples are not on the top of my list of favorite fruits, I love apples baked into desserts; Apple Pie, Apple Streudel, Apple cake, Apple Crisp! The smell of apples and cinnamon baking is heavenly. This Apple Blossom Cheesecake with Cinnamon Graham Cracker Pecan Crust really captures the essence of these delicious Fall flavors.


I know, baking a cheesecake (especially one that looks fancy but really isn't), can be intimidating but is actually pretty easy when you follow the basic rules for baking cheesecake:
 
1. Your cream cheese and eggs absolutely must be at room temperature. This means taking them out of the fridge several hours before you use them. Cold cream cheese is a no-no and will make it difficult to blend resulting in a lumpy cheesecake batter.
 
2. Don't overmix. This incorporates too much air into the batter which may result in a cracked cheesecake.
 
3. Bake low and slow. Your oven temperature should be no higher than 300-325F max. Trust me on this one. A fussy water bath is not needed when you bake at a low temperature.
 
4. Don't peek! Opening and closing the oven too many times affects the oven temperature which can cause cracking.
 
5. Cool slowly. Again, this prevents cracking. The cool down process can take several hours. Be patient, it's worth it.
 
6. Don't stress! If, after all your best efforts, your cheesecake happens to crack, just cover it up with a topping! In the end, it's the flavor that matters anyway...
 
7. Plan ahead - cheesecakes are best when allowed to refrigerate overnight or 10 hours minimum.
 
 
So now that you're a cheesecake "expert", I hope you'll give this recipe for Apple Blossom Cheesecake with Cinnamon Graham Cracker Pecan Crust a try this Fall while apples are in season.


Apple Blossom Cheesecake with Cinnamon Graham Cracker Pecan Crust
Makes one 8-9" cheesecake (serves 10-12)

Cheesecake Ingredients:
3  8oz packages cream cheese, softened to room temp
1 1/3 cup light brown sugar
2 teaspoons vanilla extract
3 large eggs, room temp

Crust Ingredients:
2 cups graham cracker crumbs
1/2 teaspoon cinnamon
1/2 cup chopped pecans
1/2 cup melted butter
2 tablespoons light brown sugar

Apple Topping Ingredients:
4-5 Granny Smith apples, peeled and sliced into 1/3" slices
1/3 cup light brown sugar
1/4 teaspoon cinnamon
1 tablespoon unsalted butter


Directions:

Make the apple topping:

Melt the butter in a large sauce pan or skillet. Add the apples, brown sugar and cinnamon. Cook over medium-low heat until apples are softened (approx. 5 minutes).

Transfer to a large bowl and cool completely.

Make the crust:

Preheat oven to 350f

Add the graham crackers and pecans to the bowl of a food processor and pulse until the pecans are finely chopped.

Place the crumbs into a medium size bowl and add the cinnamon and melted butter. Toss with a fork until well combined and crumbs are moistened.

Press into the bottom and up the sides of your 8-9" spring form pan. Bake for 5-6 minutes. Remove from oven.


Make the filling:

Reduce oven temp to 300f

Place the cream cheese in a large bowl and beat with your electric hand mixer  at low speed just until creamy. If your cream cheese is properly softened, this should take less than 15 seconds.

Add the brown sugar and vanilla extract at beat at low speed until combined. Tip: Make sure your brown sugar doesn't have any lumps before adding.

Beat in the eggs one at a time at low speed mixing just until combined and scraping down the sides & bottom of the bowl with a rubber spatula after each addition.

Pour the filling into the springform pan. Place on a baking sheet.

Arrange the apple slices in a circular pattern (slices should be facing in the same direction) starting at the outer edges and finishing in the center.

Bake at 300 for approx. 60-70 minutes. or until sides are set but center is just slightly jiggly.

Turn oven off and prop oven door open slightly with a wooden spoon. Allow cheesecake to cool slowly in oven for 1 hour.

Remove from oven and cool on counter until room temperature (approx. 1 more hour).

Cover and refrigerate overnight or at least 10 hours.

Before serving, gently trim off any overly browned edges off of the apples (if desired) and lightly brush the apple topping with a little apple jelly to give the topping a shiny look. Tip: You can also sub apricot jelly if you don't have apple jelly. Be sure to stir the jelly to loosen it up before brushing it on if needed

Slice and serve with a dollop of fresh cinnamon whipped cream!


Wednesday, January 23, 2013

Apple Crumble Tart for Nick's 19th Birthday


Finally, our Blog is back up and running!! I've been wanting to post this recipe for about 2 weeks now, but there was an issue with Google that is finally fixed! Yay! I was starting to have Blogger withdrawals.
 
My inspiration for making this tart with my son Nick's 19th birthday. We had to celebrate his birthday early this year while he was in town visiting for the holidays. He spent his actual birthday in Napa at Culinary School. I know, rough life huh? This was actually the first birthday we have ever spent apart. I was a bit sad about that, but I know he's growing up and pursuing his dream so that made it better (a little).
 
While Nick was in town, I made this Apple Crumble Tart in honor of his birthday. I had been wanting to use the rectangular tart pan I bought a few months ago so this was the perfect occassion!


Apple Crumble Tart

Crumble Topping Ingredients:
1/2 cup all purpose flour
1/2 cup old fashioned oats
1/2 cup packed light brown sugar
1 teaspoon cinnamon
1/8 teaspoon nutmeg
1/4 teaspoon salt
6 tablespoons of unsalted butter, cold cut into cubes


Tart Ingredients:
1 refrigerated pie crust (or use homemade if you prefer)
4 large apples (I used 2 Granny Smith + 2 Golden Delicious)
1 tablespoon of fresh lemon juice
1 teaspoon of fresh lemon zest (zest the lemon before you juice it)
1/4 cup packed light brown sugar
1/4 cup granulated sugar
3 tablespoons all purpose flour
1/2 teaspoon cinnamon
1/8 teaspoon nutmeg
1/4 teaspoon salt
1/2 teaspoon vanilla
3 tablespoons unsalted butter

Directions:

Make the topping

In a medium size bowl, combine the dry ingredients and spices. Cut in the cubed cold butter with a pastry cutter (you an also use 2 forks or butter knives) until you get a course crumble mixture. Set aside.


Make the apple filling

Peel and core the apples. Slice into 1/4" thick slices. Place the apples in a bowl and toss with the lemon juice and zest.

In a small bowl, combine the sugar, spices and flour.

Melt the 3 tablespoons of butter in a skillet. Add the apples then top with the sugar/flour/spice mixture.


Cook over medium-low heat until the apples are slightly tender. Stir in the vanilla extract.


Remove from heat and allow to cool for 10 minutes.


Assemble the Tart

Here's a photo of the rectangular tart pan with removable bottom that I bought online at Amazon. Tip: As with any baking pans, try to buy one with a light color finish. Your baked goods will bake more evenly. Dark color pans tend to brown too quickly.


Place the rectangular pan on a baking sheet.

Preheat oven to 375.


Roll the pie crust out in the shape of a rectangle to fit your pan and fold down the sides to create a double layer to reinforce the edges. I wasn't able to roll out the pie crust large enough otherwise it would have been too thin so I had to cut a few pieces of the dough to create the reinforced edges.


Place the slightly cooled apple filling into the pan in an even layer.


Sprinkle the crumble topping evenly over the apples.


Bake at 375 degrees f for approx 30 minutes or until the crust is golden brown and the apples are bubbling.


Allow to cool until sturdy enough to handle and carefully remove from the tart pan. You might need to loosen the endges with a thin, sharp knife.

Place on a cutting board.


Slice and serve with a scoop of vanilla bean ice cream.


Store any leftovers loosely covered at room temperature for 2 days or refrigerate and reheat each serving as needed.

Enjoy!!

Tuesday, March 20, 2012

Homemade Apple "Pop Tarts" with Cinnamon Glaze (and how I conquered my fear of homemade crust)


Sometimes in life when you are afraid to do something you just have to dive in head first and do it. That's just what I did with this recipe. I very seldom make homemade crust (heavy emphasis on the word seldom). I haven't found a recipe I love and I hate to waste precious ingredients (butter is like gold to me) so I usually stick with store bought crust (gasp!). This time I knew I wanted the crust to be the star so I decided to dive in and give homemade crust another try. I have to say that I was so surprised and impressed by the results. This crust recipe is so buttery, so flaky and so  amazingly good it can rival puff pastry when it comes to flakiness. I'm so proud of myself for finally conquering my fear of pie crust!

If you would like to simplify the recipe and skip making your own dough, it would also be delicious using frozen puff pastry or refrigerated ready made pie crust, but I highly recommend the homemade crust if you have the time. It's definitely worth it!


Homemade Apple "Pop Tarts" with Cinnamon Glaze
Makes 8 servings (or 8 pop tarts)

Ingredients

Pastry
1 1/2 cups all purpose flour
1 tablespoon sugar
1 teaspoon salt
1 cup cold unsalted butter, cut into 12 pieces
2 egg yolks
3 tablespoons cold milk

Filling
2 large granny smith apples, peeled and thinly sliced
3 tablespoons unsalted butter
1/2 cup packed light brown sugar
1 egg lightly beaten
1/2 teaspoon ground cinnamon
1/4 teaspoon ground nutmeg
1/8 teaspoon salt
1/2 cup all purpose flour

Cinnamon Glaze
1 cup powdered sugar
1 tablespoon milk
1/2 teaspoon cinnamon

Egg Wash
1 egg lightly beaten

Instructions:

To make the dough

Using a stand mixer fitted with the paddle attachment, combine the flour, sugar and salt by mixing for a few seconds.

Scatter the butter over the top and mix at low speed just until the mixture holds together when you squeeze a clump of it in your hand. This took exactly 1 1/2 minutes on my mixer. You should still see large lumps of butter.


In a small bowl, whisk together the eggs and milk. Add to the flour mixture and mix on low speed just until the dough comes together. It should still look shaggy and messy and not cohesive.


Dump the dough out onto an unfloured surface and shape it into a tight mound. Using the heel of your hand start at the top of the dough (either the far right or far left) and smear it down towards you. Repeat the process until the entire mound of dough has been smeared. You should see streaks of butter throughout the dough. These streaks will make your pastry flaky!


Using a bench scraper or thin spatula, scrape up the dough and place it on a large sheet of plastic wrap. Using the plastic wrap, form it into a disk (I made mine rectangular shape since that's the shape you will ultimately be rolling it into). Wrap tightly and refrigerate for 4 hours or up to 4 days. As a time saver, I made my crust the night before & then assembled/baked the pop tarts in the morning.


Prepare the filling

Melt the butter in a saucepan over medium-high heat. Add the apples and stir until the apples just begin to soften (approx 2 minutes). Add the brown sugar and continue to cook stirring constantly until the sugar is melted and the apples are softened (approx 3 minutes). Remove from heat and allow to cool for 30 minutes.


To the cooked apples, add the flour, salt, cinnamon, nutmeg and egg. Stir gently with a rubber spatula to combine. Make sure the mixture is cooled completely before using.


Prepare the glaze

In a small bowl combine the powdered sugar, milk and cinnamon. If glaze is too runny, add a little more powdered sugar and vice versa.


To assemble

Remove the dough from the refrigerator and cut in half. Place one half back in the refrigerator.

On a lightly floured surface, roll out the dough into a rectangle approximately 24"x11". Cut the dough into 8 equal rectangles.


Brush four of the rectangles with the egg wash. Spoon 2 tablespoons of the apple filling into the center of the egg washed rectangles. Place the other rectangles on top and crimp with a fork.


Remove the second half of the dough from the fridge, repeat the above process with the remaining dough.

Place on parchment lined baking sheets and bake for 35-40 minutes or until dough is golden brown.

Allow to cool 30 minutes, then brush with the cinnamon glaze. Enjoy!


Keep leftovers stored at room temperature for up to 2 days.

Source: Adapted from Buns in my Oven