Monday, December 28, 2015

Italian Sausage, Orzo and Spinach Soup

I have this strange superpower. I'm really good at making things that I can't (or don't) eat. Cheesecake for example. That's my shit. I can "put my foot" (southern expression meaning something is remarkably cooked) in some cheesecake. Just ask my family and friends. I can also make a killer soup, although I'm not a big fan of it. It needs to be a really cold, rainy day in order for me to crave soup, which is rare here in Southern California. My husband, on the other hand, could eat soup every day. Any kind, any day, any time, doesn't matter...


Last weekend, we had our Annual Christmas Cookie Bake. Here's a photo of some of the delicious cookies we baked this year.
 
 
While I normally share a cookie recipe from the cookie bake, I decided to do something different this time...
 
We have this tradition every year where I make a new soup for us to eat for lunch. Over the years I have made some really great soup and I never make the same kind twice. My White Bean Chicken Chili/Soup has become "legendary". Everyone I have given the recipe to loves it and I still get requests for that recipe. As a matter of fact, Yvonne just called me this morning asking me to resend it to her because she has a cold and wanted to make it. It's definitely a "feel good" type of soup. I'll have to share that recipe one of these days.
 
For this year's cookie bake, I made Italian Sausage, Orzo and Spinach Soup.
 
In these photos, I didn't have the Italian Sausage, so I used smoked turkey sausage links
 
The girls really enjoyed it (Teresa even made it for her family a few days later!) so I promised I would share the recipe on the blog. I'm almost embarrassed at how easy it is to make, but hey, there are days when easy isn't a bad thing, right?


So here's my recipe for super easy, super simple, super delicious Italian Sausage, Orzo and Spinach Soup. I hope you enjoy it!


Italian Sausage, Orzo and Spinach Soup
Serves 4

Ingredients:
2 tablespoons Olive Oil
3-4 links Turkey Italian Sausage (casing removed)
** Feel free to sub any sausage you like
1 small onion, diced
4 carrots, diced large
2 -3 stalks of celery, diced
3 garlic cloves, minced
1 14oz can fire roasted tomatoes
7 cups of chicken stock
1 1/4 cup dried Orzo pasta
1/2 tsp dried thyme
1/2 tsp dried oregano
salt & pepper to taste
1 bag of baby spinach
1/4 tsp fresh chopped rosemary


Directions:

Heat 2 tablespoons of Olive Oil in a large dutch oven over medium heat. Add sausage and cook until browned and no longer pink, breaking up into chunks with a wooden spoon as you cook it. Remove sausage to a bowl and set aside.

Reduce heat to medium-low and add the onions. Cook, stirring occasionally, until softened and translucent. Add the carrots and celery and cook for 3-4 minutes, stirring occasionally. Add the garlic and cook for 20-30 seconds or until fragrant.

Add the chicken broth, tomatoes, pasta and seasonings. Bring to a boil, stirring frequently and scraping the bottom of the pan to ensure the pasta doesn't stick. When the mixture comes to a boil, reduce heat to low and simmer 10 minutes (you may need to stir occasionally during this process) to prevent the pasta from sticking to the bottom.

After 10 minutes, taste and adjust seasonings then add the spinach, the chopped fresh rosemary and the cooked sausage. Cook stirring just until spinach is just wilted (approx. 1 minute).

Enjoy immediately while still hot.

Store leftovers refrigerated in an air-tight container.

Note: Over time, the orzo, as with any pasta, will absorb a lot of the liquid. When reheating, you may need to add additional chicken broth to reach desired "soup" consistency.

To make ahead: Cook pasta separately and add to the broth when reheating the soup just before serving.

Thursday, December 17, 2015

Gingerbread Shortbread #greatfoodbloggercookieswap2015

The Great Food Blogger Cookie Swap is an event I look forward to every year. It's right up there with Thanksgiving and my annual Cookie Bake. For this event, organized by Julie from The Little Kitchen and Lindsay from Love and Olive Oil, thousands of fellow food bloggers from across the globe, bake and swap cookies through the mail with other food bloggers, all to raise money for Cookies for Kids Cancer, a non-profit organization committed to funding pediatric cancer research.


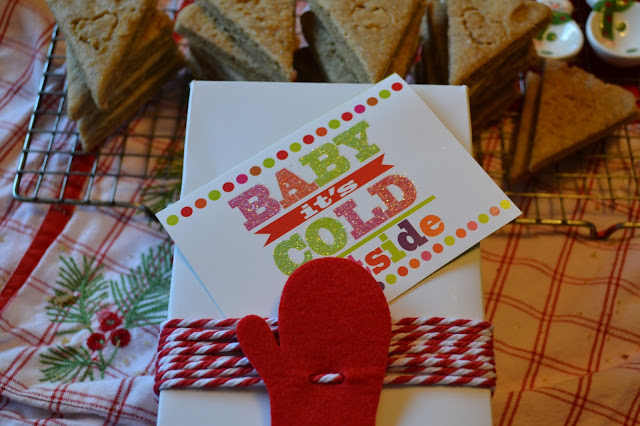
For this year's cookie swap, I baked Gingerbread Shortbread. Shortbread is always a classic during the holiday season, but gingerbread shortbread is even better! Instead of cutting the shortbread into small shapes, I decided to bake them into wedges! Pretty cute, huh? Now that I think of it, cutting them into actual gingerbread men/women shapes would have been cute too!


My cookies were shipped to Ashley from Couture Palate, Susan from A Less Processed Life and Tracy from Pale Yellow. I hope they enjoyed them!
 
I included some Tazo Sweet Cinnamon Spice Tea to compliment the spices in the cookies. After all, what's shortbread without tea?


In return, I received Southern Molasses Crinkle Cookies from Rachel at A Southern Fairy Tale, Chai Spiced Oatmeal Cookies and Funfetti Biscotti from Mel Bakes Things and Peanut Butter Chocolate Chip Cookies from Forty Cakes. All of the cookies I received were super yummy! Thanks Ladies!
 
I have to give a special thanks to Lindsey and Julie. Each year they spend countless hours of their time organizing this event. I personally have a lot of fun baking, packaging and shipping the cookies and waiting to see what I receive in the mail in return. But, at the end of the day, it's not about the cookies, it's all about finding a cure for pediatric cancer.


If you are a food blogger and are interested in participating in the 2016 Great Food Blogger Cookie Swap, be sure to sign up to receive notifications about next year's event here. You won't want to miss it!
 
Now onto the recipe for these delicious Gingerbread Shortbread....


Gingerbread Shortbread
Makes 16 cookies
Adapted from BHG

Ingredients
2 cups all purpose flour, sifted
1/2 cup powdered sugar
1/4 teaspoon ground ginger
1/2 teaspoon ground cinnamon
1/8 teaspoon ground cloves
1 cup cold butter, cut into tablespoon size pieces
2 tablespoons unsulphured molasses
Turbinado Sugar for sprinkling

Directions

Preheat oven to 325F

Line 2 baking sheets with parchment paper

Combine the flour, sugar and spices in a large bowl. Whisk to combine.

Add the butter and molasses to the flour mixture. Cut the butter into the flour mixture using a pastry blender until the mixture resembles fine crumbs.

Knead the dough to form a ball. Divide the dough in half and place one ball of dough onto each prepared cookie sheet. Pat into an 8" circle. Using your fingers, create a scallop edge.

Sprinkle each round with turbinado sugar, then prick with the tines of a fork (about every inch or so). If desired, make a heart shape on the top of each wedge using a toothpick or small cookie cutter (just make an indentation, do not cut all the way through the cookie).

Cut each circle into 8 equal wedges leaving the circle intact.

Bake at 325f for 15-18 minutes or until the edges start to turn golden brown and the center is set.

Remove from the oven and recut the wedges while still warm using a sharp knife.

Transfer to a wire cooling rack to cool completely.

Store tightly covered in an air tight container for up to 3 days.


Monday, December 14, 2015

Chocolate Toffee Biscotti #creativecookieexchange

So is everyone else knee deep in cookie baking this month? I know I am! I love to bake and give homemade cookies for Christmas gifts.


The theme for this month's Creative Cookie Exchange was biscotti. Biscotti are actually the perfect cookie for gift giving. They ship well and stay fresh for several days. I have to admit that I'm not the biggest fan of biscotti. They tend to be dry and crumbly, in desperate need of dunking, while I tend to lean towards soft, chewy cookies. These Chocolate Toffee Biscotti, however are different. Due to the addition of chocolate chips and chocolate covered toffee bits in the dough, they are not as dry as the usual biscotti. The chocolate coating on the toffee bits melts into the dough while baking, giving it added moisture, while the toffee bits surprise you with little bursts of caramel crunch. The chocolate glaze and additional sprinkling of toffee bits add an extra layer of flavor.
 

This batch of Chocolate Toffee Biscotti is being gifted to a special friend/co-worker for her birthday. She happens to love biscotti and chocolate. I hope she enjoys eating them as much as I enjoyed baking them!


Chocolate Toffee Biscotti
Make about 18 cookies
Adapted from

Ingredients:
2 cups all purpose flour
1/3 cup natural cocoa powder
1/4 tsp salt
1 1/2 tsp baking powder
1 tablespoon espresso powder
2 tablespoons hot water
1/2 cup unsalted butter softened
3/4 cup granulated sugar
2 large eggs
1/2 tsp vanilla extract
3/4 cup dark chocolate chips coarsely chopped
1 cup chocolate covered toffee bits (like Heath or Skor)
Egg wash (1 large egg beaten with 2 tablespoons cold water)

Topping:
1 cup dark chocolate chips melted
1 cup chocolate covered toffee bits

Directions:

Preheat oven to 350f and line a baking sheet with parchment paper

In a small bowl, combine the hot water and espresso powder and stir to dissolve. Set aside.

Place flour, cocoa powder, baking powder and salt in a medium size bowl and whisk well to combine. Set aside.

In the bowl of your stand mixer fitted with the paddle attachment, cream the butter and sugar together until light and fluffy (approx. 2 minutes).

Scrape down the bottom and sides of the bowl and the paddle. Beat in the eggs, one at a time, at low speed, mixing just until combined.

Add the espresso mixture and mix on low speed just until combined. Scrape down the bottom and sides of the bowl and paddle.

Add the flour mixture and mix on low speed until combined. Add the chocolate chunks and toffee beats and mix  on low speed just until distributed.

Dump the dough onto the prepared baking sheet and divide in half. Shape each half into a log approx. 8" long x 1.5" wide making sure each log is approx. 5" apart on the baking sheet since the dough will spread. Brush lightly with egg wash.

Bake approx. 25 minutes or until set and the dough looks done in the center. Remove from oven and place baking sheet on a cooling rack to cool.

Remove the cooled logs and place on a cutting board. Slice into 3/4" thick slices using a serrated knife (cut straight or on a diagonal). It is very important that the biscotti are completely cool before you cut them. Cutting while warm may cause them to break.

Place the cut biscotti back onto the baking sheet and return to the 350f oven. Bake another 6-8 minutes. Remove from oven and cool completely on the baking sheet.

To glaze the biscotti - melt the chocolate chips and drizzle the chocolate over each cookie. Sprinkle with toffee bits.


Allow the chocolate to set before storing.

Store at room temperature in an air tight container for  up to days.


Biscotti (or mandelbrot or any other twice baked cookie by any other name) are one of the perfect Holiday tin cookies! They last forever, and there are so many ways to make them festive. So we’ve got you covered--sweet, savory, low fat, loaded with decadence, you name it, we’ve got it! Happy Holidays!

You can also use us as a great resource for cookie recipes. Be sure to check out our Pinterest Board and our monthly posts (you can find all of them here at The Spiced Life). You will be able to find them the first Tuesday after the 15th of each month! Also, if you are looking for inspiration to get in the kitchen and start baking, check out what all of the hosting bloggers have made:

Tuesday, November 17, 2015

Cinnamon Chai Shortbread with Cinnamon & Vanilla Bean Glaze #Creative Cookie Exchange

This is my first post for The Creative Cookie Exchange group I just recently joined and I'm really excited about it. First of all, I LOVE cookies. Cookies are my favorite snack, dessert, comfort food et al... I eat them when I'm happy, I eat them when I'm sad, I'm eat them when I'm mad. Seriously, shouldn't there be a Dr. Seuss book about cookies already? I could totally write it...
But back to these cookies. The theme for this month's Creative Cookie Exchange was cinnamon. I happen to think cinnamon and chai pair perfectly together, maybe that's a bit redundant because cinnamon is an ingredient in chai, but oh well..
While searching for cinnamon inspiration, I found fell in love with this blog called i bake he shoots. Amazing photography and great recipes. I was captivated by Mondo's Chai Shortbread and knew I wanted to make these for the cookie exchange with a few modifications. I decreased the orange zest, omitted the anise (didn't have it) and added vanilla bean paste to the glaze. Can I just tell you how amazingly delicious these cookies are? The flavor of the warm spices complimented by the zing from the orange zest make you want to slap your mama cuddle up in your favorite armchair with a cup of tea, a fuzzy throw and a good book. 
Make them for the holidays. Everyone will love you.
Cinnamon Chai Shortbread with Cinnamon & Vanilla Bean Glaze
Makes 18 2" cookies
Cookie Ingredients:
1 1/4 cup all purpose flour
1/2 teaspoon cinnamon
1/2 teaspoon cardamom
1/4 teaspoon nutmeg
1/8 teaspoon ginger
1/8 teaspoon cloves
1/8 teaspoon salt
1/3 cup sugar
1/2 teaspoon fresh orange zest
1/2 cup unsalted butter, softened
Glaze Ingredients:
1 cup powdered sugar
dash of cinnamon
splash of vanilla bean paste
3-4 teaspoons of milk or cream
Whisk together the flour, spices and salt in a small bowl and set aside.
Place the sugar and orange zest in the bowl of your stand mixer fitted with the paddle attachment and using your finger tips squeeze the orange zest into the sugar to release the oils and create orange "scented" sugar. The sugar should smell really fragrant.
Add the softened butter and mix at medium speed until fluffy (approx. 2 minutes), scraping down the sides and bottom of the bowl with a rubber spatula as needed.
Add the flour mixture and mix on low speed until combined.
Place the dough onto a parchment lined baking sheet and place another piece of parchment on top. Roll into a disk about 1/4" and refrigerate for about 30 minutes.
Remove dough from refrigerator and preheat oven to 350f.
Line 1-2 baking sheets with parchment paper.
Using a cookie cutter (mine was a 2" square cutter with scalloped edges) cut about 18 cookies.
Place the cookies on the prepared baking sheets (they don't spread) and bake for approx. 15 minutes or until lightly browned.
Remove from the oven and carefully place on a wire cooking rack to cool completely.
While the cookies are cooling, make the glaze by combining all of the ingredients in a small bowl and whisking with a fork or whisk until smooth. Start with only 3 teaspoons of milk/cream and mix well to check the consistency. Gradually add more milk/cream little by little (stirring well after each addition) until you reach desired consistency.
Drizzle or dip your cookies into the glaze as desired.
Enjoy!!
Leftover cookies (if any!) can be stored in an air tight container for 2 days.
Are we the only ones who start craving cinnamon when the weather gets colder? We can't be! And we are talking anything sold under the word cinnamon--cassia, "true cinnamon", Ceylon cinnamon, Vietnamese Cinnamon--if it is sold as cinnamon, it is what we want! Check out all of our cinnamon cookies below! Hint: A lot of them could be used for your holiday cookie table!

You can also use us as a great resource for cookie recipes. Be sure to check out our Pinterest Board and our monthly posts (you can find all of them here at The Spiced Life). You will be able to find them the first Tuesday after the 15th of each month! Also, if you are looking for inspiration to get in the kitchen and start baking, check out what all of the hosting bloggers have made:

Sunday, November 15, 2015

Maple Bacon Chocolate Bourbon Pecan Pie Bars with Pecan Shortbread Crust

While I have always been more of a cookie or cake person, I recently discovered, after making 15 pies for a former co-worker's wedding, that I love to bake pie.


There's something homey and comforting about pie. The process of making the dough and prepping the fillings is actually pretty relaxing. It's amazing how a few simple ingredients can be transformed into something beautiful and delicious.
 
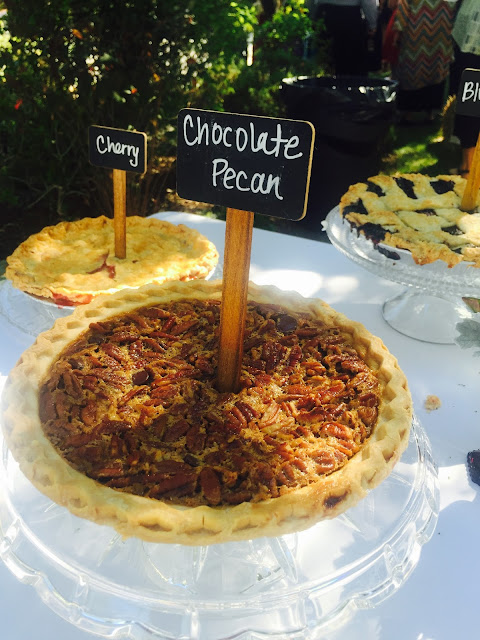
To support my new-found love for pie baking, I recently joined a Pie Baking Group on Facebook (thanks Karen!). For the month of November, Karen challenged us to bake a Pecan Pie. I have to admit, I'm not a big fan of pecan pie, there's something about the gooey texture (and corn syrup) that doesn't appeal to me, but I found a way to put my personal spin on the challenge and that involved 2 of my favorite baking ingredients....bacon and bourbon! Hence these Maple Bacon Chocolate Bourbon Pecan Pie Bars with Pecan Shortbread Crust were born!


If you love pie, want to learn more about pie or just want to look at drool-worthy pie photos, I encourage you to join the group. I guarantee you'll be ins-pie-erd.


Maple Bacon Chocolate Bourbon Pecan Pie Bars with Pecan Shortbread Crust
Makes 9-12 bars depending upon size
 
 
Crust Ingredients:
6 tablespoons cold unsalted butter, cut into cubes
1 cup all purpose flour
1/4 tsp baking powder
1 tsp salt
1/3 cup light brown sugar, packed
1/4 cup pecans, chopped
 
 
Filling Ingredients:


2 slices thick cut bacon cooked and chopped (I baked my bacon at 375 for approx. 20 min. Baking the bacon renders the fat more evenly)
4 tablespoons unsalted butter, melted and slightly cooled
1/2 cup light brown sugar, packed
1/3 cup maple syrup
2 teaspoons pure vanilla extract
1 tablespoon bourbon
1/2 tsp salt
1 large egg, room temp
1/2 cup dark or semi-sweet chocolate chips
1 cup pecans, coarsely chopped


Directions:
Preheat oven to 350.


Spray a rectangular tart pan with removable bottom with non-stick cooking spay or line a 9"x9" baking pan with non-stick foil (or spray regular foil) leaving a slight overhang to use as handles to easily remove the bars from the pan.

Place the flour, baking powder, salt, brown sugar and pecans in the bowl of your food processor fitted with the blade attachment. Pulse until combined and the pecans and small. Add the butter and pulse until the mixture looks like course crumbs (a few small chunks of butter remaining is ok).


For the tart pan: press the dough mixture into an even layer over the bottom and all the way up the sides of the pan. Place on a baking sheet.

For the 9x9 baking pan: press the dough evenly over the bottom and a little way up the sides (approx. 1").

Bake at 350 for approx. 20 minutes or until lightly golden brown. Remove from oven. If the crust has puffed up a little, press it down with a spoon.

Make the filling:

Combine the melted butter, maple syrup, bourbon, vanilla, salt, brown sugar and egg in a large bowl and whisk to combine. Pour the mixture over the baked crust.


Sprinkle the pecans, chocolate chips and bacon evenly over the filling.

Bake at 350 for approx. 20-25 minutes or until set.

Remove from oven.

If using the tart pan - allow to cool for approx. 1 hour before releasing the tart from the pan. Keep the bottom of the pan on until completely cooled. Then remove the bottom of the pan and cut into bars.

If using the 9x9 baking pan - allow to cool for approx. 30 minutes then remove the bars from the pan using the foil overhang. When completely cool, cut into bars.


Enjoy!


Thursday, October 22, 2015

Perfect Fall Treat !!! Mini Pumpkin Cheesecake Tarts!


Need a quick & delicious dessert for your upcoming Fall parties? Well, these Mini Pumpkin Cheesecake Mousse tarts are perfect! There is very little baking involved and they can be made the day ahead!  
 
I was attending the annual birthday party for my boyfriend and his friends, and I needed a quick and tasty dessert recipe. I used the base of my usual party favorite (Cheesecake Cups)and added pumpkin and a few other fall flavors and boom....... these Mini Pumpkin Cheesecake Mousse tarts were born!
 
 As usual, after testing a recipe, I posted a picture on Instagram saying the recipe would be coming soon. Then I planned a second round of recipe testing before sharing the recipe with you all on the blog.
 
For the second round of testing, just to make sure the recipe was absolutely perfect,  I baked the tarts for a double celebration - happy hour to congratulate a co-worker who had recently been promoted  (Congrats Brie!) and a friend's birthday (Happy Birthday Amber!).  I followed the same basic recipe as the first test round, but made a few changes which elevated the tarts to the next level and made them blog worthy!
 
The flavors are the essence of the holidays all rolled into one; pumpkin, cinnamon, crisp-buttery crust and light & fluffy cheesecake. Honestly what could be more perfect? The birthday girl said she needed of bathtub full of the stuff and another co-worker called them PUMPKINLICIOUS!.   
 
I hope you give this sweet treat a try for your holiday parties!
 
Mini Pumpkin Cheesecake Tarts
Makes 24-36 minis (or 12-16 regular size)

Ingredients:
1 box premade pie crust (if you want to make homemade, here is the link)
1 1/3 cups heavy Whipping Cream
1/4 cup powder sugar
8oz cream cheese, soften
1 teaspoon vanilla extract
1/4 teaspoon maple extract (optional)
3/4 cup Solid Pumpkin (not pumpkin pie mix)

1 cup powdered sugar
2 teaspoons pumpkin pie spice
1 teaspoon cinnamon
3 tablespoons orange juice

Directions
Preheat oven to 350
Lightly spray the back side of a mini cupcake pan lightly with cooking spray.

Roll pie crust out on a floured surface. Use rolling pin to straighten edges but do not over roll.  Cut into 2 1/2" circles.  Place circles on a flipped over mini pie tray.  Make two indention's into each cup


Bake for 11-13 minute till light brown.. Remove from oven and place on cooling tray. They should slide right off.


As crust is cooling, whip cream until it forms soft peals (approx 2-3 minutes)

Add 1/4 cup of  powdered sugar. Mix until peaks are stiff.  Transfer to a bowl and refrigerate.


Place the cream cheese, vanilla and maple extracts in the same bowl (no need to clean out) that was used to whip the cream and mix until creamy.

Add remaining ingredients and mix until well combined.

Filling will be nice and smooth. (I know you'll want to eat with a spoon right there and then!)


Fold in Whipped cream.

Add mixture to piping bag and fill each of the individual tarts.


Refrigerate for 1 hour.

Enjoy!

Fun stuff!
1. I took the leftover pie crust and made little cookie hearts. Just cut pie dough into shapes, brush with butter and sprinkle sugar and cinnamon. bake at 350f or 10 minutes


2. You will have some leftover mousse. I just made little mousse cups. Just as good without the calories of the crust :-)!