Sunday, December 30, 2012
Thursday, December 20, 2012
Christmas Cookie Bake 2012
Our annual Christmas Cookie Bake is an event we look forward to every year. We usually have way too much fun and wind up with way too many cookies and this year was no exception. Although there were fewer of us this year than last, there was no shortage of Christmas cheer....
 |
| Photo Courtesy of Teresa Klein |
Last week's tragedy in Connecticut had me thinking about past cookie bakes, the friends who have come and gone, and wondering what the future holds. Will my friends and I continue baking until we're little old ladies? Will the tradition go on even if I'm no longer around? To be honest, getting together every year to bake cookies is more about the friendship than the food. It's a time when we reflect on the past year, talk about our kids, our health, marriage and relationships, look back at where we started and how far we've come. And while we may be exhausted at the end of the day, it's still a day we look forward to from the moment the last tray of cookies comes out of the oven.
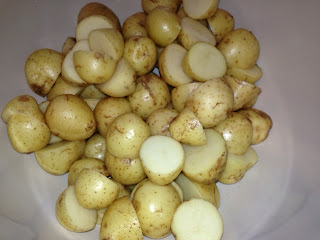
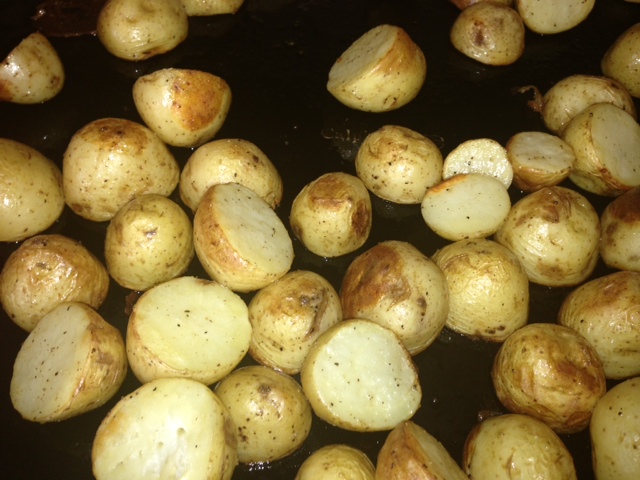
As usual our day started out with breakfast; Broccoli and Cheddar Frittata, Roasted Potatoes, Oven Baked Bacon, Fruit and Tim's famous Sticky Buns.
After the delicious breakfast, the mixing, rolling, baking and decorating began...
As usual, there was even some singing....
In between the baking and singing, we managed to find time to take a quick break for lunch; Pasta Fagioli Soup and Tomato & Mozarella Panini.
Mmmm....
And in the end, all of our hard work paid off.......
After the delicious breakfast, the mixing, rolling, baking and decorating began...
 |
| Photos courtesy of Teresa Klein |
As usual, there was even some singing....
(Sorry we didn't get a photo of the singing, but just picture us singing & dancing & looking cute)
In between the baking and singing, we managed to find time to take a quick break for lunch; Pasta Fagioli Soup and Tomato & Mozarella Panini.
Mmmm....
And in the end, all of our hard work paid off.......
Most of the recipes for the cookies we made this year can be found here (from last year's cookie bake).
From left to right: Snowballs, Snickerdoodles, Triple Berry Shortbread Bars, Molasses Crinkles, Peanut Butter Cups, Pumpkin Fudge, Chocolate Dipped Salted Caramel Coconut Macarons, Chocolate Oat Bars, Lemon Poppyseed Cut Out Cookies, Magic 9-Layer Bars, Cranberry Pistachio Cookies, Jackie's Tarts
This year, we're sharing the recipe for the amazing Lemon Poppy Seed Cut Out Cookies that Teresa made at the spur of the moment when we realized we didn't have any lemon cookies! They were a huge hit and definitely one of my new favorites. We hope you'll add this recipe to your holiday baking. It's definitely a keeper!
From left to right: Snowballs, Snickerdoodles, Triple Berry Shortbread Bars, Molasses Crinkles, Peanut Butter Cups, Pumpkin Fudge, Chocolate Dipped Salted Caramel Coconut Macarons, Chocolate Oat Bars, Lemon Poppyseed Cut Out Cookies, Magic 9-Layer Bars, Cranberry Pistachio Cookies, Jackie's Tarts
 |
| Photos courtesy of Teresa Klein |
This year, we're sharing the recipe for the amazing Lemon Poppy Seed Cut Out Cookies that Teresa made at the spur of the moment when we realized we didn't have any lemon cookies! They were a huge hit and definitely one of my new favorites. We hope you'll add this recipe to your holiday baking. It's definitely a keeper!
Lemon Poppy Seed Cut Out Cookies
Adapted from The Sweet Adventures of Sugarbelle
This recipe makes a lot of cookie using a small cookie cutter
 |
| Photo Courtesy of Teresa Klein |
Cookie Ingredients:
1 cup unsalted butter, softened
1 1/2 cup powdered sugar
1 large egg at room temperature
Zest from one large lemon
Approx 2 tablespoons fresh lemon juice
1 teaspoon vanilla bean paste
2 3/4 - 3 cups all purpose flour
2 teaspoons baking powder
1 teaspoon salt
2 teaspoons poppy seeds
Icing Ingredients:
1 cup powdered sugar
1 T corn syrup
2-3 T water
1 T fresh lemon juice
1/2 teaspoon lemon zest
In a medium mixing bowl, whisk together the flour, baking powder and salt. Stir in the poppy seeds.
In a large bowl using an electric hand mixer, cream the butter and powdered sugar until light and fluffy.
Add the egg, lemon zest, lemon juice and vanilla bean paste and mix until combined.
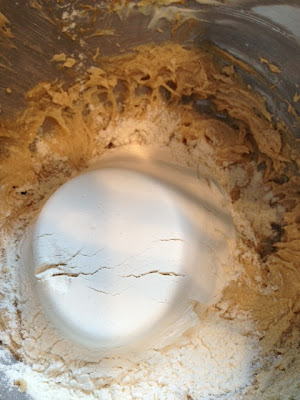
Add the dry ingredients and mix until the dough forms a ball.
Roll out onto a flour surface about 1/4" thick. Cut into desired shapes with cookie cutters and place on parchment lined baking sheets.
 |
| Photo courtesy of Teresa Klein |
Bake for 7-9 minutes or until just very lightly browned around the edges.
Remove from to cooling rack to cool completely.
While cookies are cooling, make the icing by combining all of the icing ingredients in a medium size bowl. Add more powdered sugar if needed to reach desired consistency.
Frost and decorate cooled cookies.
 |
| Photo Courtesy of Teresa Klein |
Store in an air tight container at room temperature for up to 3-4 days.
So from our homes and hearts to yours, we wish you the happiest of holidays and a sweet new year!
 |
| Photo Courtesy of Teresa Klein |
Love,
LiveBakeLove
Monday, December 17, 2012
National Blogger's Day of Remebrance
Remembering those who lost their lives and praying for the loved ones left behind. We keep you all in our hearts, thoughts and prayers.
Love,
~ Faye & Yvonne
LiveBakeLove
Love,
~ Faye & Yvonne
LiveBakeLove
Monday, December 10, 2012
Mini M&M Pretzel Chocolate Chip Cookies for Chris
One of the down sides of moving to the northern part of San Diego County is I don't get to see my son, Chris, as much as I would like. This weekend my husband had some errands to run in the South Bay so I decided to surprise Chris with some homemade cookies. I know how much he misses my baking : ) Instead of the basic Chocolate Chip, which is one of his favorites, I decided to make something different - Mini M&M Pretzel Chocolate Chip Cookies. The mini M&M's are the perfect size for a cookie and the chopped up pretzels add a slight saltiness and crunch. I couldn't stop there, of course I had to throw in some chocolate chips for good measure. Chris rated these cookies as superb and said they are now one of his all-time favorites!
Whether you are baking for a loved one or just yourself, I hope you'll give this recipe a try!
Mini M&M Prezel Chocolate Chip Cookies
Makes 15 large cookies or 22 small cookies
Ingredients
2 cups all purpose flour
2 teaspoons corn starch
1/2 teaspoon salt
1 teaspoon baking soda
3/4 cup dark brown sugar
1/4 granulated sugar
3/4 cup (1 1/4 sticks) unsalted butter, softened
1 egg, room temperature
2 teaspoons vanilla extract
1 cup mini M&M's
3/4 cup chopped pretzels (I used the thin kind)
3/4 cup semi-sweet chocolate chips
Directions:
Preheat oven to 350 degrees farenheit
Line 2 baking sheets with silpat or parchment paper.
In a medium size bowl, combine the flour, cornstarch, baking soda and salt. Whisk to combine.
In a large bowl with an electric mixer or stand mixer fitted with the paddle attachment, cream the butter and sugars together at medium speed until light and fluff (approx 3 minutes).
Scrape down the bowl and add the egg and vanilla extract. Mix at medium speed until combined.
Add the flour mixture and mix at low speed until combined.
Fold in the M&M's, chopped pretzels and chocolate chips.
Using a large cookie scoop (or small if you prefer smaller cookies), place 6 scoops of dough onto each cookie sheet.
Flatten slightly with the palm of your hand. I didn't do this with my first batch and I prefered the look of the batch that was slightly flattened before baking.
Bake for 9-10 minutes or until lightly browned around the edges.
Remove from oven and allow cookies to cool on the baking sheet for about 5 minutes. Remove to a cooling rack to cool completely or enjoy warm!
Store leftovers (if any) at room temperature in an air tight container for up to 2 days.
Friday, December 7, 2012
The Perfect Toffee Bars
The Perfect Toffee Bar’s (adaption from better home and garden)
This is the type of recipe that is perfect for a gift and super easy to make. I needed something to make last week for a house warming party. Once again I looked at what I had in my pantry and found that I had ½ a bag of toffee bits. Hmmmm..what to make…what to make! I did a little searching and found a recipe for Toffee bars in a old cook book I had. I have now made the recipe twice and I think this new and improved recipe is amazing. Added a bit more toffee , a bit more pecans and a more CHOCOLATE of course! I hope you enjoy These PERFECT TOFFEE BARS. Perfect for a holiday treat for your friends and family or yourself of couse!
Happy cooking!
½ cup unsalted butter softened
¾ packed brown sugar
1 egg
1 teaspoon vanilla
1 cup flour
1/8 teaspoon salt
1 cup semi-sweet chocolate chips
½ cup pecans
½ cup toffee pieces
Preheat oven to 350 degrees
1. Mix together with electric mixer soften butter.
2. Add brown sugar, egg and vanilla to butter. Beat until will combined.
3. Add flour and salt to egg mixture till all combined.
4. Pull out a 13x9x2 in glass baking dish , ungreased and
spread the cookie mixture on the pan in a even layer. (two things, do not spray oil or put wax paper,tried both and it makes it hard to to them out, experience talking here )
5. Bake for 15 minutes. The sides will be come a light brown and the top will be dry.
6. Once your remove from oven, immediately sprinkle the cup of chocolate chips evenly over baked cookie. Wait about 3-5 minutes. The chocolate chips will melt. Using a spatula, spread the chocolate evenly over the cookie until the chocolate completely cookie.
7. Mix together the ½ cup of chopped pecans and ½ cup toffee pieces and
Sprinkle over the chocolate. Using your hand, gently press the pecan and toffees into the chocolate.
8. Cut into bars and put on a baking rack to cool. Chocolate will be come hard. If you need them faster for a party , like I did. I popped them into the refrigerator for 30 minutes.
ENJOY
Monday, December 3, 2012
Pecan Pie Brownies
What can be more delicious than homemade brownies? How about homemade Pecan Pie Brownies? These brownies are rich, decadent and delicious. The topping and exterior are crisp, nutty and slightly chewy while the interior is rich and gooey. These brownies are best served slightly warmed up topped with a large scoop of vanilla bean ice cream and a generous drizzle of chocolate syrup.
Pecan Pie Brownies
Makes One 9x9 pan, serves 12
Brownie Ingredients:
1 stick unsalted butter
1 cup semi-sweet chocolate chips
1 1/2 cups granulated sugar
2 eggs
1 teaspoon vanilla extract
1 cup all purpose flour
1/4 teaspoon salt
Pecan Pie Topping Ingredients:
1/2 cup light corn syrup
1/2 cup dark brown sugar
2 eggs
1 1/2 tablespoons vanilla extract
2 cups pecans, coarsely chopped
1 cup semi-sweet chocolate chips
Directions:
Preheat oven to 350 degrees farenheight
Line a 9x9" baking pan with non-stick foil or spray regular foil with non-stick spray.
In a small bowl, combine the flour and salt. Set aside.
In a large glass bowl, microwave the butter and chocolate chips in 30 second intervals until melted , stirring well after each interval.
Whisk in the sugar until completely incorporated. Then whisk in the eggs and vanilla extract.
Whisk in the flour and salt just until combined.
Pour the batter into the prepared pan and spread evenly.
Bake for 10 minutes.
While the brownies are baking, make the pecan pie topping.
In a large bowl using an electric hand mixer (or in the bowl of your stand mixer fitted with the paddle attachment), mix together the corn syrup and brown sugar until completely combined.
Beat in the eggs and vanilla extract.
Slowly add the melted butter (I did mine in 1/2 tablespoon increments) and mix until combined.
Stir in the chopped pecans and chocolate chips.
Remove the brownies from the oven after 10 minutes and pour the pecan pie topping over the brownies distributin g evenly over the top.
Return the pan to the oven and bake for 45-50 minutes more or until the top is set. If the edges start to brown too much during the baking process, tent the pan with foil.
When the top feels completely set to the touch, remove from the oven and allow to cool on a wire rack for 2 hours.
Cut into squares using a sharp knife and serve topped with vanilla bean ice cream and chocolate sauce. Yummm.....
Store leftovers for up to 2 days tightly wrapped in foil or in an air tight container at room temperature.
Friday, November 30, 2012
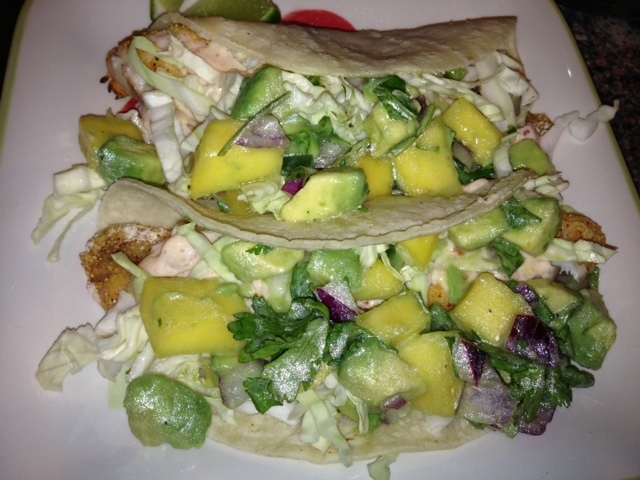
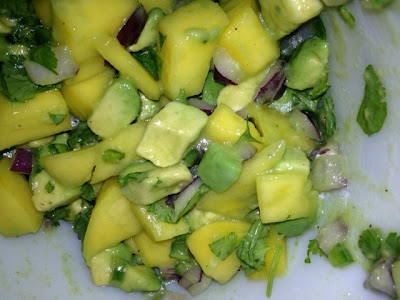
Baked Fish Taco’s with Mango Salsa and Chipotle sauce
Baked Fish Taco’s with Mango Salsa and Chipotle sauce
It’s so hard to be healthy when you live close to your mother who is an amazing cook! My boyfriend’s favorite recipe my mother makes is her fish tacos! But of course they are battered and deep fried and covered in a thick white sauce, and well just delicious! So this week I was on a mission to try and come up with a lighter version which still has that amazing flavor and Earl will not feel so deprived. I have to say, that these Baked Fish Taco’s with Mango Salsa and Chipotle Sauce were amazing. The flavor of the fish, with the sweet-tangy salsa and then the creamy sauce with a little kick made an amazing dinner. I received two thumbs up. And the best part, the whole meal end up costing under $25.00, feeds four people and took only 1 hour and 15 minutes to make. I hope you give this recipe a try and let us know how it works out for you. Happy Cooking!!
Fish:
4 Tilapia Fillets sliced into strips (I got 3 strips per fillet)
¼ cup fresh squeeze lime juice (about 3 lime, keep limes after juicing)
1 teaspoon Garlic salt
Breading:
¼ cup Flour
1/3 cup Cornmeal
1 teaspoon chile powder
1 teaspoon seasoning salt
¼ teaspoon pepper
¼ teaspoon garlic powder
Mango Salsa:
1 ripe mango
1 ripe avocado
2 ½ teaspoons finely chopped jalapeno
¼ cup chopped cilantro
2 tablespoons lime juice
1 tablespoon Canola oil (you can use olive oil too)
Salt and pepper to taste
Chipotle sauce:
¼ low fat yogurt
¼ cup sour cream
¼ light mayo
2 tablespoons Milk ( I used 1%, it’s what I have in my frig)
2 chipotle pepper in adobo sauce, chopped (they come in a can, located in the Mexican section of your market)
½ teaspoon salt
¼ teaspoon pepper
Misc:
Chopped cabbage
8-12 corn tortillas
Place your large cookie sheet in the oven and preheat oven to 475 degrees.
1. Take your sliced fish and place into plastic ziplock bag. Mix the lime juice with the garlic salt and pour over the fish. Add the three cut juiced limes for extra flavor. Shake bag a bit too so that all the fish is coated. Set aside for 20-25 minutes (step #6 start with the fish again)
2. While the fish is marinating, you have perfect time to finish the breading, mango salsa and sauce.
3. Breading: mix together the flour, cornmeal, chile powder, salt, pepper and garlic power in a medium size bowl. Set aside.
4. Salsa: Chop the mango and avocado into small bit sides (one of Earls comments was that I cut the mango a bit too big and it should have been smaller), put into small bowl. Add the chopped red onion, Jalapeno, Cilantro. In another small bowl or cup, add the lime juice, oil, salt and pepper. Mix with a fork till well blended. Pour over the Mango salsa and mix. Do not over mix or the avocado will start breaking down. Put in refrigerator until ready to use.
5. Sauce: Combine yogurt, sour cream, mayo, milk, chopped chipotle pepper, salt and pepper together. Mix till all is well combined. Put in refrigerator until ready to use.
6. Chop cabbage and set aside.
7. Back to fish, remove hot cookie sheet from the oven. Spray with cooking oil (be careful that it doesn’t splash back) . Set on counter. Remove fish from marinade. Pat each piece dry and put into breading mixture. Make sure piece is coated on each side, then place fish on the hot cookie tray. Once all the pieces have been coated, put back into oven. Bake for 4 minutes, then take tray out and flip the piece with a spatula and bake for another 4-5 minutes. Remove from oven.
8. Put your tortillas in the microwave for about 1 minute, they will be nice and pliable. Or you can warm them on a griddle on your stove.
9. Time to start assembling. Take one tortilla, add one piece of fish, add about 1 table spoons of sauce (or more, the stuff is amazing!), add a handful of the cabbage and then 1-2 tablespoons of salsa, fold!
10. Enjoy!!!
Subscribe to:
Posts (Atom)


