Wednesday, February 24, 2016

Meyer Lemon Almond Cakes with Candied Meyer Lemon Slices

Have I told you lately how much I love Meyer lemons? With Meyer lemons at peak season, now would be a good time to remind you...
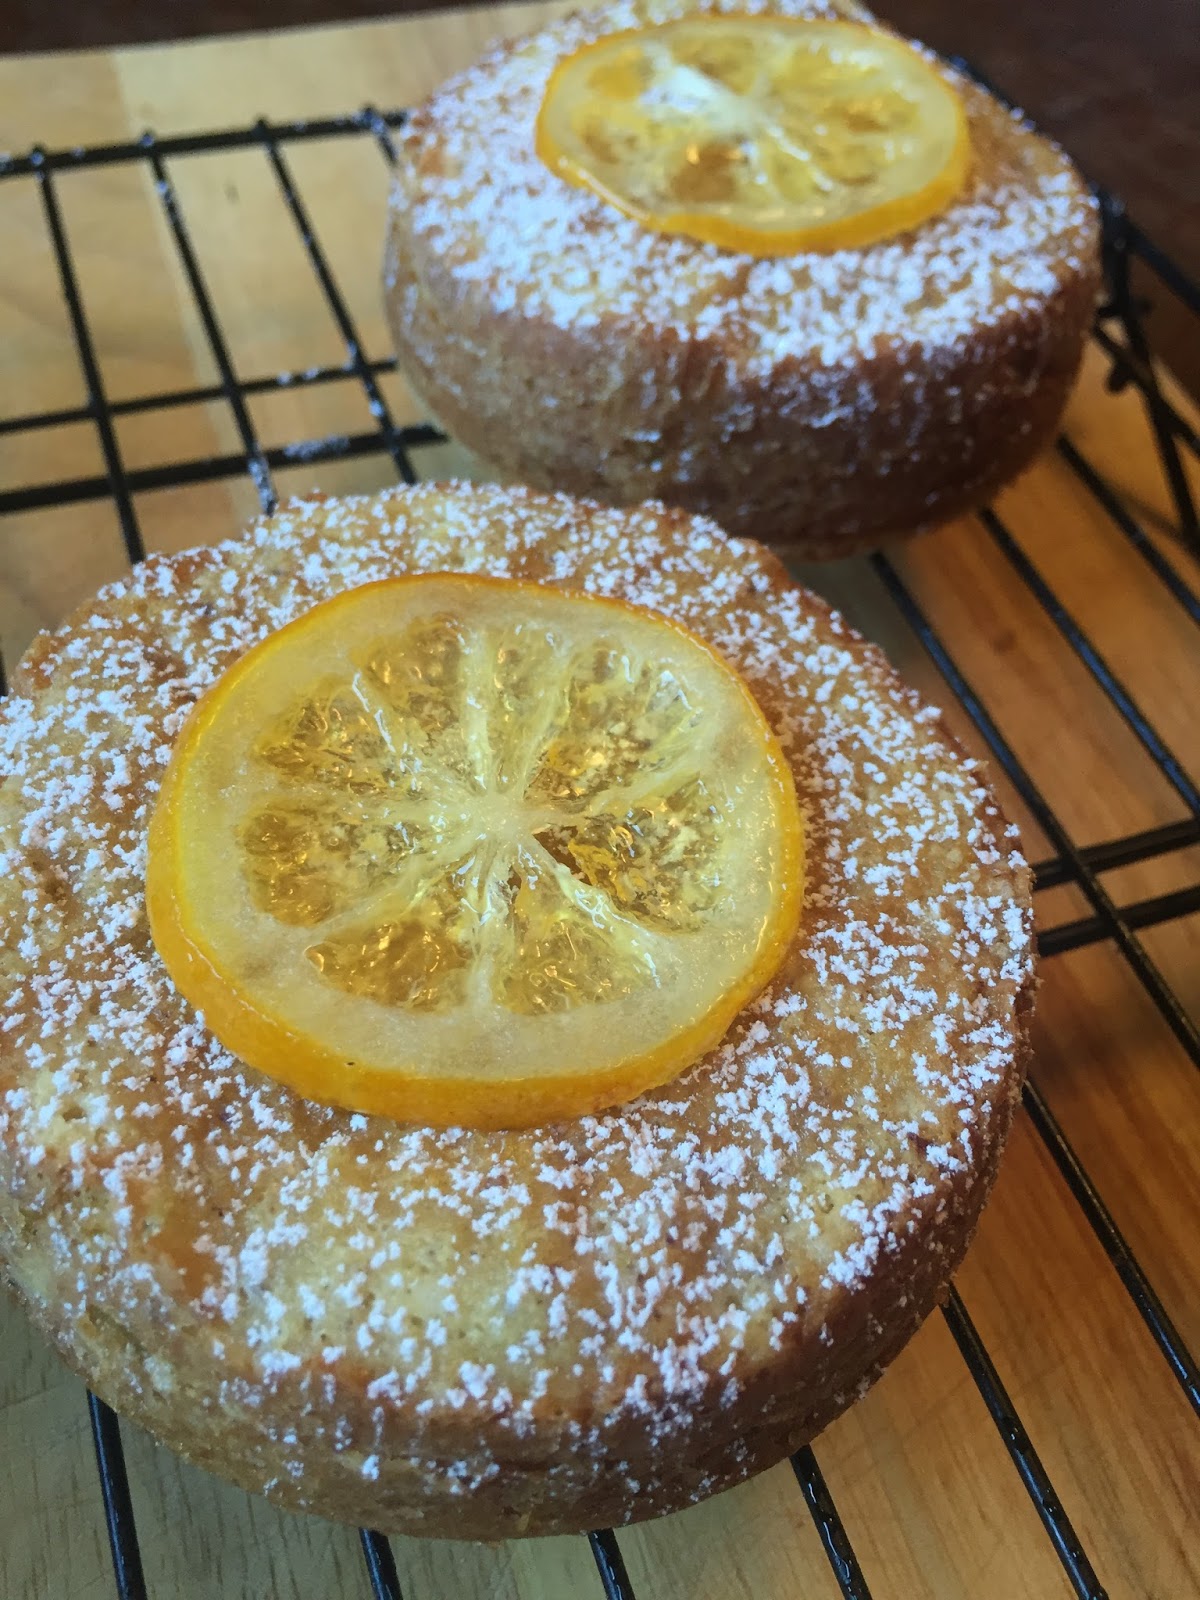


I have a generous co-worker who has been spoiling me with home grown Meyer lemons from his tree. His Meyer lemons are huge and juicy! I seriously was able to get 3/4 cups of juice out of 2 lemons...


Now, when someone gives you lemons, wouldn't it be rude not to bake him (or her) a cake? As a thank you, I baked these Meyer Lemon Almond Cakes with Candied Meyer Lemon Slices. I have to admit, I was pleasantly surprised by how well these cakes turned out! The lemon flavor is present without being too overpowering. The almond flour adds nuttiness and beautiful brown flecks to the batter. The texture of the cake is surprisingly light and fluffy.
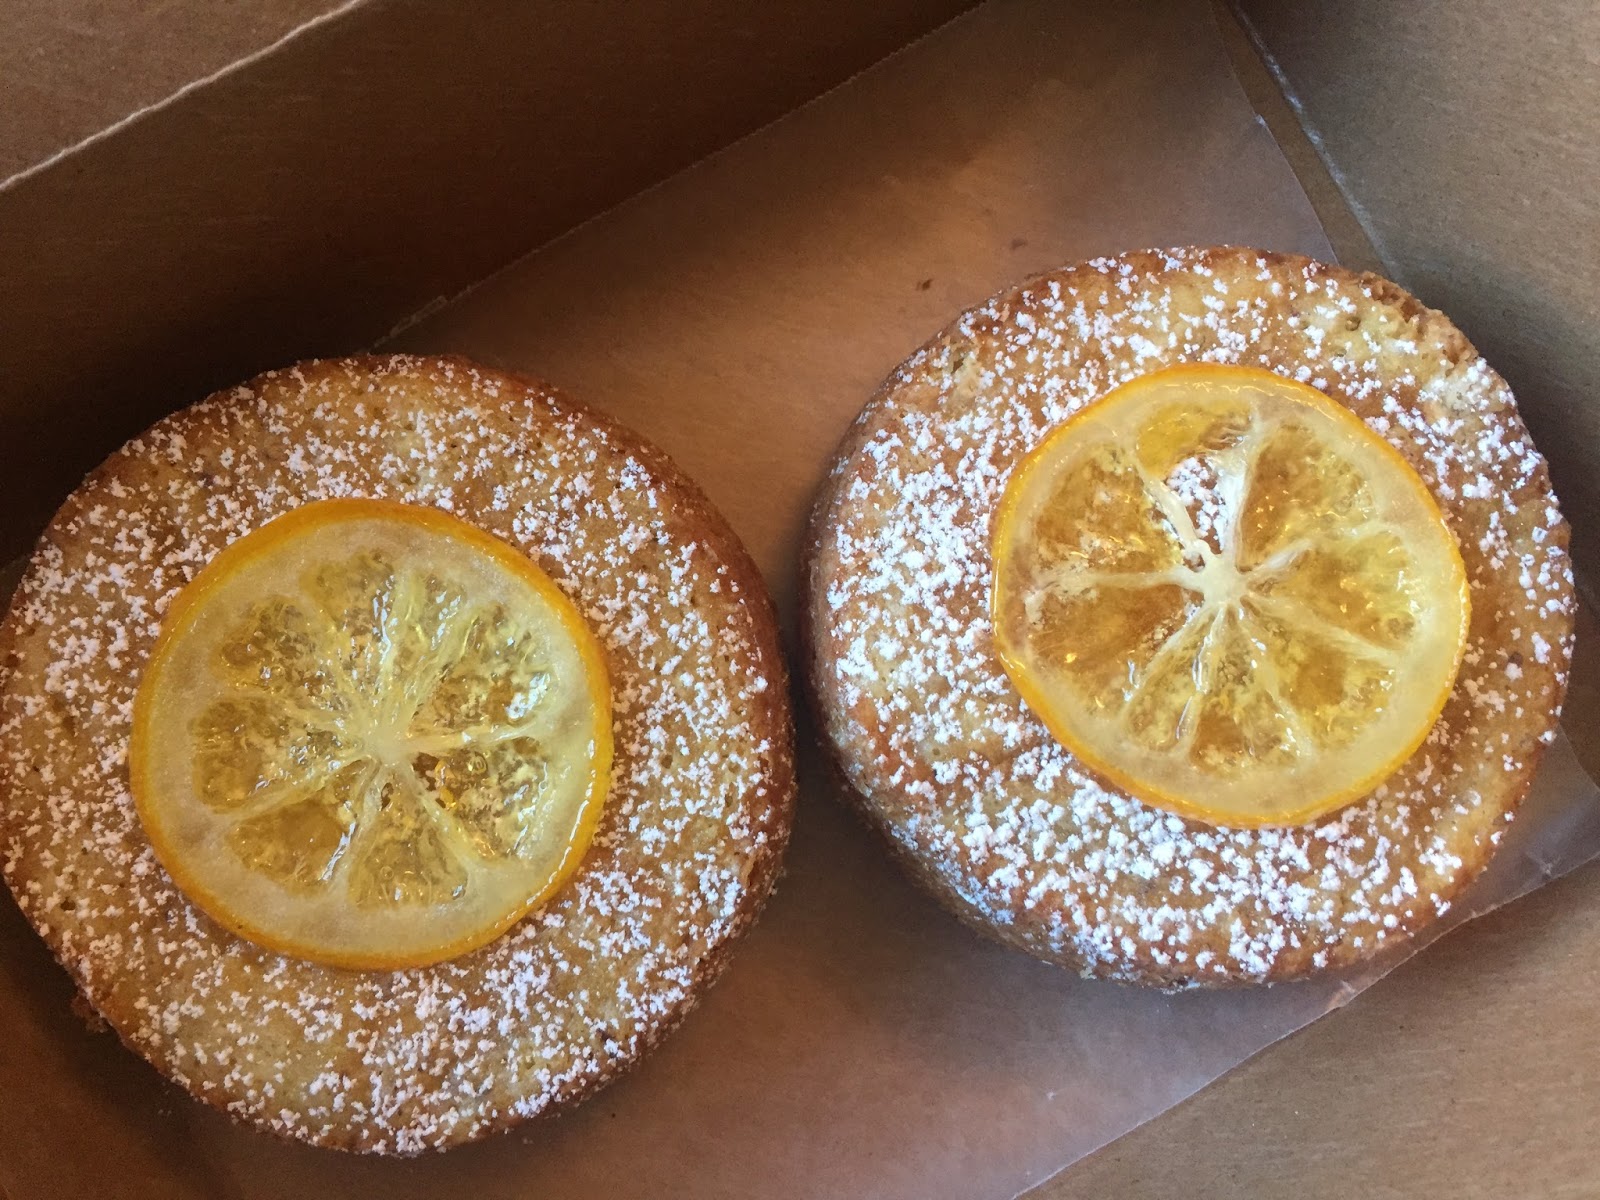


Now, you know me, I can't give anyone a naked cake, so I decided to top them with a light dusting of powdered sugar and a candied Meyer lemon slice. So pretty, don't you think?
 
If you're more of a glaze person, which I tend to be on most days, you can also drizzle the cakes with a fresh Meyer lemon glaze. I've included the ingredients and recipes for both options below.
 
No matter how you top them, I hope you enjoy a delicious slice of sunshine!


Meyer Lemon Almond Cakes w/Candied Meyer Lemon Slices
Makes 5 small 5" cakes or 1 8-9" cake
Serves 5-6

Cake Ingredients:
1 cup cake flour
1/3 cup almond flour (I use Trader Joe's almond meal)
1/2 tsp baking powder
1/2 tsp baking soda
1/8 tsp salt
1 cup granulated sugar
zest from 2 meyer lemons
3/4 cup unsalted butter, softened
2 large eggs, room temp
1 tsp vanilla extract
2/3 cup sour cream (do not use low fat or fat free)

Candied Meyer Lemon Ingredients:
1 meyer lemon, washed and thinly sliced
1 cup granulated sugar
1 cup water

Meyer Lemon Glaze (alternative topping option):
zest of 1 meyer lemon
approx. 2 tablespoons fresh meyer lemon juice
1 cup powdered sugar
1 tablespoon butter, softened


Directions:

Preheat oven to 350f

Butter and flour 5 mini 5" springform pans (or 1 8-9" springform pan).

Whisk together the dry ingredients in a medium size bowl and set aside.

Place the sugar and lemon zest in the bowl of your stand mixer (or a large mixing bowl if using a hand mixer) and squeeze/crush the zest into the sugar using your finger tips. The sugar will become infused with the oils from the zest making it really fragrant.

Add the butter to the sugar/lemon zest mixture and cream at medium speed until light and fluffy, approx. 2 minutes. Scrape down the bottom and sides of the bowl with a rubber spatula.

Add eggs, one at a time, mixing just until combined and scraping down the bowl with a rubber spatula after each addition.

Mix in vanilla extract on low speed just until combined.

With mixer on low speed, gradually mix in the flour mixture just until combined. Do not overmix.

Using a rubber spatula, fold in the sour cream just until incorporated. Do not overmix.

Divide the batter evenly between the prepared springform pan(s). Place the pan(s) on a baking sheet and bake until the cake springs back when lightly touched and/or a toothpick inserted in the center comes out clean (approx. 35-45 minutes for an 8-9" springform pan or approx. 20-25 minutes for mini pans). Note: to prevent overbaking, check for doneness at the beginning of the bake time and continue baking as needed just until done).

Remove and place on a wire cooling rack to cool. Remove from the springform pans. Sprinkle with powdered sugar and decorate with candied meyer lemon slices (if desired). You can also drizzle lightly with a meyer lemon glaze. Both recipes are below.

To make the candied meyer lemon slices - bring sugar and water to a boil in a wide, shallow pan (like a skillet) stirring to dissolve the sugar. Add the lemon slices making sure they're in a single layer and reduce heat to a simmer. Allow to simmer until the rind becomes translucent (approx. 20-30 minutes). Remove from heat and allow the lemon slices to cool in the sugar/water mixture. Remove from the pan and place on a wire cooling rack placed over parchment paper (to catch the drippings). Allow to stand at room temperature for a few hours.

To make the fresh meyer lemon glaze - place 1 cup of powdered sugar in a medium size bowl. Add 1 tablespoon of softened butter, the lemon zest and 1 tablespoon of fresh meyer lemon juice. Mix well with a spoon. Gradually add additional lemon juice, a little at a time, stirring well after each addition until you reach desired consistency. The glaze should be thick but pourable.


Monday, February 15, 2016

Passion Fruit Curd Shortbread Cookies #creativecookieexchange


I am in love with sandy beaches, tropical drinks, warm island breezes and this Passion Fruit Curd! How about you?

I originally shared the recipe as a filling for a Vanilla Cake, but for this month's Creative Cookie Exchange, the theme was "Tropical Cookie Take Me Away" and this amazing Passion Fruit Curd immediately came to mind.
Passion Fruit Curd paired with shortbread cookies is sweet, tropical perfection.


Passion Fruit Curd Shortbread Cookies
Makes approx. 20 cookies
** The curd recipe makes approx. 2 cups of curd. You will have leftover curd which should be stored in the fridge.

Curd Ingredients:
6 egg yolks
1 cup granulated sugar
1/2 cup passion fruit puree
4 tablespoons room temp butter, cubed
pinch of salt

Cookie Ingredients:
1/2 cup unsalted butter, softened
1/4 cup powdered sugar (or granulated sugar)
1 egg yolk
1/2 tablespoon lemon zest
1 tablespoon lemon juice
1/2 teaspoon salt
1 1/14 cups all purpose flour

Curd Directions:
Combine the egg yolks, sugar and passion fruit puree in a saucepan. Cook over med-low heat whisking constantly until thickened enough to coat the back of a spoon (this takes approx. 5-10 minutes). Remove from heat add a pinch of salt and gradually whisk in the butter until completely melted. Strain through a fine mesh strainer into a glass bowl or jar. Cool completely then refrigerate.


Cookie Directions:

Preheat oven to 350f and line 2 baking sheets with parchment paper.

Whisk the flour and salt together in a small bowl and set aside.

Place the butter and sugar in the bowl of your electric stand mixer fitted with the paddle attachment and mix on medium speed until light and fluffy (approx. 3 minutes) scraping down the bowl with a rubber spatula as needed.

Add the egg yolk, lemon zest and lemon juice and mix just until combined.

Add the flour and salt mixture and mix on low speed just until big clumps start to form. Using your hand, form the mixture into a ball.

Shape into 1" balls and place onto prepared cookie sheets. Using your thumb, create a well in the center of each cookie large enough to hold about a tablespoon of curd.

Bake approx. 15-18 minutes or until just lightly browned on the bottom. Remove from oven and fill each well with curd. Return to the oven for 1-2 minutes to allow the curd to set.


Remove from oven and place cookies on a wire cooling rack to cool completely. Sprinkle with powdered sugar.


Serve the same day.

To make ahead, bake the cookies but do not fill with curd. Fill each cookie with curd and sprinkle with powdered sugar just before serving.

Enjoy!!


It’s that time of year again, the time when many of us want to daydream about being somewhere else. A tropical treat is just the ticket! The Creative Cookie Exchange is going all tropical this February, and that could mean anything from fruit to spices to cut-out cookies. We’ve got you covered!


You can also use us as a great resource for cookie recipes. Be sure to check out our Pinterest Board and our monthly posts (you can find all of them here at The Spiced Life). You will be able to find them the first Tuesday after the 15th of each month! Also, if you are looking for inspiration to get in the kitchen and start baking, check out what all of the hosting bloggers have made:

Thursday, February 4, 2016

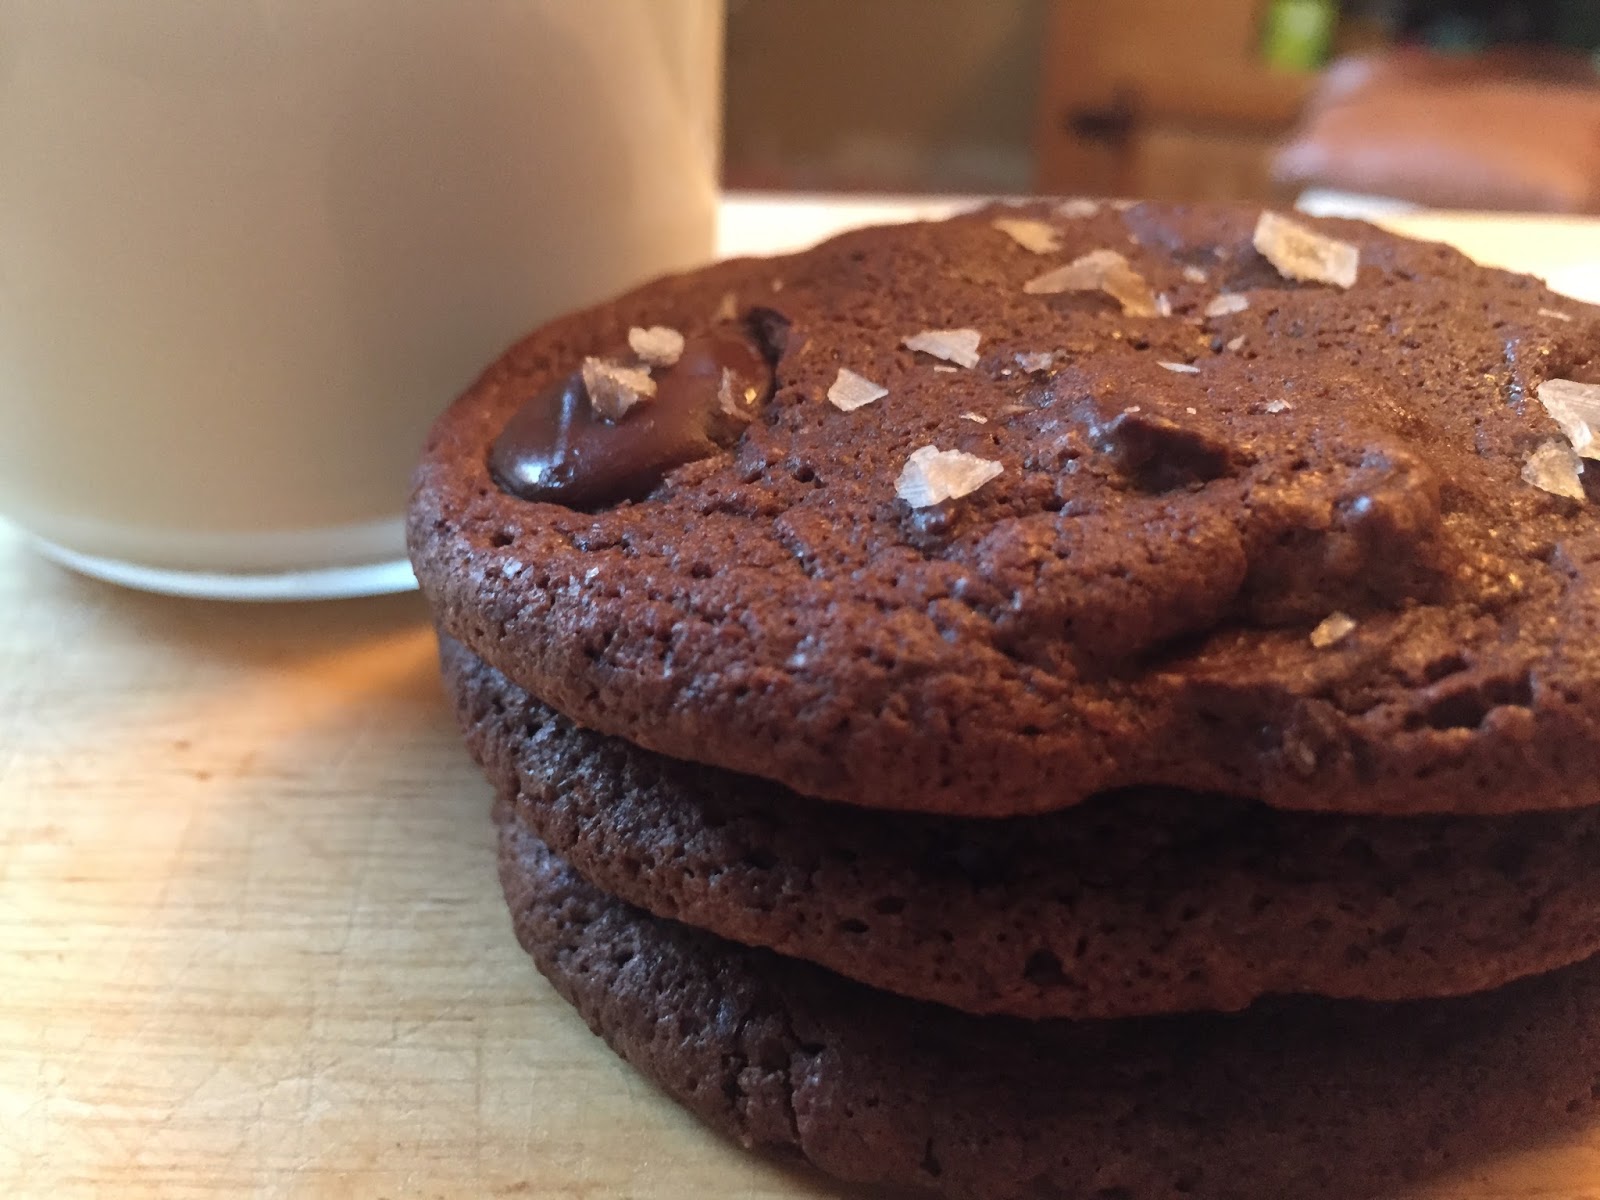
Dark Chocolate & Espresso Cookies with Smoked Sea Salt for #theleftoversclub

I may be tardy to the party, but have you discovered smoked, flaked sea salt? Have you ever sprinkled it on chocolate chip cookies? The flavor combination is amazing! The smokiness of the sea salt adds a depth of flavor you don't get with just regular flaked sea salt. Now add dark chocolate and espresso to the equation and you have a cookie that means serious  business.  
 
These cookies right here are my new obsession...


My partner for this month's Leftover's Club is Kathia from Basic and Delicious. Kathia and I have been partners before and she actually lives in the same city (well county) that I do...San Diego! I was really excited that my partner lives so close, because let's face it, stale cookies are no fun. I knew these cookies would arrive to her while still fresh and I am a stickler for freshness when it comes to baked goods. Honestly, I could have just hand delivered them straight from my oven to her door. Why didn't I think of that sooner?
 
I think Kathia will really enjoy these cookies. They're bold, sophisticated and fun!
 
If you'd like to join in on the fun and swap baked goods each month with a fellow food blogger, please sign up at Alwayz Bakin. We'd love to have you in the group!


Dark Chocolate Espresso Cookies w/Smoked Flaked Sea Salt
Adapted from Alice Medrich
Makes approx. 20 cookies


Ingredients:
1/3 cup all purpose flour
1/4 tsp salt
1/4 tsp baking soda
1/4 cup coconut oil
4 ounces of unsweetened chocolate, chopped
6 ounces of dark chocolate cut into chunks
1 1/3 cup sugar
2 large eggs room temperature
1 tsp vanilla extract
1 1/2 tsp espresso powder


Directions:

Place the coconut oil and unsweetened chocolate chunks in a bowl placed over a pan of barely boiling water. Heat until melted stirring often. When completely melted, remove the bowl from the heat and allow the chocolate mixture to cool to room temperature.

Place the eggs, sugar, vanilla extract and espresso powder in the bowl of your stand mixer fitted with the paddle attachment (or use a large bowl and your electric hand mixer). Mix on med-high speed until light and fluffy (approx. 5 minutes). The mixture should stream from the paddle in thick ribbons.

Using a rubber spatula fold in the cooled chocolate mixture, then fold in the flour mixture, then fold in the dark chocolate chunks.

Refrigerate the dough for 1 hour.

After 1 hour, preheat your oven to 350f and line a few baking sheets with parchment paper.

Using a small cookie scoop, place scoops of dough onto the prepare cookie sheets approx. 2" apart. Sprinkle the cookies with the smoked, flaked sea salt.

Bake one sheet at a time (unless you have double oven) for approx. 10 minutes, rotating the cookie sheet front to back halfway through the baking time. Sprinkle a little more sea salt on each cookie halfway through the baking time if needed.

Remove from oven and allow the cookies to cool directly on the cookie sheet for 2 minutes. Remove from the cookie sheet and place on a wire cooling rack.


Wednesday, February 3, 2016

Healthier Alternative to Starbucks Loaf Breads


Ok, I know it's the time of year when we should be dieting, and part of me is per se, but one thing I have probably mentioned before is I have a very, very hard time giving up bread! Any type, any kind, I LOVE them!  
So, in keeping with the healthier eating goal, I had to find a way to stop going to Starbucks for coffee and piece of loaf bread or muffin every other day :-).  
For this recipe, I was actually inspired by an episode of Trisha Yearwood's Food Network show.  She made a lemon loaf that looked so delicious I had to try it! I started there and revised the recipe to fit what I wanted it to be...a healthier, delicious replacement for my Starbucks obsession :-)  
I have been working on this easy and delicious loaf bread recipe for a few weeks now (trust me, I have baked plenty of loaves these last couple of weeks!) and I have finally perfected it! Now that I have my perfect recipe, I can bake it on Sunday and have my breakfast bread for the week which I enjoy with yogurt or maybe a boiled egg and coffee I brew myself at home.
Oh, I still miss my morning Starbuck runs, but now they  have at least decreased and I actually enjoy it as a special treat. Plus I'm satisfying my craving for bread with a recipe that is probably better for me while saving some money in the process!

So now about the bread.... it's s hearty, flavorful, and perfect for coffee.  I have made it most often with banana, not the brown mushy kind more suited for banana bread, but with a perfect yellow banana at just the perfect ripeness for eating  (picture below).


I have occasionally switched out the banana for blueberries and the bread is just as good. Trust me, the base recipe is what counts! Switch out the fruit and use your favorite.

I hope you enjoy the recipe. Happy Cooking Everyone!


Ingredients
1 cup All Purpose Flour
1 cup Wheat Flour
3/4 Sugar (I have used 1/2 cup if you want to make it less sweet.
2 teaspoons baking powder
1/2 teaspoon baking soda
1/2 teaspoon salt
2 Bananas (cut into 1/2" pieces) or 1 cup of blueberries
1/2 Pecans (optional)
1/4 mini Chocolate Chips
2 large eggs
1/3 cup full fat or lowfat yogurt (I prefer vanilla, honey or maple)
1/3 cup vegetable oil
1/4 cup melted butter  (unsalted, if you use salted, remove the 1/2 teaspoon salt above)
1 tablespoon vanilla extract
1/2 cup lowfat milk (I have used both 2% and 1%)


Directions:
1. In large bowl, whisk the flours, sugar, baking powder, baking soda and salt until well combined.

2. Add the chopped banana (or blueberries), nuts and chocolate chips.  Stir with a spoon until everything is coated in flour.


3. Create a well in the middle of flour/banana mixture and set aside.

4. In a second bowl, whisk together the 2 eggs, yogurt, oil, melted butter ,vanilla and milk.


5. Once combined, pour into the well you created in the flour mixture. Stir with a spoon just until all of the flour has been blended into egg mixture. DO NOT OVER MIX.


6. Pour into the prepared loaf pan.


7. Bake at 350 for 1 hour


If you would like to add a simple glaze... just combine 1/4 cup powder sugar and 1 tablespoon milk and 1/4 teaspoon of vanilla extract. Pour over slightly warm bread.


.  

Monday, January 25, 2016

Slow Cooker Turkey 2-Way Chili

I'm excited to start a new Healthy (Mostly) Slow Cooker Recipe Series on the blog. I'll be sharing (mostly) healthy recipes you can make in your slow cooker with a few decadent recipes thrown in every once in a while!


This first recipe I am calling "Turkey 2-Way" Chili. I incorporated 2 types of turkey, ground turkey and smoked turkey sausage, for extra flavor. I love using smoked meats in chili and this recipe does not disappoint!


I'm a bit of a wimp when it comes to spices, so if you like your chili on the spicy side, feel free to add more chili powder, however I encourage you to taste the chili after a few hours of cooking first and then adjust the spices to suit your taste. The 2 tablespoons of chili powder plus the cayenne pepper might be enough for you...


I'd also like to point out that the consistency of my chili was thicker than I would have liked. I recommend adding some broth to loosen it up, which I have added to the recipe below.

The beauty of this chili is that you can customize it to suit your taste! If you prefer thicker chili, like the photos, you can leave out the broth or you can judge the consistency about 3/4 of the way through the cooking process and add the broth at that time if you prefer chili with more liquid like me.
However you prefer it, I hope you enjoy!


Turkey 2-Way Slow Cooker Chili
Serves 6


Ingredients:
2 tablespoons olive oil
1 lb ground turkey
1 lb smoked turkey sausage, diced
1 medium onion diced
2 cloves of garlic, minced
2 15oz cans black beans, drained and rinsed
2 15oz cans red kidney beans, drained and rinsed
2 15oz cans petite diced tomatoes (do not drain)
2 15 oz cans tomato sauce
1 1/2 cups vegetable broth
1 15oz can fire roasted corn or regular corn
1/2 cup pickled jalapenos
2 tablespoons chili powder
1 tablespoon ground cumin
1/2 tsp cayenne pepper
1/2 tsp smoked paprika
1 tsp salt
1 tsp pepper


Directions:

In a large pan, heat 2 tablespoons of olive oil. Add the diced smoked sausage and cook until browned. Remove from pan and add the ground turkey. Cook, breaking apart with a wooden spoon, until browned and no longer pink. Try to get some good brown color on the ground turkey meat for additional flavor. Remove from pan and place the meat into your slow cooker.

Add the remaining ingredients to the slow cooker and stir to combine.

Cook on low for 6 hours. Taste and adjust seasonings as needed.

Serve topped with cheese, tortilla chips, sour cream, diced green onions, avocado and cilantro if desired. Of course, if you add the cheese, sour cream etc... it makes the chili less healthy : )

Saturday, January 23, 2016

Cookie Butter and Raspberry Jam Heart-print Cookies


Who doesn't love Valentine's Day? I'm a sucker for anything heart shaped (as you can tell from the blog logo). This month's Creative Cookie Exchange theme was Hearts/Love....totally up my alley.


I had a total baking fail with my Raspberry Palmiers so I went with these Cookie Butter and Raspberry Jam "Heartprint" Cookies. The heart shape makes them perfect for Valentine's Day, but really they would be cute for any occasion especially if you're a cookie butter fan like I am!


Cookie Butter & Raspberry Jam Heart-print Cookies
Makes 24 cookies

Note: This recipe requires a total of 30 minutes of chilling time

Ingredients:
1 1/2 cups all purpose flour
1 1/2 teaspoons baking powder
1/2 teaspoon salt
1/2 cup (1 stick) unsalted butter, softened
1/2 cup granulated sugar
1/2 cup light brown sugar
1 cup Trader Joe's Cookie Butter (or Speculoos Cookie Butter)
1 large egg, room temp
1/2 teaspoon vanilla extract
1/3 cup seedless raspberry jam

Directions:

Place the raspberry jam in a small bowl and stir to loosen. Set aside.

Whisk the flour, baking powder and salt in a medium bowl. Set aside.

Place the butter and both sugars in the bowl of your electric stand mixer fitted with the paddle attachment (or use your electric hand mixer). Cream the butter and sugars together on medium speed until light and fluffy (approx. 1 minute). Scrape down the beater and the bottom and sides of the bowl with a rubber spatula.

Add the cookie butter and mix on low speed until combined.

Add the egg and vanilla and mix on low speed until combined. Scrape down the paddle and bottom & sides of the bowl again.

Add the flour mixture and mix just until combined.

Refrigerate the dough for 10 miunutes to make it easier to handle.

Remove the dough from the fridge and roll into 1 1/2" balls.

Line 2 large cookie sheets with parchment paper. Place 12 balls approx. 2" apart on each cookie sheet. With the palm of your hand (or bottom of a glass), flatten each ball into disk approx. 1 3/4" in diameter.

Using your finger, or the bottom of a wooden spoon, make a heart pattern into the top of each cookie. Refrigerate for 20 minutes.


While the dough is chilling, preheat the oven to 350f

After 20 minutes, place the baking sheets in the oven and bake approx. 10 minutes. The cookies should look slightly set but should not be all the way done.

Remove from oven. At this point, the heart pattern will probably have faded quite a bit. Using your finger, or bottom of a wooden spoon, reshape the heart pattern. Fill each heart with raspberry jam and return to the oven to bake for another 2 minutes.


Remove from the oven. Cool on the cookie sheets for 30 seconds then remove to a wire cooling rack to cool completely.

These cookies are best the same day they are made/. Store leftovers tightly covered in an air tight container for up to 1 day.

Thursday, January 7, 2016

Brown Butter & Nutella Chocolate Chip Cookie Bars with Fleur de Sel for #TheLeftoversClub

For this month's Leftovers Club, I was paired with Michele! Michele has a great blog called Always Bakin (love the name!) and has recently taken over the reigns as fearless leader/organizer extraordinaire of The Leftovers Club!  Our previous fearless leader, Elizabeth from Food Ramblings, just had an adorable baby boy just a few days ago! Congratulations, Elizabeth!! Thank you so much for all you have done for the club.
 
This month, I had a really tough time deciding which recipe I wanted to share. I actually sent Michele 2 different options because I was so indecisive... these Brown Butter & Nutella Chocolate Chip Cookie Bars and a loaf of Sour Cream Cinnamon Coffee Cake. Well, Michele was absolutely no help at all because she loved them both! Haha....


I decided to share the recipe for the bars because well...brown butter+nutella+chocolate+fleur de sel = duh! Need I say more? I will definitely post the recipe for the Sour Cream Cinnamon Coffee Cake later, but for now here's a preview pic...


I really enjoy being a part of The Leftovers Club. Swapping baked goods with fellow bloggers is a lot of fun! If you'd like to sign up to be a part of the club, I highly recommend it. Check out all of the details here....http://alwayzbakin.com/the-leftovers-club/


Brown Butter & Nutella Chocolate Chip Cookie Bars w/Fleur de Sel
Makes 1 9"x13 pan, approx. 18 bars
 
Note: This recipe requires chilling so plan ahead
 
Ingredients:
2 sticks of unsalted butter, cut into tablespoon size pieces
1 cup dark brown sugar
1/2 cup granulated sugar
1 large egg + 1 large egg yolk, room temp
2 teaspoons vanilla extract
1 tablespoon sour cream
2 1/4 cup all purpose flour
1 teaspoon baking soda
1/1 teaspoon salt
3/4 cup nutella
Fleur de Sel for sprinkling
 
Directions:
 
Make the brown butter
 
Place the butter in a sauce pan, and melt over medium-low heat, swirling occasionally. Continue with this process...the butter will foam up and have lots of bubbles, then the foaming will gradually subside, the butter mixture will become translucent and brown bits will form at the bottom of the pan. The butter will also become fragrant and smell nutty/caramel-y. Once the brown bits have formed, remove the butter from the heat and pour into a glass bowl. Cool the brown butter completely. approx 1-2 hours. I like to wait until mine has somewhat solidified.
 
Once the brown butter has cooled completely, scoop/pour it into the bowl of your stand mixer fitted with the paddle attachment. Make sure you get all of the brown bits, that's the flavor!
 
Add both sugars to the bowl and mix on low speed until well combined (approx 30 seconds). Scrape down the bottom and sides of the bowl.
 
Add the eggs, vanilla extract and sour cream. Mix on low speed until combined. Scrape down the bottom and sides of the bowl.
 
Add the flour mixture and mix on low speed just until combined. Fold in the chocolate chips.
 
Refrigerate the dough for 3 hours or overnight.
 
Line a 9x13" pan with nonstick foil or spray regular foil with nonstick cooking spray.
 
Place 2/3 of the dough in the pan and press into an even layer. Tip: Since the dough is somewhat stiff when it comes out of the fridge, I found it was easier to place small chunks of the dough all over the bottom of the baking pan (they should be close together) and then press them together in an even layer. If you put one huge chunk of dough into the pan and try to press it out into an even layer that way, it's a lot harder to do.
 
Heat the nutella in the microwave for a few seconds to loosen it up, then scoop/pour it into 3 rows across the length of the pan. Tip: Imagine cutting the bars into 3 rows along the length (the 13" side) of the pan. You want to place your 3 rows of nutella in the center of those 3 rows so that the streak of nutella is in the center of each bar when you cut it.
 
Crumble the remaining cookie dough randomly over the top. Tip: Don't cover up the stripes of nutella too much, you want those to be peaking out a bit when they're done baking so you see little puddles of nutella.
 
Bake at 350 for approx 15-20 minutes. Do not overbake! The dough should look lightly golden brown but should still be somewhat what (not completely set or dry). Tip: If you overbake, the cookie bars will be dry but don't worry, there's a fix for this! Just microwave the bars a few seconds before you eat one to warm it up and make it gooey.
 
Remove from the oven and place on a wire baking rack to cool for 10 minutes. After 10 minutes, sprinkle a touch of Fleur de Sel over the top (try to get some of it on the puddles of nutella peaking out of the dough).


Allow to cool completely, then remove from the pan using the foil as your handle. Cut into bars & serve!
 
Leftovers can be stored in an air tight container at room temp for up to 2 days or send some to your Leftovers Club Partner like I did! : )