Tuesday, June 21, 2016

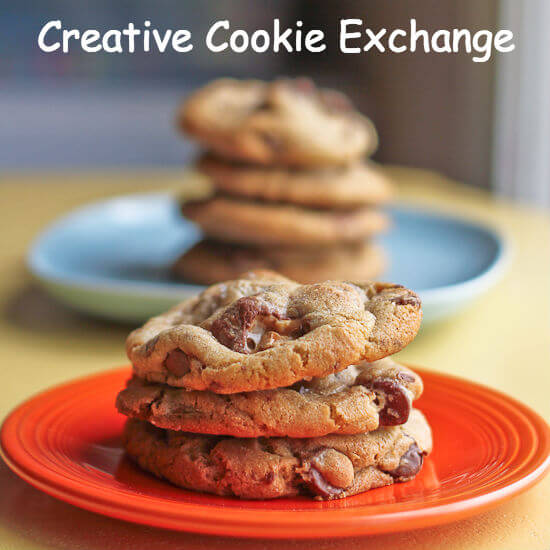
No Bake Cookie Butter S'mores Bites #CreativeCookieExchange

I've been on a bit of a S'mores kick lately. I recently made these decadent Nutella S'moreos for my Leftovers Club partner. There's something about S'mores that's synonymous with Summer don't you think?


The theme for this month's Creative Cookie Exchange was no bake cookies. After all, who wants to turn on the oven on a hot Summer day? Not me and I'm pretty sure you don't either. On those days, these No Bake Cookie Butter S'mores Bites are the perfect treat to satisfy your sweet craving.
So leave the oven off, grab an ice cold drink, kick back in front of the fan and enjoy one of these No Bake Cookie Butter S'mores Bites!


No Bake Cookie Butter S'mores Bites
Makes 12 large cookies or one 13"x9" pan


Ingredients:
3 tablespoons unsalted butter
3/4 cup cookie butter
6 cups mini marshmallows + 2 cups
6 cups Golden Grahams cereal
2 cups dark chocolate

Place the 2 cups of chocolate chips in the fridge 15 minutes prior to making. This will help keep them from melting.

Spray a 12 cup silicone muffin pan with nonstick cooking spray or line a 13"x9" pan with nonstick foil (alternatively line with regular foil and spray the foil with nonstick cooking spray).

Place the butter and cookie butter in a large pot and stir constantly until melted. Add the 6 cups of marshmallows and stir constantly until melted. Remove from heat and fold in the cereal then fold in the chocolate chips and remaining 2 cups of marshmallows.

Divide evenly between the muffin cups and press firmly. Allow to cool completely. Once cool, carefully remove from the pan and serve.

Store leftovers in an air tight container for up to 2 days.


To hot to turn on your oven? The theme this month for the Creative Cookie Exchange group is No Bake Cookies! If you are a blogger and want to join in the fun, contact Laura at thespicedlife AT gmail DOT com and she will get you added to our Facebook group, where we discuss our cookies and share links. You can also just use us as a great resource for cookie recipes--be sure to check out our Pinterest Board and our monthly posts (you can find all of them here at The Spiced Life). We all post on the first Tuesday after the 15th of each month! Also, if you are looking for inspiration to get in the kitchen and start baking (or this month "no baking"), check out what all of the hosting bloggers have made:

Wednesday, June 1, 2016

Nutella S'moreos for #theleftoversclub

The theme for this month's Leftover's Club exchange was nut butters! Originally, I was planning to post a cookie recipe using homemade maple roasted almond butter (sounds yummy doesn't it?), but the recipe didn't quite turn out as I had planned and I discovered that I don't really like almond butter. As hard as I try, my mind can't seem to grasp the fact that it's just not peanut butter. I think the taste of the almonds is too subtle for me and I keep expecting to taste peanuts. I was hoping that roasting the almonds in maple syrup and adding cinnamon to the mixture would help amp up the flavor, but neh...almond butter is just not my thing.

 
So I went with plan B - Nutella! You can't go wrong with Nutella can you? Chocolate + Hazelnuts = Yum. Plus I had a huge jar or it in my pantry...

 
I debated for quite a while about what to make and decided on not one but two recipes! Homemade Nutella Puff Cereal for my exchange partner Michele's adorable son, Nicholas (he has the same name as my son!) and these decadent Nutella S'moreo Cookies for Michele. Michele does such a great job as the leader of The Leftover's Club I thought she deserved something extra special.


I have to admit that I was a little disappointed with the outcome of the Nutella Puff Cereal. While the dough is super easy to make, pinching the dough into tiny balls and rolling them was a little time consuming and too repetitive for me. This would be a great task for the kids to help with (hint,hint)! Also, I thought the Nutella flavor didn't really shine through enough. I'm curious to hear if Michele's son, Nicholas, gives them the thumbs up or thumbs down.
Here's the link to the recipe I tried. If you're into making your own homemade cereals (and you have someone to help you roll the tiny balls), I encourage you to give it a try. The recipe makes a small batch, enough for about 2 servings.
Now, onto these decadent Nutella S'moreo Cookies....I mean c'mon, just look at these things.
Who knew making your own homemade oreo cookies was so easy? And they totally taste like Oreos only better. Just think, you can fill them with whatever filling you want! Since the theme was nut butters, I made a creamy Nutella filling, topped it with some marshmallow fluff and graham cracker crumbs. Oh mama!
I really hope they are delivered to Michele intact and that she enjoys them! Thanks Michele for all you do for The Leftovers Club!
If you are interested in swapping yummy treats each month with fellow food bloggers, sign up over at Michele's blog, Alwayz Bakin!


Homemade S'moreos with Nutella Cream Filling & Marshmallow Fluff
Adapted from Crazy for Crust
Makes approx. 12 sandwich cookies

Ingredients:
1 1/4 cup all purpose flour
1/3 cup dark cocoa powder (unsweetened)
1/4 tsp salt
1/2 tsp baking soda
1 stick unsalted butter, room temp
2/3 cup light brown sugar, packed
1/4 cup granulated sugar
1 large egg, room temp
1 tsp vanilla extract

Filling Ingredients:
1/4 cup unsalted butter, room temp
1/2 cup Nutella
1/4 tsp salt
1 cup powdered sugar, sifted
2 tablespoons heavy whipping cream
1 jar Marshmallow Fluff
1/3 cup graham cracker crumbs

Directions:

Preheat oven to 350f and line 2 baking sheets with parchment paper

In the bowl of your stand mixer fitted with the paddle attachment (or using your electric hand mixer), cream the butter and both sugars for approx. 1 minutes scraping down the sides with a rubber spatula as needed.

Add the egg and vanilla extract and mix until combined. Slowly add the dry ingredients just until combined.

Scoop 1 1/2 tablespoon size balls onto the prepared baking sheets and bake at 350f for approx. 10 minutes or until the cookies are set and no longer look shiny. Remove from oven and allow to cool on the baking sheets. Remove to a wire cooling rack.

Make the filling

Place the butter, nutella and salt in the bowl of your stand mixer fitted with the paddle attachment (or use your electric hand mixer) and cream together until smooth. Add the powdered sugar and mix until combined. Add the heavy whipping cream and whip and med-high speed until creamy (approx. 1 minute). Place the filling in a piping bag (decorating tip optional).

Assemble the cookies

Once the cookies have cooled, take half of the cookies and place them upside down. Pipe the nutella filling around the edges of the cookies. Dollop some marshmallow fluff on top then sprinkle with some of the graham cracker crumbs. Place the remaining cookies on top of each of the filled cookies creating cookie sandwiches.


These cookies are best eaten the day they are assembled. You can bake the cookies a day ahead.

The Perfect Strawberry Custard Cream pie


Growing up there was one dessert that always stood out from all of my mom's famous desserts and that was her Strawberry Custard Cream Pie.  She learned to make this pie from a Mexican cook that would broadcast recipes over the radio for the listeners to write down.  This pie was so yummy, I still remember requesting it for my birthday.  
 
As the years went by, somehow the recipe was lost in one of our moves. Mom tried recreating it once, but it just didn't taste the same.  A few months ago, I was craving this pie so badly I could literally taste it. I thought to myself, I have a food blog.. I can do this this! 
 
So I daringly attempted to recreate the famous, lost Strawberry Custard Cream Pie recipe at home. My starting point was everything I could remember about the pie... 
 Pie crust, a strawberry custard filling , fresh strawberries and lots of Cool Whip (mom didn't use whipped cream back then, Cool Whip was cheaper ) 
 
I found a good basic custard recipe (originally for a banana cream pie), added strawberries, replaced the Cool Whip with heavy whipping cream and used an organic pie crust that I love.  When the pie was finished, I brought it to a family dinner and waited for the reactions...
 
  My sister Miriam was the first to say, "Did you find mom's recipe?" SCORE!  I knew I had it when I took the first bite...
 
I did my second test run of the recipe this past weekend, made one or two minor adjustments and bingo! Mom's pie was back and even better! 
 
 This pie is delicious. Everything you want in a cream pie; creamy, fluffy, full of strawberry flavor. The perfect pie for strawberry season.  I brought some to a party and not a single piece was left. I had to keep myself from taking a second piece, trust me I wanted it!  So I guess I will need to make another two very, very soon! 
 
Of all the recipes I'm proud to call my own, this has to be at the top of the list. I hope you give it a try.
 
 
Happy Cooking Everyone

The Perfect Strawberry Custard Cream Pie
Make two 9" pies

Ingredients:

2 premade pie crusts
1 1/2 cups whole milk
1/2 cup heavy whipping cream
7 egg yolks
1/2 cup light brown sugar
1/4 cup granulated sugar
1/3 cup cornstarch
pinch of salt
2 teaspoons vanilla extract
3 tablespoons sweet cream butter, softened
1 cup of chopped strawberries
2 1/2 cups heavy cream
1 teaspoon vanilla
3 tablespoons powdered sugar
10 strawberries, cut in 1/2 for decoration

Directions

Prep work:
1. Bake Premade crust per directions on package and set to cool.  Make sure you poke holes with a fork for venting.


 Most Pre-make crust taste ok, but this brand is absolutely delicious.  Tastes like you made it yourself.. super flakey


2. Whip 2 1/2 cups heavy whipping cream until soft peaks have formed. Add 1 teaspoon of vanilla extract and 3 tablespoons of powdered sugar and whip to combine. Refrigerate until ready to use.

3. Chop strawberries into small pieces to equal one cup chopped (about 7-8 large berries). Place on a paper towel to remove excess moisture. Refrigerate until ready to use.

Filling layer #1
1. Bring milk to a boil. Do not let it spill over. Once boiled, set as side.
2 . In a heavy pot, add egg yokes, brown sugar, white sugar, cornstarch and salt. Whisk together.


3.  Add 1/4 cup of the hot milk to the egg mixture. Whisk together quickly so it doesn't scramble the eggs.  Add another 1/4 cup of milk, and continue whisking. Repeat until you are out of milk.


4. Put the egg mixture on the stove at medium heat. Continue to whisk.
5. Once the mixture begins to boil it will become really thick, continue to whisk for another minute or two until all liquid had turned into a thick velvety mixture. Remove from stove.


6. Whisk in vanilla and set aside for 5 minutes.
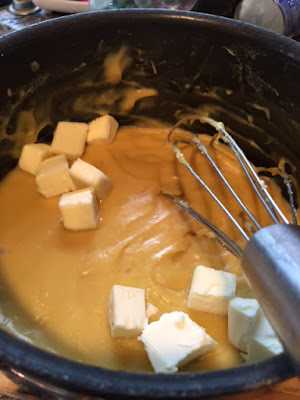
7. After 5 minutes, add the butter cut into small cubes.  Whisk until completely melted.

8. Pour the custard in to a glass bowl and cover with either plastic wrap or parchment paper. Put into refrigerator for 1-2 hours, till custard is chilled. (the custard can be chilled up 3 days)

9. Once custard has cooled , beat with electric mixer for 4-5 minutes to get nice and creamy.


10. Add 1/2 cup of custard to the bottle of each pie crust.


Filling layer #2
1. Take the remaining custard, and beat in 2 cups of the heavy whipping cream you prepared earlier and add one drop of red food dye for color, just until blended (approx. 1 minute). Do not over beat or it will break down the cream.


2. Add 1 cup of chopped strawberries.  Mix until blended, but do not over mix or it will breakdown the cream.


3. Divide the filling between both pies


Filling Layer #3
1. Take the remaining whipped cream and divide between both pies.

2. Decorate with the strawberries you cut in half.

Chill pie for at least 3 hours, honestly the longer this pie chills the better the flavor.