Showing posts with label Cookie Butter. Show all posts

Tuesday, June 21, 2016

No Bake Cookie Butter S'mores Bites #CreativeCookieExchange

I've been on a bit of a S'mores kick lately. I recently made these decadent Nutella S'moreos for my Leftovers Club partner. There's something about S'mores that's synonymous with Summer don't you think?


The theme for this month's Creative Cookie Exchange was no bake cookies. After all, who wants to turn on the oven on a hot Summer day? Not me and I'm pretty sure you don't either. On those days, these No Bake Cookie Butter S'mores Bites are the perfect treat to satisfy your sweet craving.
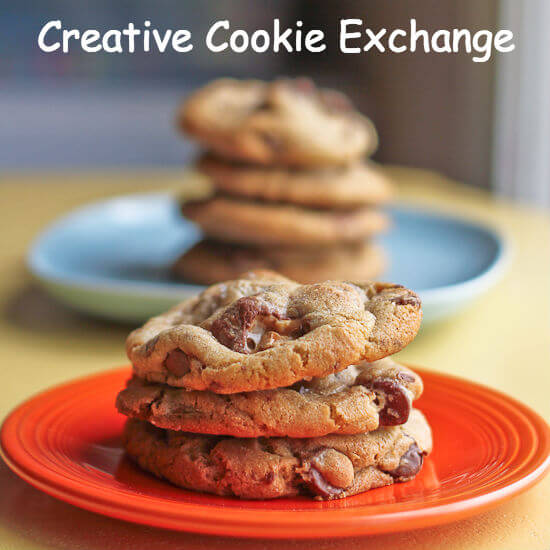
So leave the oven off, grab an ice cold drink, kick back in front of the fan and enjoy one of these No Bake Cookie Butter S'mores Bites!


No Bake Cookie Butter S'mores Bites
Makes 12 large cookies or one 13"x9" pan


Ingredients:
3 tablespoons unsalted butter
3/4 cup cookie butter
6 cups mini marshmallows + 2 cups
6 cups Golden Grahams cereal
2 cups dark chocolate

Place the 2 cups of chocolate chips in the fridge 15 minutes prior to making. This will help keep them from melting.

Spray a 12 cup silicone muffin pan with nonstick cooking spray or line a 13"x9" pan with nonstick foil (alternatively line with regular foil and spray the foil with nonstick cooking spray).

Place the butter and cookie butter in a large pot and stir constantly until melted. Add the 6 cups of marshmallows and stir constantly until melted. Remove from heat and fold in the cereal then fold in the chocolate chips and remaining 2 cups of marshmallows.

Divide evenly between the muffin cups and press firmly. Allow to cool completely. Once cool, carefully remove from the pan and serve.

Store leftovers in an air tight container for up to 2 days.


To hot to turn on your oven? The theme this month for the Creative Cookie Exchange group is No Bake Cookies! If you are a blogger and want to join in the fun, contact Laura at thespicedlife AT gmail DOT com and she will get you added to our Facebook group, where we discuss our cookies and share links. You can also just use us as a great resource for cookie recipes--be sure to check out our Pinterest Board and our monthly posts (you can find all of them here at The Spiced Life). We all post on the first Tuesday after the 15th of each month! Also, if you are looking for inspiration to get in the kitchen and start baking (or this month "no baking"), check out what all of the hosting bloggers have made:

Wednesday, November 13, 2013

Heavenly Cookie Butter Cocoa Swirl Cheesecake Bars

Have you tried the Cookie Butter Cocoa Swirl spread from Trader Joe's yet? I have always been a big fan of Cookie Butter (aka Biscoff knock-off) since back in the day, but Trader Joe's really took the concept to another level with their Cookie Butter Cocoa Swirl. Amazing! One taste and I knew I had to create something with it that allowed its' amazing flavor to shine.


I tried Blondies with the Cookie Butter swirled into it, but the flavor got a little lost and I wasn't happy with the results....then one day, on my drive to work, inspiration struck and my old stand-by, Cheesecake, came to mind (you really can make cheesecake out of just about anything). I felt that cheesecake flavored with Biscoff spread baked on top of a Biscoff cookie crust would really hit the mark...and what a winner it was! Creamy, cinnamon-y (is that a word?), with the flavor of Biscoff...eh I mean Cookie Butter.. throughout. Divine!

If you love Cookie Butter, Chocolate, Biscoff Cookies & Cheesecake, this recipe is for you!


Heavenly Cookie Butter Cocoa Swirl Cheesecake Bars with Biscoff Cookie Crust
Makes one 8x8 or 9x9 pan, 12-16 bars
 
 ** Plan ahead: The bars need to chill several hours or overnight before serving **
 
Bar Ingredients:
2 8oz packages cream cheese, softened to room temperature
3/4 cup granulated sugar
2 large eggs + 1 large egg yolk, room temperature
3/4 cup Biscoff spread
1/2 cup heavy whipping cream
2 teaspoons vanilla extract
1/2 teaspoon cinnamon
1/4 teaspoon salt
3/4 cup Cookie Butter Cocoa Swirl
 
Crust Ingredients:
1 package of Biscoff Cookies
2 tablespoons granulated sugar
7 -8 tablespoons of butter melted
 
Directions:
 
Preheat oven to 35of
 
Line an 8x8 or 9x9 square baking pan with nonstick foil or spray regular foil with nonstick cooking spray.
 
Make the crust
 
Place the Biscoff cookies in a food processor and process until fine crumbs.
 
Place the crumbs in a bowl, add sugar and stir with a fork to combine. Drizzle in the melted butter and toss with a fork to combine.
 
Press the crumbs evenly into the bottom about 1/2" up the sides of the prepared baking pan.
 
Bake at 350 for 7-8 minutes or until lightly toasted/golden brown.
 
Remove and set aside.


Make the filling
 
Reduce oven temp to 325f
 
Place the softened cream cheese in a large bowl and mix with your hand mixer at med-low speed until creamy (this will take about 30 seconds if you cream cheese is softened properly).
 
Add the sugar and mix at medium low speed until combined.
 
Add the eggs and mix at medium-low speed until combined, scraping down the bottom and sides of the bowl as needed. At this point try to make sure there are no lumps.
 
Add the Biscoff spread, vanilla extract, cinnamon and salt and heavy whipping cream mixing at low speed just until combined.


Pour batter into the prepared pan.
 
Heat the Cookie Butter Cocoa swirl spread in a small bowl for a few seconds just to loosen it up but not long enough for the swirls to dissolve.

 
Dollop the Cookie Butter onto the batter and create a swirl pattern using a butter knife or skewer.


Place on a rimmed baking sheet then bake in the oven at 325f until set. This should take about 40-45 minutes, but all ovens are different so your actual baking time may vary.

Remove from oven and transfer to a wire baking rack to cool completely. The cooling process should take place slowly to help prevent cracking so try to cool in a draft free spot to prevent sudden temperature change.
 

Once the bars have cooled to room temperature, refrigerate them for several hours or overnight to allow them to set.


Remove from the pan using the foil liner. Cut & serve!

Store leftovers tightly covered in the refrigerator for up to 3 days.