Showing posts with label brunch. Show all posts

Friday, February 28, 2014

Lemon Pull Apart Rolls with Fresh Lemon Glaze

For the past year I've had this obsession with Pull Apart Bread. I'm sure you've seen the pictures on Pinterest. You know the ones...loaves of golden brown sweet bread dripping with glaze. So you understand the reason for my obsession.
 
 Well, I couldn't ignore my craving any longer and finally got the chance to make some this past weekend. Instead of making a loaf (that I would probably have eaten all by myself the minute it came out of the oven and got doused with glaze), I decided to practice portion control and make individual rolls. While making a single loaf would definitely be easier, I have to say that I love this idea better. Instead of everyone pulling off of the same loaf of bread (that's assuming you're gonna share of course), everyone gets their own individual roll!


Initially the assembly seemed complicated, but once I got through the first few rolls, it was pretty easy. The dough was easy to make and work with. It wasn't sticky or tacky at all, which is often my frustration when working with dough.

These rolls require some work, but they are definitely a labor of love and the end result is truly worth it. I mean, isn't homemade bread always worth it?


With rain forecasted all weekend, why not spend a leisurely morning making some of these delicious, not overly sweet, light, tender Lemon Pull Apart Rolls. They just might be the ray of sunshine you need on an otherwise dreary rainy day.


Lemon Pull Apart Rolls
Makes 10-12 Muffin Size Rolls

** Plan ahead - the rolls need to rise 2x for a total of 2 1/2 hours. You want to start making these about 3 1/2 hours before you serve them.
 
Dough Ingredients:
1/3 cup whole milk
4 tablespoons unsalted butter
1/4 cup room temperature water
1 1/2 teaspoon vanilla extract
2 3/4 cups all purpose flour
1 packet rapid rise yeast (I used Red Star) ** tip: make sure the yeast is not expired
1/4 cup granulated sugar
1/2 teaspoon salt
2 large eggs, room temperature

Filling Ingredients:
4 tablespoons melted butter
1/2 cup granulated sugar
3 tablespoons lemon zest

 
Glaze Ingredients:
1 1/4 cup confectioners sugar
1 tablespoon freshly squeezed lemon juice
1 tablespoon milk
1/4 teaspoon fresh lemon zest


Directions:
 
In the bowl of your stand mixer fitted with the paddle attachment, combine 2 cups of the all purpose flour, sugar, yeast and salt. Pulse to combine.
 
In a small saucepan, heat the milk and butter over low heat just until the butter is melted. Remove the pan from the heat and add the water. Stir to combine. Allow to cool to 120-130f (about 1 minute), then stir in the vanilla extact.
 
Add the milk mixture to the bowl with the flour mixture. Mix on low until evenly moistened.
 
With mixer on low speed, add the eggs one at a time mixing just until combined.
 
Stop the mixer and add 1/2 cup of flour. Mix on low until the dough is smooth (about 45 seconds).
 
Add 2 tablespoons of flour and mix on medium speed another 45 seconds. The dough should be smooth, soft and sticky.


Sprinkle a work surface with flour and turn the dough out onto the work surface. Using a bench scraper or your hands, knead the dough until smooth and no longer sticky adding no more than 1-2 tablespoons of flour if needed. I didn't have to add any additional flour. The flour I sprinkled on the work surface incorporated with the dough while I was kneading it to create a smooth dough that was no longer sticky.
 
Place the dough in a large bowl sprayed with non-stick spray. Cover and place in a warm place to rise until doubled in size (approx. 1 1/2 hours). My dough took 1 1/2 hours to double, but your dough might rise faster, it all depends upon the yeast, the temperature in the room etc...
 
Tip: To help with the rising process, I placed the covered bowl of dough on top of the stove, preheat my oven to 300 then turn it off and leave the door slightly ajar. This creates a warm environment for the dough to rise.

While the dough is rising, make the filling:

In a medium size bowl, combine the granulated sugar and lemon zest. Allow to sit while the dough is rising. The lemon zest will perfume the sugar and the sugar will draw out some of the moisture from the zest.

After the dough has doubled in size, assemble the rolls:

Spray a 12 cup muffin/cupcake pan with non-stick cooking spray. Set aside.

Turn the dough out onto a clean work surface and cut in half. Set half of the dough aside and cover it.

Gently shape the half of the dough you're working with into a log and cut into 12 pcs (approx. 3/4" wide). Roll each piece into a strip that's 6" long and 3/4" wide.
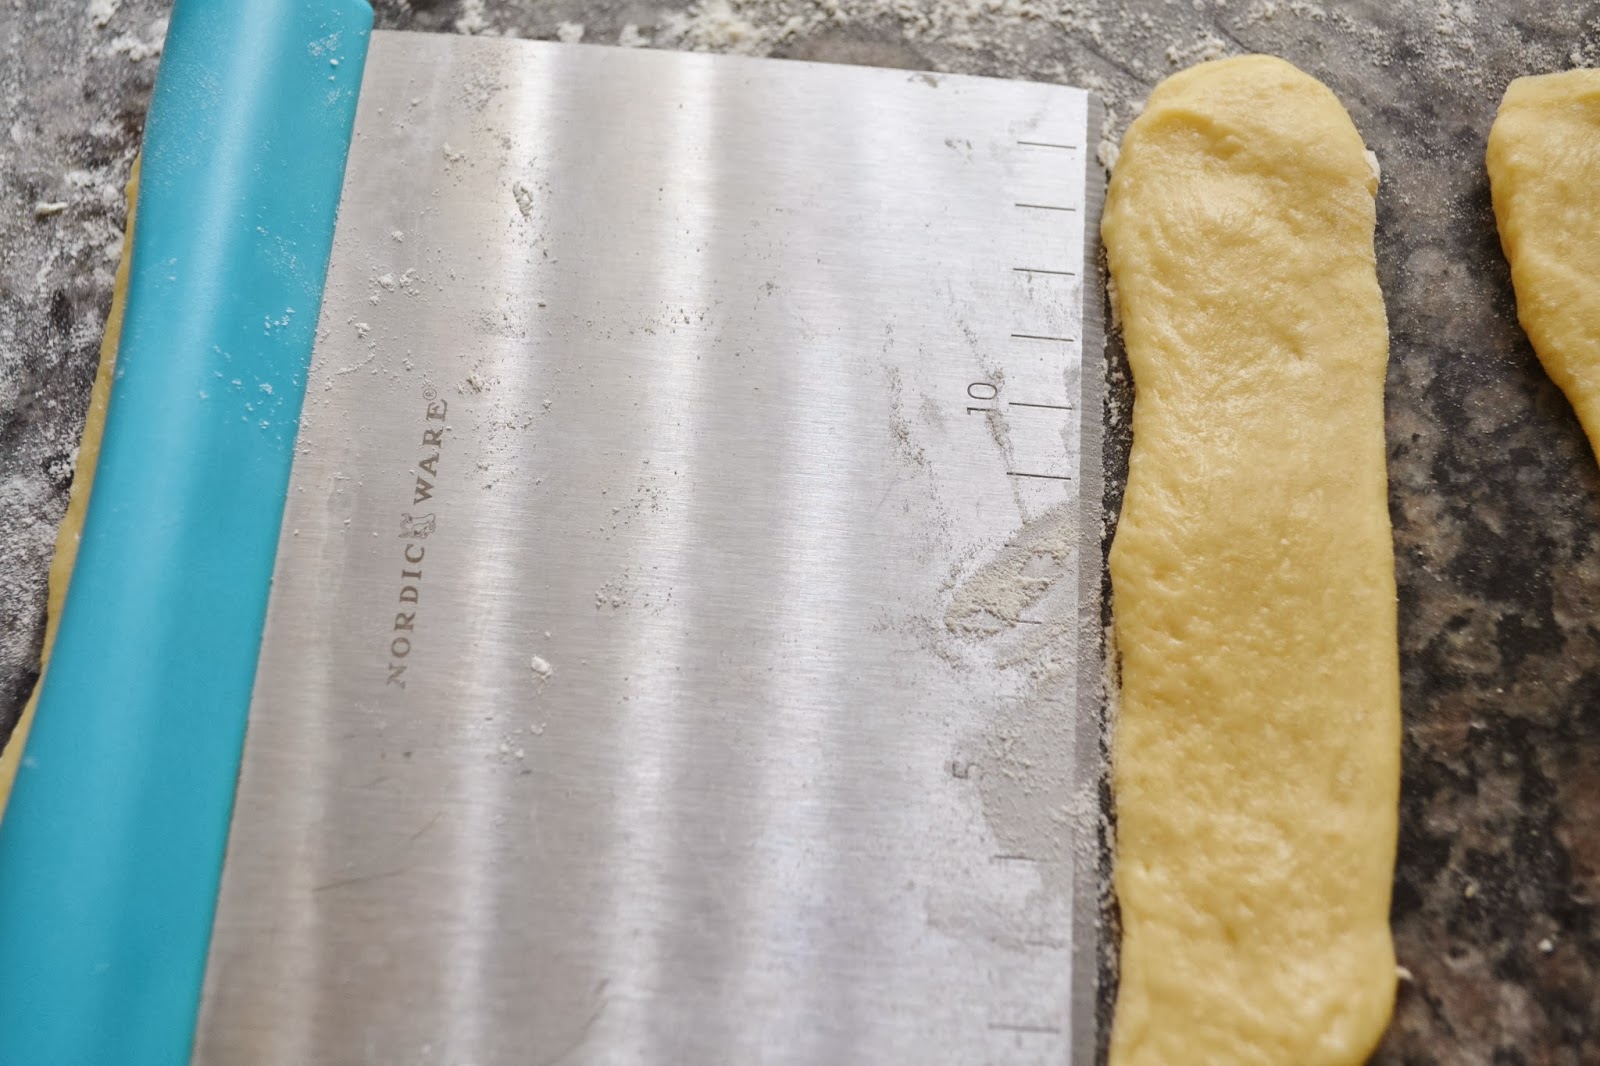


Using half of the melted butter, brush each strip generously with butter.

Using half of the lemon sugar mixture, sprinkle each stripe with sugar.

Cut each strip in half widthwise, creating a total of 24 strips then 6 of the strips and stack 3 strips on top of each one creating 6 piles of 4 strips.

Disregard the number of strips stacked in this photo. I got so caught up in the moment, I forgot to count before I took the shot haha....

Pinch the bottom of each stack of strips and place the pinched bottom into the bottom of the muffin cup. Fan the top slightly.


Repeat until all rolls have been assembled, then sprinkle any excess lemon-sugar mixture remaining on your work surface that may have escaped during the assembly process onto the top of the rolls.

Cover the rolls and place in a warm place to rise for about 60 minutes.

Preheat oven to 350f and bake 18-20 minutes or until golden brown. Remove from oven, allow the rolls to cool slightly in the pan them remove to a wire cooling rack.


While the rolls are cooling, assemble the glaze -

Mix all of the glaze ingredients in a small bowl

Drizzle the glaze over the cooled rolls and serve.



Store leftovers covered at room temperature for 1 day. To reheat, place in the microwave for a few seconds.

Monday, September 16, 2013

Roasted Bell Pepper, Red Potato, Broccoli and Provolone Frittata for Two

Not only are Frittatas delicious, but they're a great way to use up leftover meat, veggies and cheese. They really are a versatile dish and can be enjoyed any time of day, breakfast, lunch or dinner! They're the perfect dish to serve for Brunch or overnight guests because they can be made ahead of time and don't have to be served hot. I like to make them on Sunday mornings while I'm enjoying my first cup of coffee served with homemade biscuits fresh out of the oven, fresh fruit and a side of bacon or sausage (if there's no meat in the frittata).
 
This morning I made a Roasted Red Potato, Roasted Red Bell Pepper, Broccoli and Sharp Provolone Frittatta just for two! The Roasted Red Potatoes were frozen so I baked those in the oven before adding to the Frittata. I also sautéed the Broccoli until tender-crisp to achieve the desired texture.
 
For more Frittata ideas, check out these other delicious LiveBakeLove Frittata recipes:


Roasted Red Pepper, Potato, Broccoli and Provolone Frittata for 2

Ingredients:
5 eggs
2 tablespoons milk
salt & pepper to taste
1/4 cup grated cheese (I used sharp provolone)
1/2 cup coarsely chopped broccoli florets
1/4 cup roasted red bell pepper, sliced
3/4 cup roasted red potatoes, coarsely chopped


** If you'd like to add meat to this dish, some cooked Italian Sausage would be great. Just cook it in the same skillet before cooking the broccoli. Or just serve meat on the side like I did!
 

Directions:

Turn oven to broil

Add eggs, milk, salt and pepper to a medium bowl and whisk to combine. Add cheese.

Add 2 tablespoons Olive Oil and 1 tablespoon butter to a small oven proof skillet (mine was 6") over medium-low heat. Add broccoli, season with salt and pepper and sauté until crisp, tender about 1 min. Tip: Most skillets are oven proof. If yours has a plastic handle, cover in a few layers of foil before placing in the oven.


Add the sliced red pepper and chopped potato to the skillet making sure they are evenly distributed.


Pour in the egg mixture and cook over low heat until eggs are almost set. During the cooking process, run your rubber spatula along the edges to pull the cooked egg slightly towards the center and allow the uncooked egg to flow to the edge.


When eggs are just about set, place the pan in the broiler and cook until puffy and completely set. Don't overcook or your eggs will be tough.


Remove from oven and allow to set for 15 minutes.

Serve warm or at room temperature. Any leftovers can be stored in an air tight container in the fridge and reheated for a few seconds in the microwave.


Thursday, January 24, 2013

Black & Blueberry Buttermilk Cake


The weather in San Diego this past weekend was unusually warm which had me thinking of Summer fruit. It just so happens that Blackberries were on sale at Sprouts for only .99 cents a package so I had to indulge.
 
On their own, the blackberries were sweet and delicious; definitely some of the sweetest blackberries I have ever tasted, but I bought so many of them I wanted to incorporate them into a coffee cake/dessert. I also had some buttermilk in the fridge that was about to expire so I decided to make this Blackberry Buttermilk Cake which I am calling Black & Blueberry Buttermilk Cake because I ended up throwing in some Blueberries.
 
The cake is tender, moist and delicious. The addition of fresh lemon and orange zest compliments the fresh berries perfectly and made them taste even better! If you make this cake, which I sure hope you will, definitely do not skip out on the fresh citrus zest.
 
My husband brought some of the cake to work with him 3 days after I baked it and it was still moist, fresh and delicious. I don't recommend going beyond 3 days since fresh berries can spoil pretty quickly.

Black & Blueberry Buttermilk Cake


Ingredients:
3/4 cup unsalted butter at room temperature
2 1/3 cups sifted cake flour (sift the cake flour first, then measure out 2 1/3 cups)
6 ounces fresh blackberries and 3 ounces fresh blueberries
1/4 cup granulated sugar for the topping
1 1/3 cups granulated sugar for the cake batter
1 1/2 teaspoons baking powder
3/4 teaspoon salt
1/2 teaspoon baking soda
3 large eggs, room temperature
2 teaspoons vanilla extract
1/2 teaspoon fresh lemon zest
1/2 teaspoon fresh orange zest
1 cup well shaken buttermilk
Powdered sugar for dusting

Directions:

Position oven rack in the center of the oven and preheat to 350 degress F.

Butter a 9-10" springform pan. Place a circle of parchment paper at the bottom. Butter the parchment paper and lightly dust the entire inside of the pan with flour.**Alternatively you can use a 9"-10" cake pan, but please make sure you butter and flour the pan & use the parchment paper. This helps prevent the berries from sticking to the bottom of the pan.

Into a medium size bowl, sift together the flour, baking powder, baking soda and salt. Set aside.** Essentially you are sifting the flour twice - before you measure it and again in this step. Don't skip this step, it gives the cake its' light fluffy texture.


Sprinkle the berries in an even layer into the bottom of the prepared pan, then sprinkle 1/4 cup of sugar over the berries.


When this photo was taken, I realized I didn't have enough Blackberries so I filled in the gaps with blueberries. Hence the name Black & Blueberry Buttermilk Cake.

In the bowl of your electric stand mixer fitted with the paddle attachment (or in a large bowl using your electric hand mixer), cream together the butter and the 1 & 1/3 cups granulated sugar until light and fluffy (approximately 2 minutes).


Add the eggs, one at a time, mixing well after each addition and scraping down the bowl as needed.


Beat in the lemon and orange zests and the vanilla at low speed and mix just until combined.

At low speed, mix in the flour mixture and buttermilk alternating between the two. Start with 1/3 of the flour, mix just until combined, add 1/2 of the buttermilk, mix until just combined and repeat. Be sure to mix just until combined during this step so you don't overmix the batter.


Spread the batter in an even layer into the prepared pan.


Place on a baking sheet and bake for approxinmately 45-50 minutes. Since each oven is different, be sure to check for doneness at the beginning of the bake time (around 40 minutes). If the cake isn't done, repeat checking for doneness periodically until done. If your cake starts to brown too quickly, tent it with a piece of foil. The cake is done when it springs back when lightly pressed in the center or a toothpick in the center comes out clear. Be careful not to overbake.

Remove from oven and cool in pan on cooling rack for 15 minutes. Remove the sides from the springform pan and invert only a cooling rack. Carefully remove the parchment paper being careful not to pull off the berries.


Allow to cool a few minutes longer then dust generously with powdered sugar.


Place on a cake stand or platter and serve (dusting again with powdered sugar if needed).


Store leftovers tighly covered at room temperature. Since this cake is made with fresh berries, I recommend eating within 2 days although my husband brought our leftovers with him to work on day 3 and the cake was still moist and delicious. I wouldn't go any longer than that....

Wednesday, December 21, 2011

Lemon Blueberry Bread

I don't remember exactly how old I was when I stopped believing in Santa or even how it happened. Did I find out by accident? Did my Mom or Dad (or one of my older siblings) break the news to me when I reached the "appropriate" age or one of the older kids on the playground at school? Even though I don't remember exactly how it happened, I distinctly remember being disappointed. There wasn't a jolly old man that magically delivered presents to good boys and girls all over the world in a single night? The Wish List I made every year was really going to Mom and Dad?? After that, Christmas just wasn't the same...it was no longer magical.


The magic and wonder of Christmas was recaptured when I started taking care of my stepson and my 2 boys were born. I got to re-live it all through the eyes of my children. Feeling their anticipation build as Christmas approached, watching the joy on their faces as they raced down the stairs early Christmas morning to find all of the presents Santa brought piled under the tree. Hearing their exclamations as they tore the wrapping off of the toys they had asked Santa to bring when they sat on his lap a few weeks earlier.


The boys are all older now and obviously no longer believe in Santa. Although we all know Santa isn't real and that the true meaning of Christmas has nothing to do with a jolly old man in a red suit, we can still believe in the spirit of Santa. The spirit of giving.


Which brings me to today's post...I was recently invited to a holiday brunch and wanted to show my appreciation for the invitation by bringing the hosts a homemade gift. I happened to have some fresh blueberries in the fridge that needed to be used up so I made one of my favorite quick breads - Lemon Blueberry Bread that's brushed with a lemon simple syrup while still warm and then finished with a lemon glaze. This Lemon Blueberry Bread is so moist and delicious, packed with lemon flavor without being over powering and bursting with blueberries. It's a slice of heaven. If you can't get fresh blueberries, you can substitute frozen with the same great results making this a treat you can enjoy all year round. I hope you'll give this recipe a try and maybe even make it as a gift yourself.

Lemon Blueberry Bread with Lemon Simple Syrup and Lemon Glaze
Slightly adapted from sweetpeaskitchen
Makes one 9" loaf, serves approx 8-10

Ingredients


For the bread:
1 1/2 cups all purpose flour + 1 Tablespoon separated
2 teaspoons baking powder
1/2 teaspoon salt
1 cup whole milk vanilla yogurt
1 cup granulated sugar
3 large eggs
2 teaspoons lemon zest (from 1 1/2 - 2 lemons)
1/2 teaspoon vanilla extact
1/2 cup vegetable oil (I used canola)
1 1/2 cups blueberries, washed and dried


Lemon Simple Syrup
1/3 cup freshly squeezed lemon juice (do not use the bottled lemon juice)
1/3 cup granulated sugar


Lemon Glaze
1 cup powdered sugar
2 - 3 tablespoons fresh lemon juice
1/2 tsp lemon zest


Directions:


Preheat oven to 350


Grease and flour a 9" loaf pan


In a medium bowl, whisk together the flour, baking powder and salt. Set aside.


In a large bowl, whisk together the sugar, yogurt, eggs, lemon zest, oil and vanilla.


Slowly whisk in the dry ingredients.


In a small bowl, toss the blueberries with the 1 Tablespoon of flour. This supposedly will help keep all of the blueberries from sinking to the bottom of the bread although I have found that this doesn't always work...


Gently fold the blueberries into the batter and immediately pour it into the prepared loaf pan.


Bake for 50-55 minutes or until a toothpick inserted comes out clean (mine took about 50 minutes).


Remove from oven and place on a cooling rack. Allow to cool in pan for 15 minutes. Loosen the sides with a knife and then remove from pan and place on the cooling rack with a cookie sheet or wax paper underneath.


While the bread is cooling is cooling in the pan, prepare the lemon simple syrup. In a small saucepan over medium heat, combine the lemon juice and sugar. Bring to a simmer stirring to ensure the sugar dissolves. Simmer for 3 minutes stirring occasionally. The liquid should be slighly reduced. Remove from heat and set aside.


After removing the bread from the pan, use a skewer or toothpicks (a skewer is better because it makes bigger holes),to poke holes in the top of the bread. You will need to poke a lot of holes to allow the simple syrup to soak in. Be careful not to poke all the way through the bottom of the loaf.


Take the simple syrup and brush or pour slowly over the top of the loaf allowing the syrup to soak into the bread. This should be done as soon as you remove the bread from the pan so the syrup will soak in better. It won't soak in as well if the bread is too cool. Allow to cool completely.


Prepare the lemon glaze by combining the powdered sugar, lemon juice and lemon zest. Make sure the glaze is the appropriate drizzing consistency. It should slowly drip off of a spoon so it will sit on the bread and slowly pour down the sides.


When the bread is completely cooled, drizzle with the lemon glaze.


This bread is so good, I made 2 loaves!
Mmm...a slice of heaven

Keep stored in an air tight container for 2-3 days (if there are any leftovers).

Wednesday, November 30, 2011

Easy All-in-One Breakfast Muffns


Easy All-in-One Breakfast Muffins

I have to confess that this recipe actually came about by accident. It was a Friday morning and I was planning to make mini-quiche using ready-made biscuit dough for the crusts to bring to work to share with some co-workers. The night before I had inadvertantly bought the Grands biscuits, the kind that puff up quite a bit instead of the regular biscuits. Not realizing my mistake, the next morning I proceeded with the recipe as planned. Pulling them out of the oven, I was surprised to see muffins with egg, sausage and cheese in them instead of the quiche I had envisioned. Not having the time (or the ingredients) to remake, I brought them to work anyway and my co-workers loved them! The "mistake", which I didn't own up to at that time, turned out to be a big success. Don't you love it when life works out that way?

This recipe is also a favorite with my husband and kids. It's a quick, easy breakfast treat they can grab on the go. They can be made ahead, stored in the refrigerator and reheated as needed. Also, they can be customized to suit all tastes, even the pickiest of eaters: omit the meat and add your choice of vegetables for vegetarians, saute bell peppers, onions and mushrooms and add to to the cooked sausage for more adventurous appetites, use turkey sausage instead of pork, subtitute a different combination of cheeses...the choices and possibilities are as endless as your imagination....


Easy All-in-One Breakfast Muffins
Makes 12

Ingredients:
1 can Pillsbury Grands Butter Tastin' Biscuits
1/3-1/2 of a 16 oz roll of Jimmy Dean Regular Pork Sausage
4 eggs
1 1/2 T milk
Salt & Pepper to taste
1 1/2 cups of shredded cheese (I used a combination of cheddar and monterey jack)

Directions:

Preheat oven to 350

Spray a 12 cup regular size muffin pan with non-stick cooking spray. Set aside.

In a small skillet or sauce pan, cook the sausage over medium heat until browned and no longer pink. Remove to paper towl-lined plate to drain.

Open the can of biscuits and separate. Cut about 1/4 off of each biscuit. Combine 2 of the scraps together to form 4 additional biscuits. You should have a total of 12 biscuits.


Shape each biscuit into a flat disk. Place on a cutting board and using the heel of your hand flatten until they are big enough to fit into the bottom and most of the way up the sides of each muffin cup.
Biscuits shaped into disks
Flattened biscuits ready to go into the muffin pan


Place in the muffin cups.

It's ok of the dough doesn't go all the way up the sides, the biscuits will puff up as they bake

Divide the cooked sausage evenly between the biscuit lined muffin cups.


Crack the eggs into a measuring cup. Add the milk, season with salt & pepper and whisk to combine. Pour on top of the sausage, dividing evenly.


Sprinkle each muffin with cheese.

Bake at 350 for approx 20-25 minutes or until the muffins are golden brown and done and the eggs are set.

Remove from oven and allow to cool for a few minutes in the pan. Remove from the pan and serve warm.


Can be reheated in the microwave for 10-15 seconds.

Store covered in an air-tight container in the refrigerator for 2-3 days.